

- Overview
- Transcript
2.6 jQuery UI Button Widget
In this lesson, you will learn how to use the jQuery UI framework to create a simple button widget with default styling applied to it.
Related Links
1.Introduction
1.1Introduction00:41
1.2Introduction to jQuery UI04:40
2.jQuery Form Elements
2.1jQuery UI Selectmenu Widget07:14
2.2jQuery UI Autocomplete Widget05:47
2.3jQuery UI Spinner Widget06:59
2.4jQuery UI Datepicker Widget06:27
2.5jQuery UI Checkboxradio Widget03:12
2.6jQuery UI Button Widget04:02
2.7jQuery UI Progress Bar Widget09:54
3.Conclusion
3.1Final Thoughts00:39
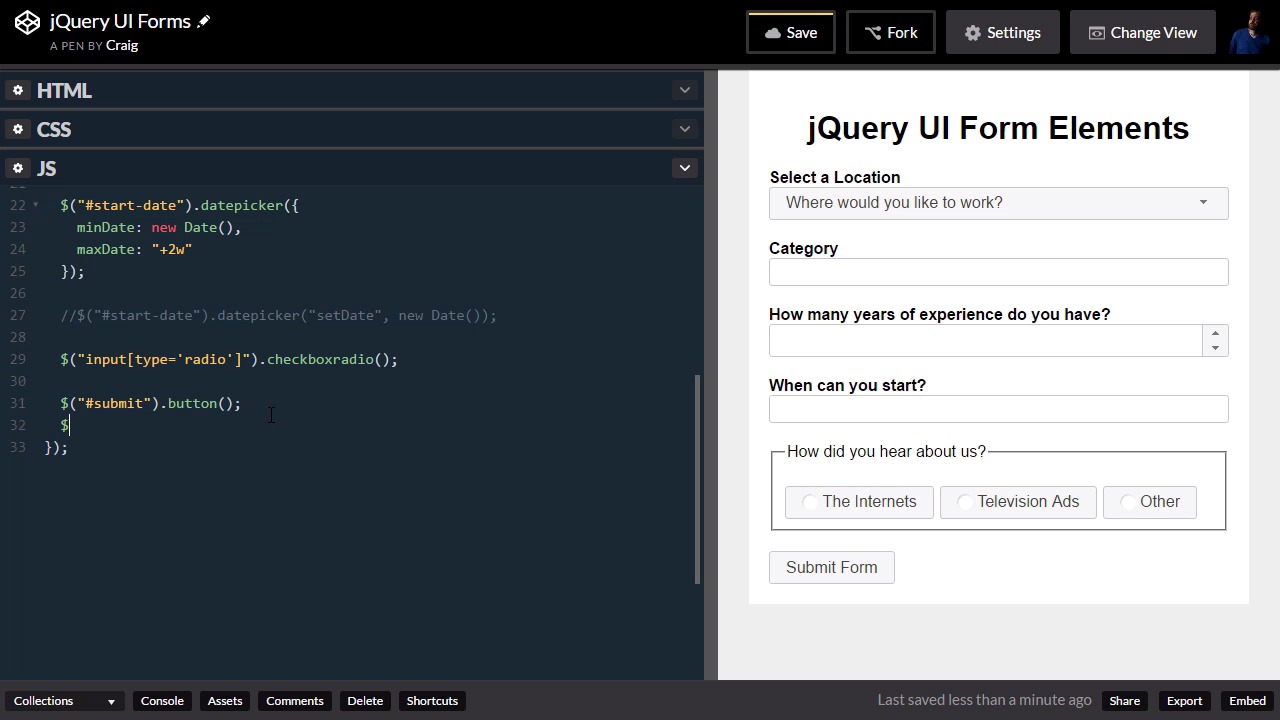
2.6 jQuery UI Button Widget
Hello, and welcome back. In this lesson, we're gonna create a simple Submit button at the bottom of our form. We're going to jump into our HTML first of all. And before we get started, you can find the URL for this starting pen in your course notes for this lesson. Once you open that up, go ahead and click on Fork, and we'll start with a fresh copy. So let's drag this out a little bit, so we have some room to work with. And then we'll go down to the very bottom of our HTML. And just inside the closing form tag, just after our radio buttons, after that div. We're gonna go down to the next line, and here we're just gonna create a button element with an ID of submit. And then, inside that button, we're just gonna say, Submit Form, and put our closing button tag here. And then in our JavaScript, as you can imagine, it's really easy to activate this in jQuery UI. We're gonna come down here to the bottom, just below our checkbox radio. And we're gonna point to our button object, which again, has an ID of submit. And we're gonna say .button(); to end your statement. And we have this nicely styled button. Then we can jump into our CSS, add some more styles to that button, if we want. All I'm gonna do is add some margin-top to it. And we've already added some margin-top to our labels and to this fieldset. So in addition to the fieldset, I'm just gonna say, button. And there we go, and that actually adds that to more than I want. So I'm gonna undo that, and instead of just button, I'm gonna say #submit. So just in case we have multiple buttons on the stage, it's only going to apply that top margin to this particular one. So really, that's all we need to do for our button. We can do a couple more things. For example, if we want this Submit Form button to be disabled by default, we can come down here below our button, after we instantiate it. We're gonna go to the next line, and basically do the exact same thing, submit .button. But this time, inside the parentheses we're gonna add an option. We're gonna say option, disabled. And this is inside the curly brackets here, disabled: true. And then we'll put a semicolon at the end of that statement, and you'll see that the button is disabled. Now, if we wanted to comment that out, we could go into our button here, and then just say disabled: true. And that works as well. The reason I showed it to you this way is because I wanted to show you different ways that you can change the options or properties of your jQuery UI components. Sometimes you might want to change the value of a certain property after the page loads, maybe in response to something else. And the way you would do that is, you would just leave the initial instantiation empty, or set it to a certain value. For example we could just set it to false here, and then uncomment this one, which would set it to true. And you'll see that it basically disables itself after it's instantiated. So if you ever need to change the value of a particular property after you've created a jQuery UI component, you can do it using similar syntax to this. You would just put option inside quotation marks, and then after a comma you would have your properties inside a object, inside the curly brackets. So I just wanted to provide you more options there. I'm going to comment that out for now, and I'm gonna disable it here. We'll just set disable to true here. And in the next lesson, we'll create a progress bar. And once that progress bar reaches 100%, we'll re-enable that button. So let's save our work, and we'll see you in the next lesson. Thank you for watching.


