


- Overview
- Transcript
2.6 Nested Variants
In this lesson, I’ll continue our discussion of nested elements by illustrating a case when you would need to use variants instead of drilling multiple layers into CSS classes.
Related Links
1.Introduction
1.1Introduction00:52
1.2What Is RSCSS?02:14
2.Components and Elements
2.1RSCSS Components and Elements03:35
2.2Styling Components and Elements09:11
2.3Variants07:20
2.4Positioning Components06:24
2.5Nested Components07:44
2.6Nested Variants06:02
3.Other Considerations
3.1Creating Helper Classes02:57
3.2CSS File Structure02:15
3.3Using the Inverted Triangle06:49
3.4Planning Out Your Site07:11
4.Conclusion
4.1Final Thoughts00:44
2.6 Nested Variants
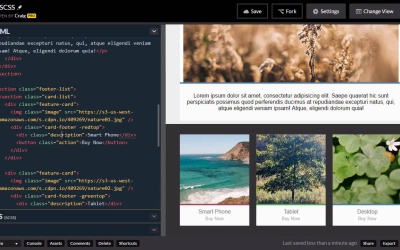
Hello and welcome back. In this lesson we're gonnacontinue our discussion of nested elements as we discuss a particular situation that we might come across. And the best way to explain that situation is just to show it to you. So you'll notice first of all that I've added some elements to our website. We have a kind of a featured image, which this is using the exact same feature card that we've used before. We're just using a much larger one, and it's contained inside a section with a class of feature-banner. And if we jump into our CSS, we can see our feature-banner has a width of 640 and a margin of 10 pixels auto. We also have this footer-list element. And it has a dark gray background, a top margin, and some padding applied to it, and that's all. Inside that bottom element, this footer list, we have another card list. Remember that cardless class is the one we created for our top section, which allows us to lay our items out and float them to the left, like we've done at the top. So by using those same classes, we've been able to do the same with these elements at the bottom. Now a lot of what we're gonna cover in this lesson we've already touched on a little bit. But it's very important in the context of talking about nested elements. Because as we mentioned in the last lesson, you don't want to have more than one level of nested elements. So you can have a parent element and an element inside of it. Now obviously in your HTML, you can nest as many as you want. But when it comes to your CSS, you wanna keep your CSS code clean and readable. So in our CSS we don't wanna have more than one level of nested elements. But let's say we have this list of cards here. And with the dark background of this footer section, maybe we wanna darken up the footer of these cards a little bit, so they're not quite so bright. Now if we look at our code for those items, we can see our feature-card is nested inside the card list component. And inside the feature-card we have our card-footer component. And inside that we have a description and our action. So for the card-footer, we want a darker background but then we're also gonna need to change the color of the text. The description text and the button text will stay the same. We'll need to change the color of at least the description text. So we want this to happen whenever we have our dark background. So we want it to happen when we're inside this footer-list. The problem is, how do we drill in to that description text from our footer-list if we're only using the child selector? Well, we would have to go several levels deep. We'd have to go from the footer-list into the card-list, into the feature-card, into the card-footer, into the description. And that's really more nesting than we want to allow ourselves to do. So we really only want one level of nesting, one element inside another. So in order to get to that, we would need a description element inside a card-footer. The problem is we have no way of knowing if this card-footer is inside that footer-list. So what the RSCSS framework suggests doing is to add another variant to the card-footer. And then to look inside that card-footer with that particular variant, to make any changes we need to make. So we already have one variant, called redtop, which gives us that red border. I'm gonna add another variant, and again, variants start with a dash. And then I'm just gonna call it dark. And so we're gonna do the same thing for the card-footer elements in our other two cards, there we go. So now we need to jump into our CSS to make this work. So we'll go into our CSS, and here we have our card-list. Above that we have the card-footer. The card-footer is where we're looking right now. So in normal CSS, not Sass, if we were to do this in regular CSS, we would type .card-footer.-dark. And then we would use our child selector to point to any actions inside that. But first, we need to apply some rules to the card-footer itself. We need to make the background a little bit darker. So we're gonna set our background to a value of #555 to darken it up. And then we can jump down one level inside this rule to create a rule for our nested description. Actually we need the child selector first, and then .description. Here we're just gonna set the text color to a value of #aaa, and that'll brighten that text up so it looks better against that background. And so, as you can see, by doing this we've created only one level of nesting here. We have these two classes which are both pointing to the same object, but we're pointing to that object as long as it has both classes applied to it. And then we are looking down into our description to change the color of the text. So we can grab all of this and pull it into this card-footer rule. And we would just do that by highlighting that, actually we just need to highlight everything starting with a .-dark. So we're gonna cut that and then down here I'm gonna type &.-dark. And then we can nest everything inside that. Let's nudge that over, so it's a little more legible. And there we go, that gives us the exact same effect. So again, as I've mentioned before, we've already talked this idea of using variants to change a particular set of CSS rules on an object. And now that we understand the guidelines behind nesting in the RSCSS specification, we get a better idea of how we can use those variants to avoid too much nesting in our CSS code. So thank you so much for watching and I'll see you in the next lesson.


