


- Overview
- Transcript
4.2 Animating a Gradient
In this lesson, you will use the colorProps basics that you learned in the previous lesson to animate a radial gradient based on the JavaScript properties that are being animated.
Related Links
1.Introduction
1.1Introduction00:35
1.2The Plugins02:58
2.Animating HTML Attributes With AttrPlugin
2.1Quick Review06:32
2.2Tweening SVG Shapes08:13
2.3Setting Up Your SVG09:46
2.4Tweening Attributes08:38
3.Animating on a Curve With the Bezier Plugin
3.1Animating in a Circle14:27
3.2Bezier Properties07:00
3.3More Curves06:21
4.Animating JavaScript Color Properties
4.1Tweening Properties10:11
4.2Animating a Gradient10:16
5.Animating Text Changes With TextPlugin
5.1Animating Text08:02
6.Animating CSS Rules
6.1Starting From Scratch06:58
6.2Animating the Rule09:49
7.Directional Rotation
7.1Directional Rotation Basics10:32
7.2Random Rotation08:19
7.3Return on Hover11:29
8.Conclusion
8.1Final Thoughts00:42
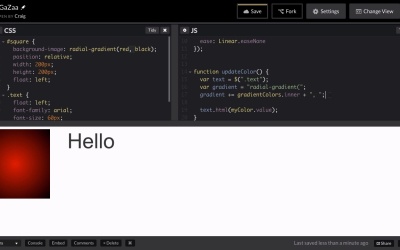
4.2 Animating a Gradient
Hello, and welcome back to Advanced Animation with GSAP Plugins. In our last lesson we talked about how the color props plugin works by taking a JavaScript color value and animating it from one value to another. And we demonstrated that by updating the text inside this particular div. And we saw that that worked really well, if we were to refresh this and display it again. Even though we've written our opening color as a hex value and our closing colors as an RGB value, the plugin is smart enough to know how to animate those. So now instead of just animating the text inside that particular div, I wanna actually change the color of our gradient. So inside this updateColor function, we're gonna create a new variable to basically build the string for our radial gradient. So we're just gonna call this string gradient. And we're gonna set this equal to a value, and it's gonna end up looking something like this, radial-gradient. And let's move this over so that we have a little more room to see what we're doing. It's gonna end up looking like this, so radial-gradient, and then inside parentheses we'll have two values. So we'll have our first value and our second value. So our first value might be something like red, our second value might be something like black, just like we have here. So what we need to do, since we actually have two colors we're animating here, is we need to create two properties to animate. Right now we're just animating one color property. So let's go back up to the top and for myColor here, let's change the name of that to make more sense. Let's call this gradient colors, and we'll have an inner and an outer value. So this one will be called inner and it will be red. And as we can see, red is our inner value for our gradient anyways. And then our outer color will be black. And obviously you can give those two any colors you want. You can put it in RGBA format, RGB format, you can put it in hex format, however you want. So we've created an inner and outer property now for those gradient colors. And so inside of our tween, right now we're just animating one value, but we're gonna change this so that we're animating two. So we're gonna animate our inner value to black and our outer value to red. So they're basically just gonna be changing color. They're gonna be swapping back and forth. So it's gonna start off with red in the inside an end up with black on the inside and red on the outside. So we have that animating. Now we need it to actually update our object here. So we need to build this string one piece at a time and insert the proper colors based on the values stored in myColor. So how are we gonna do that? Well, let's grab this, and I'm gonna put this text variable above this first variable. And for our gradient, the items that are gonna change are gonna be red and black. So we're gonna start off by just building everything up to that first opening parenthesis there. And then after this we need to tack onto it the inner value, cuz the inner value in the radial-gradient comes first. So we'll go to the next line here and I'm gonna say gradient +=. That's how we can append more onto the end of a string, we can say +=, and we're gonna point to, I forget what we called it. We called it gradientColors. And we also need to change that here because we changed the name of it up here. So let's change the property we're tweening to gradientColors, and we also need to point to it here. We're gonna say += gradientColors.inner. Okay, so that's gonna put the color value here just inside that first parenthesis. Now the next thing we need, if we look over here in our CSS, after we have that first color value we need a comma and a space. The space is kind of optional, but I like having it there. So the next thing I want to do here is just after gradientColors.inner, I'm gonna say + and then inside quotation marks I want to type our comma and our space. Then I'll go to the next line, and we could do all of this on one line where we just have var gradient equals this plus this. I'm sorry, this plus gradientColors.inner plus comma equals plus whatever. We could put that all on one line if we want to, but it's easier to read if we break it up a little bit. So we have our first color and then comma space, and then our next line we'll say gradient += again, and now we need our second color which is our outer color. So gradient we gotta spell that right gradientColors.outer. And then after our outer color value, we have our closing parenthesis there, so we just need to add that here. So we'll add that inside quotation marks and then a semicolon to end our statement. So now we've strung all of these values together, we have radial-gradient, our opening parenthesis, and then our inner color comma space our outer color and then our closing parenthesis. Now that we've strung all that together, we want to apply it to our gradient. And I'm gonna use a jQuery to do this using the CSS method. So right now we've already pointed to the text object. Now I wanna point to our gradient object, which is our square. And we can actually see our text object still animating if we point to the right items here, so we could say HTML equals gradient, so we can just point to this value here and just watch that gradient change over time as it animates. And we can probably reduce that font size quite a bit so that it actually fits into place. But we saw that animating from one value to another. Now we just need to apply this string to our gradient. And let's just go down to the next line here and let's point to this object. And if we scroll up to the top, we haven't created anything for it yet, so let's create another variable. We could do it on another line and do var again, but if we don't want to type var again we can type comma and then just the name of the next variable, which is going to be square. And we'll use jQuery to point to that, and it has an ID of square, not a class, so I'll use pound. And we have another another variable right below it, so I'll put another comma here and get rid of this var. And there we go, so we've created these three variables separated by commas. And it ends here with a closing semicolon because we're appending more onto it on the next line, so that's why we did it that way. So we have our text value updating now. On the next line we want to actually update the square. So I'm gonna point to the square object and then I'm gonna say .css(); to end your statement. And inside the css method, inside quotation marks the first thing we need is the name of the property that we're going to be targeting with our css method, and we're going to be targeting the background image. And then after those quotation marks, we have a comma, space, and then inside quotation marks again the value we're going to give to it. Well, we don't need these quotation marks because we've already created our value as a string called gradient, so I'll just copy that and paste it here. And now hopefully we'll see our gradient animate, and we can see that it does it just fine. So as you can imagine, you can just punch in any two numbers you want here or any two colors you want here. So we could change inner to green if we wanted and our outer one here to blue. And we'll see it will animate from red black to green blue. And again, you can use hex values, you can use RGB values, however you prefer. But that is the most common way of using this color props plugin to animate our background. Now again, keep in mind that we are not animating the square object itself. Everything we've been doing up to this point we've been animating an actual object in the display in the browser window. This time we're animating a JavaScript variable, as we can see here. We're pointing to a JavaScript variable, not an object on the stage. And then when we point to that variable, we're animating the values inside that variable and then using this onUpdate feature here to run the updateColor function over and over again as that tween is occurring, as we're flipping through frames in that tween. And so over and over again, this updateColor function is running and updating the color for that background image which is really just a gradient. So hopefully all of that makes sense. If it doesn't, watch it through one or two more times. It's really simple once you're able to wrap your mind around it. And the real key to understanding it is understanding that we've got a function down here that we're just running over and over again using this onUpdate property. So I hope that made sense, but that's how the color props plugin is used. Thank you for watching, and I'll see you in the next lesson.


