

- Overview
- Transcript
7.3 Return on Hover
Now that your random rotations are set up, in this lesson, you’re going to learn how to animate all objects back to their starting positions when the user hovers over the object.
Related Links
1.Introduction
1.1Introduction00:35
1.2The Plugins02:58
2.Animating HTML Attributes With AttrPlugin
2.1Quick Review06:32
2.2Tweening SVG Shapes08:13
2.3Setting Up Your SVG09:46
2.4Tweening Attributes08:38
3.Animating on a Curve With the Bezier Plugin
3.1Animating in a Circle14:27
3.2Bezier Properties07:00
3.3More Curves06:21
4.Animating JavaScript Color Properties
4.1Tweening Properties10:11
4.2Animating a Gradient10:16
5.Animating Text Changes With TextPlugin
5.1Animating Text08:02
6.Animating CSS Rules
6.1Starting From Scratch06:58
6.2Animating the Rule09:49
7.Directional Rotation
7.1Directional Rotation Basics10:32
7.2Random Rotation08:19
7.3Return on Hover11:29
8.Conclusion
8.1Final Thoughts00:42
7.3 Return on Hover
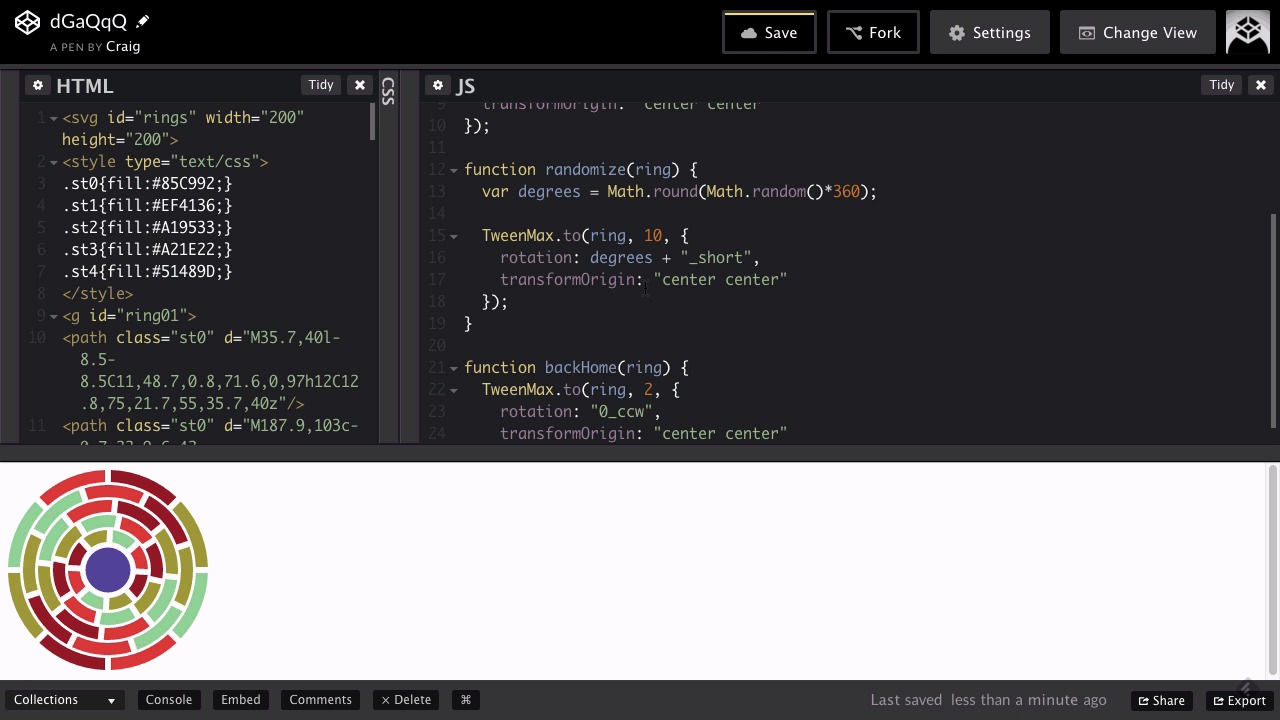
Hello, and welcome back to Advanced Animation with GSAP Plugins. In this lesson we're gonna pick up where we left off. So right now we have a randomized animation, and what I want to do now is that when we hover over this SVG file, I want all of those items to animate back to their original position. So right now we have a jumbled mess of colors, and when we hover over our item, they're all going to line back up and we're going to move them there in the shortest possible way. We're not necessarily gonna go clockwise or counterclockwise. We're gonna use the _short suffix to get us there in the quickest way possible. So the URL for this is starting pen is in your course notes. Once you open that up, we'll click on Fork to create a new version of it. And let's nudge this over so we have a little more room in our JavaScript window. So basically what we're doing is we're taking this function here where we've created a random number and then animated to that number. And we actually need this function twice because when we hover over our SVG, we want everything to return back to normal. But then when we move our mouse cursor a way from it again, we want those rotations to be randomized again. So what I want to do is instead of creating this each function twice, it would be kind of pointless to create the same function in two separate places. Instead of doing that, I wanna grab everything inside that function, cut it, and then create a new function that we're gonna call a couple of different times. So I'll create a new function here, using the function keyword, space, and then the name we're gonna give to that function. So let's just call it randomize, and then inside the curly brackets for that function, we'll just paste all of that code that we just copied. Now the problem that we're gonna have with this function is that JavaScript no longer knows what this means right here. Since we've pulled this out into a separate function, the $(this) selector no longer means anything. We don't know what it's supposed to be pointing to. It knew what it was talking about when it was inside this each function up here. But now that it's inside this separate function, JavaScript doesn't know what to do with it. So what we need to do is we need to pass something into this function telling this function which item or which ring needs to be animated. So what we're gonna do inside the parentheses here is we're going to create a variable called ring. And you can call this whatever you want to, I'm just gonna call it ring. And so whenever we call this function, we're gonna pass a item into that function, and then we will animate that item instead of $(this). So we're gonna animate that ring over the course of ten seconds to a random number. So now inside this each function, we're gonna be calling the randomized function and we need to pass into it the particular ring that we need to animate. So here inside the each function, we know what this is. This is pointing to whichever current ring is being animated. So if we pass that current ring to this randomize function and store it inside this ring variable, then we know which ring needs to be animated down here. So as you can see, if we refresh our animation, we're back to where we were. Everything is animating just fine. So we know that this function that we've pulled out and moved elsewhere, we know that that's working just fine. So now what I want to do is I want to create the functionality so that when we hover over this item, it's going to return back to its original position, and when we pull our mouse cursor away from it we're gonna run this randomize function again. So let's create another function called backHome. And [LAUGH] we could probably come up with a better name for that, but we're basically going to return everything back to its original rotation. We're gonna return it all back to a value of zero. So we're gonna do the same thing for this backHome function. We're gonna pass into it a specific ring, cuz we're gonna run this for every single ring in that rings array. So here we're simply going to animate all of that back to zero. So we're gonna do the same thing. In fact, we can just grab this entire tween here and copy it so we don't have to type it all out again. And we're gonna be animating whichever ring we're passing into this function, over the course of ten seconds. And in fact, for this one we're actually going to speed it up a little bit. Whenever we hover over that item, I want everything to kind of bounce into place. So instead of using 10 here, I'm gonna bring that all the way down to 2 seconds. So when we hover over it, we're gonna get a really fast animation, and when we move our mouse cursor back away from it, it's going to slowly animate back out to these random positions. So we're gonna animate each ring over the course of two seconds. And instead of this here, we're just gonna put it all inside. Now let's delete that first. There we go. We're gonna put this all inside quotation marks, and say 0_ccw. So you'll notice here that I'm animating them all the same direction. And actually, up here for the randomized, I want to randomize the direction we're moving it to. For some reason, I decided initially to do this clockwise. Let's actually make that _short. So we're going to, over the course of ten seconds, very slowly animate not only to a random number but also in whichever direction gets us there the quickest. So it's gonna be going in different directions. So now let's go back down to our backHome function, where we're gonna animate everything quickly back to its original position. So we have everything animating like we want it. The transform origin is still in place. The only thing I want to add here is a fun little easing equation. We're gonna do a bounce. We're gonna do bounce.EaseOut. So when we hover over it, it's going to bounce back into place. Now we haven't created that hover functionality yet, as we can clearly see here. We've just created this function that we haven't called yet. So now let's create our hover event. So up here initially, we have this rings.each function which is running whenever the page first loads, which is fine. We want this to animate as soon as the page first loads. But then just below that I'm going to point to each of those rings and create a hover effect for it. Now we're actually going to create the hover effect on the entire SVG, not on the individual rings. Whenever we hover over this entire object, we want to trigger all of these animation. So we're going to do that using this rings ID, this plural rings ID, which is attributed to the entire SVG. So we're gonna use jQuery to point to that. We'll use the dollar sign and an inside parentheses, and inside quotation marks we'll point to #rings. And we're gonna create a hover function for it. So we're gonna say .hover. And then inside parentheses we're gonna create a function. So we have function() and then {}. And then, after our closing parenthesis at the end, we'll put a semicolon. So then inside this hover function, we're going to run this backHome function. But we're gonna run this backHome function for each individual item, for each individual ring. So we don't want to just run this once, we want to run this over and over again for each ring. So what we're going to do, back up here in our hover function, is we're gonna point to all of our individual rings just like we did here. We're gonna say rings.each and then will type (function() {}, Enter to nudge the closing curly bracket down, and then a semicolon at the end of that. And then for each of these we're going to be running the backHome function in passing into it the specific ring that we want to animate. So inside this function, we're gonna say backHome and then inside parentheses we're going to say $, and then inside another set of parentheses this, and then a semicolon at the end of that statement. So let's see if that works. Let's make sure our pen is saved. And now I'm going to hover over our SVG, and sure enough, we see everything bounce back into place, which is a really cool effect. Another effect we could try out instead of bounce is we could try, let's go back to the bottom here, let's try elastic instead and see how that looks. So we'll set that up, save it, and we'll let it animate for a second then we'll hover over it and everything kind of rubber bands its way back into place and that looked really cool as well. So now we just need to recreate the initial animation when we move our mouse cursor away from it, so it starts animating back to these random positions. So the way we can do that using this hover event is we have this first function that we've created. And that function ends with this closing curly bracket down here. Well, if we type a comma here at the end of that curly bracket, and then start another function, this second function will run whenever we move our mouse cursor away from it. So again, we're gonna do the exact same thing except we're gonna point to the randomize method. So we're gonna point to randomize, which is this function we created down here, and we're going to pass into it the same thing, this jQuery $(this) value here. So it should run this randomize function again, passing into it whichever current, in fact, we actually need to do this for rings.each. This right here is not gonna work. We need to put the entire loop. In fact, we can just grab this right here cuz this is exactly what we need to do, rings.each randomize this. Let's copy that and put it inside this mouseOut function, and let's nudge this over so it looks right. And there we go, so that should do it. We need this randomize function here inside rings.each because again, we want to perform that for each individual ring. So hopefully that will get us where we want to be. Let's refresh again. And we'll see everything animating initially in random directions at random intervals. And when we have hover it, it all kind of snaps back into place. And when we move away from it again, everything starts moving in a random direction again. So we can just run that over and over as many times as we want to, and it looks pretty cool. And no matter what happens, every time we hover over it, it's gonna move in a clockwise direction. So even if we just move away for just a second, when we hover back over it, some of them are gonna move really slow, some of them are gonna move really fast, and it gives it kind of a really cool effect. I like the way that looks. So that's just one of the many ways that we can use the directional rotation plugin to create some really nice animations in GreenSock. So thank you for watching, and I'll see you in the next lesson.


