

- Overview
- Transcript
3.3 More Curves
In this lesson, you will break out of your circular animation and create an animation which follows a more natural path.
Related Links
1.Introduction
1.1Introduction00:35
1.2The Plugins02:58
2.Animating HTML Attributes With AttrPlugin
2.1Quick Review06:32
2.2Tweening SVG Shapes08:13
2.3Setting Up Your SVG09:46
2.4Tweening Attributes08:38
3.Animating on a Curve With the Bezier Plugin
3.1Animating in a Circle14:27
3.2Bezier Properties07:00
3.3More Curves06:21
4.Animating JavaScript Color Properties
4.1Tweening Properties10:11
4.2Animating a Gradient10:16
5.Animating Text Changes With TextPlugin
5.1Animating Text08:02
6.Animating CSS Rules
6.1Starting From Scratch06:58
6.2Animating the Rule09:49
7.Directional Rotation
7.1Directional Rotation Basics10:32
7.2Random Rotation08:19
7.3Return on Hover11:29
8.Conclusion
8.1Final Thoughts00:42
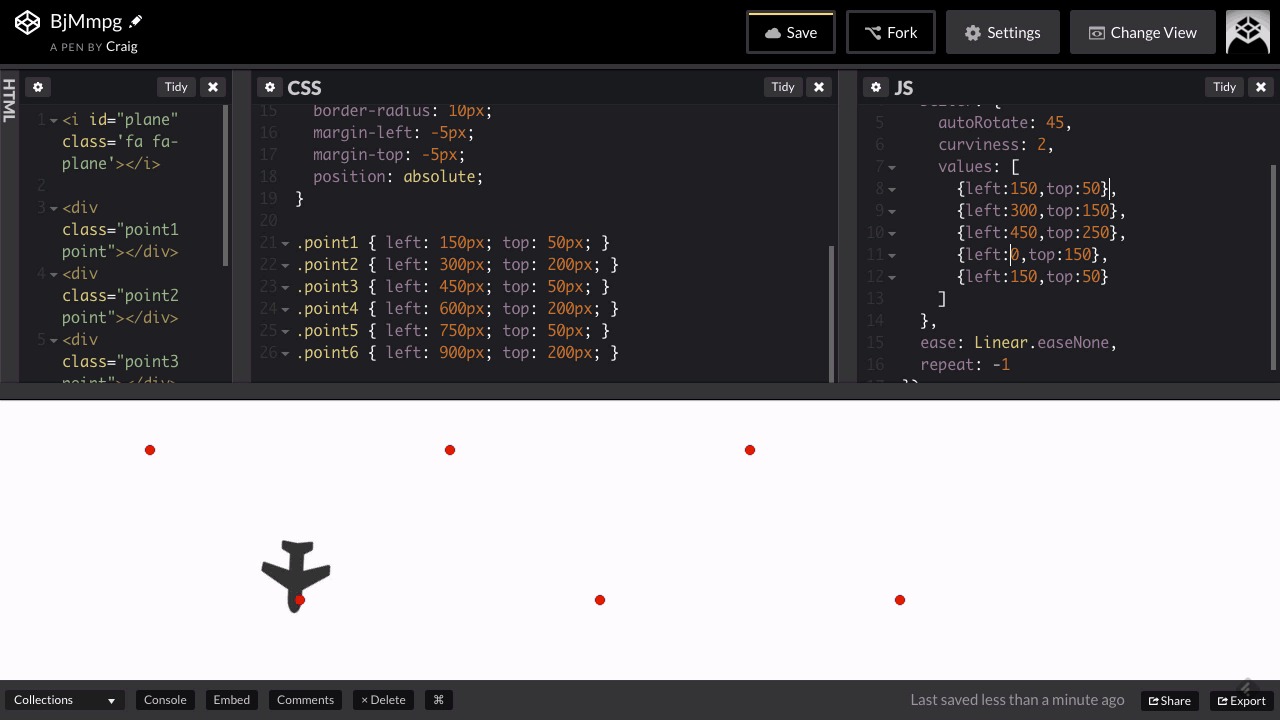
3.3 More Curves
Hello and welcome back to advanced animation with GSAP plugins. In this lesson, I want to walk you through the process of creating a more complicated path for your airplane to follow. When we first started, I already kind of had a path laid out for you by laying out these red dots, and these red dots are actually a very helpful way to do this. Now you could just open up some kind of program, like Photoshop or Illustrator, and kind of plot out the points that way and keep track of how many pixels you've moved your points and do it that way. But I kind of like to do this in a more organic fashion and you may not think this is organic, you might hate this process but I'm going to experiment with that a little bit. So we're gonna start with our first point right where it is, I like it where it is, but I do wanna add a couple more points, maybe two more. So we'll just copy and paste those and we'll add point5 and point6 to the equation. So, we have our CSS now for points 1 through 4. And let's go ahead and leave point 1 where it is, point 2 maybe we'll move it over a little bit more maybe to 350. And then let's see. Point 1 is this one of the top, I'm sorry, and then point 2 is over here. And that actually works pretty good. Let's move it down a little bit more the second, let's move it down to 250, that might be a little bit too much, maybe just to 200. And that works pretty good. So, our top is gonna move from 50 to 200. Now, I'm gonna make kind of a S shape as it moves across. So we'll just alternate between 50 and 200, so our third one will be 50, our fourth one will be 200, etc. And then with our left, we're just gonna be consistently moving from left to right. So we've got 150, let's bring it up to 300 to 450 and then we'll go from 450 to 600. And then we need two more for points 5 and 6. And we'll just redefine those. And then, for this one we'll bring that up to 750, and then our last one to 900, and there we go. So now we have this nice little zigzag that we're hopefully gonna be moving back and forth in between. But the reason I laid it out with these dots first, is so that I can get a really good idea of what that's gonna look like. Now, if I set this up using the default through value for the type, it might be a little bit too much, but this will give us a better idea of what the through and soft values do and what the differences between the two. So, let's try this out, so for our left values, we've got 150 and then 300, and then 450, and then 600, and we'll go to 750. And then, we add another one here for left, 900, and then again we're gonna be alternating between 50 and 200 pixels. So, this one 200, this one down to 50, this one to 200, this one down to 50 and then this one back to 200. So, that should give us an animation where it's moving back and forth, and as I said, since we're using that through value, we can see that it's taking some pretty sharp turns there and it doesn't look all that comfortable, so we can try just changing that. So, after curving this, I'm gonna go to the next line here and will change our type here to soft and see how that changes things. So let's watch the animation. And now, we can see something a little bit smoother, it still looks kind of jerky but it's moving a little smoother between those points cuz it's not trying to get all the way to where that point is, instead, it's just kind of being attracted towards it. So, because of how choppy that is we might stretch that out a little bit more. Maybe start this left one at a value of 100 and then just increase each by 200, so this one would be 500, this one would be 700, this one would be 990, and then this would be 1100. So let's take a look at that and maybe just by stretching them out like that it will smooth up the flight a little bit, and that does smooth it out a little bit but that's basically the process that I would go through for something like this. Try to lay it out a little bit using these points first, and then once you get what you're looking for, then you can lay it out like this. However, if you don't like that approach that's fine, you can just play with these numbers here all you want until you get the effect that you're looking for. I know this animation doesn't look too great just because it's kind of starting in the middle of the stage and just kind of disappearing instead of flying off the edge, so you could certainly adjust that a little bit. You know, maybe you could put the whole thing inside a containing div. We can get rid of all of these points here, we don't really need those, so we can comment those out if we wanted to. And then just have the plane animating. But then as we animate it, we can set our left position maybe sitting off the edge of the stage. And we'll start it there and then over here. Well maybe we'll start with another left position before we get there. And this first left position is gonna be a value of negative 100, and a top value, well in fact will leave the value at 50. So it starts off at the same height but then it starts swerving back and forth, but you can play with those values as much as you want to obviously there's a lot you can do with that. But those are the basics of using the Bezier plugin in GreenSock. Thank you for watching and I'll see you in the next lesson.


