

- Overview
- Transcript
7.1 Directional Rotation Basics
In this lesson, you’re going to learn how to take control of your rotation animations by using the DirectionalRotationPlugin to determine which direction to rotate.
Related Links
1.Introduction
1.1Introduction00:35
1.2The Plugins02:58
2.Animating HTML Attributes With AttrPlugin
2.1Quick Review06:32
2.2Tweening SVG Shapes08:13
2.3Setting Up Your SVG09:46
2.4Tweening Attributes08:38
3.Animating on a Curve With the Bezier Plugin
3.1Animating in a Circle14:27
3.2Bezier Properties07:00
3.3More Curves06:21
4.Animating JavaScript Color Properties
4.1Tweening Properties10:11
4.2Animating a Gradient10:16
5.Animating Text Changes With TextPlugin
5.1Animating Text08:02
6.Animating CSS Rules
6.1Starting From Scratch06:58
6.2Animating the Rule09:49
7.Directional Rotation
7.1Directional Rotation Basics10:32
7.2Random Rotation08:19
7.3Return on Hover11:29
8.Conclusion
8.1Final Thoughts00:42
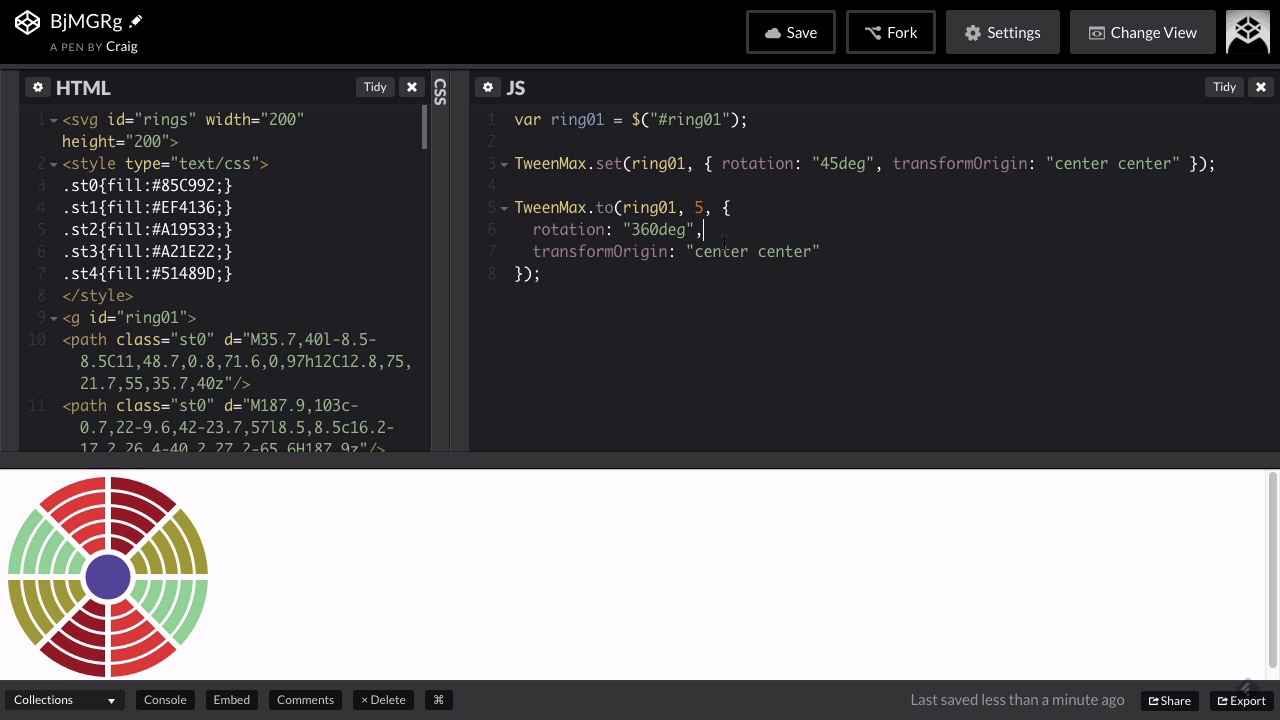
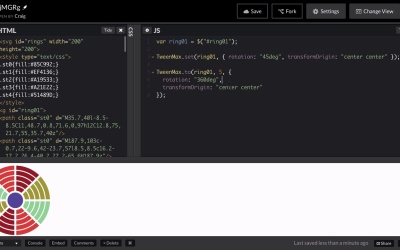
7.1 Directional Rotation Basics
Hello and welcome back to advanced animation with G.S.A. be plugins. In this lesson we're gonna start to take a look at the directional rotation plug-in and this is one of those plug-ins that does not require you to explicitly point to it in your HTML code. We don't have to create a separate script tag for it also when we use the directional rotation plug-in, there's really not much of an indication in the code that we are using it. We don't have a special property that we're gonna be setting and we don't have an extra JavaScript object that we're gonna be creating in order to house all of the properties that we need. We're really just gonna be using the rotation property but it's the way we set the value to the rotation property that marks it as a member of the directional rotation plug-in. So here in our starting pen, which you can find the URL for it in the course notes. In our starting pen here we have a simple as V.G. file, and in this SVG which I created in illustrator. We have a series of rings that we're going to rotate separately and each one of these rings starting with the outer one gradually moves inwards and again we're gonna rotate each of these rings separately and if we look at the HTML for RSVG, we can see this group here for example, a group in an SVG is indicated by this G element here and you'll see that this one has an ID of ring zero one. This is the outermost ring and it has several paths assigned to it, each of these paths represents a different segment of this ring, but the whole whole ring all the way around is inside one group with an ID of ring zero one and then we have ring zero two which is the ring just inside that. And so on and so forth, so we have a ring zero one all the way down to ring zero five. In the center, and then we have just the circle in the center, which doesn't really do anything. So before we start talking about directional rotation, let's talk about just a regular rotation animation. And we don't need to worry about CSS here, so we can collapse that all the way and just focus on our JavaScript. So in our JavaScript for now, I'm gonna create a variable to store our first ring, and we're gonna call that variable ring zero one since that's the ID of that particular group and we're gonna set it equal to using JQuery here. We're gonna put that selector inside quotation marks pound ring zero one. So that should point to that first ring. So the old fashioned way of doing animation in TweenMax is we do Tweenmax to or from, or to from, or from to I'm sorry or whatever you want to do. We're just going to do a simple TweenMax.two. We're gonna animate ring zero one, we want to last maybe I don't know five seconds will put the properties inside curly brackets just like always and here we're simply going to animate the rotation of our object. So let's say, we want to animate it to a value of 180 degrees, so we would type 180 deg. Inside quotation marks and we saw that ring just kind of take off and it's rotating around the upper left hand corner. So once it gets off the screen we can't really see it so we want to change first of all the transform origin of that item. So at the end of this line we're gonna hit comma, go to the next line and type in transform. Origin with a capital O, and we're gonna set this equal to a value of center, space, center. And hopefully that animation, there we go, makes a lot more sense. So that's how we would animate an item using old-fashioned rotation. And we could go backwards here if we wanted to. We could go to negative 180 degrees, and as it refreshes we see that it moves the other direction. So if we were let's say, we were currently at a different rotation. So let's say, we're gonna use TweenMax.set here, which again is a way just to set a particular property without creating a animation out of it, so we're gonna set ring zero one comma space and then inside curly brackets here. We're going to set the rotation property here to a value of let's just say, 45 degrees. And then for this TweenMax.to let's say, we want to animate it to a value of 360 degrees and we need to alter the transform origin here as well, or things are not gonna look right. And then once it refreshes, we can see it animating around. And it starts at a value of 45. And since it's going up to 360 degrees, it's just going to keep moving in a clockwise direction until it gets there. 360 basically bringing it all the way around back to the starting position. While the directional rotation plug-in is really just a slight tweak to the way that it works by default, but it's a tweak that makes it really really helpful and easy to use. So with the directional rotation plug-in. We have a couple of options. We can choose to rotate clockwise or counterclockwise or we can take the shortest route there. So let's say, that we started off at 45 degrees. And then inside our animation, we don't have a different property that we're gonna be using for the directional rotation plug-in. Instead we're just gonna change what we put inside the quotation marks here. So instead of 360deg for degrees, we can say, 360_cw for clockwise, and that will force it to move in a clockwise direction. Similarly we can change this to C C W. And it will rotate in the counterclockwise direction and we can see that happening. It's moving counterclockwise now, but we have another option. And this next option is gonna come in really handy if you don't know at any given point in time where your rotation values are gonna be. If you're at a random rotation for example, and you need to get to 360 degrees but you don't necessarily wanna go the long way around you just want to take the short route. You can do that and the way we do that using the directional rotation plug-in is instead of typing CW or CCW, we simply type short. So short is going to basically, determine the shortest route to get to where it's going, and it's gonna take that route in order to get there, so it's gonna take the quick way. Now really that's all the directional rotation plug-in entails. It entails these three properties CW for clockwise, CCW for counterclockwise, and short in order to turn it in whichever direction will get us there the quickest. Now I mentioned before that we don't need to use any special property for this directional rotation plug-in and certainly we don't we have our rotation property here. All we did was change this. Now there is a special property we can use called directionalRotation, which in this instance basically gives us the exact same result. It's gonna rotate according to whatever this suffix is here, either CW, CCW, or short. But again that works whether or not you decide to use this entire directional rotation property. However, there is an instance where you do need to use it. Let's say, that you want to rotate a couple of properties. So let's say, we're doing some 3D rotation. We want to rotate around the X and Y axis. So in that case we would need the directional rotation plug-in, because we would need an object here. So we have our object let's get rid of this text inside the object. We now have these curly brackets here and will nudge those down, so we can now put something in between the curly brackets. So if we wanted to do rotation X with a capital X there. Let's say, we wanted to rotate it to a value of 180 degrees and we wanted it to go. Let's say, counterclockwise and then we also had rotation Y that we wanted to move 223 degrees clockwise. So we have two different axes we're spinning around and if we want to do it that way then we're gonna need to use this directional rotation prefix or property and and then inside an object we would include both of these rotation X and rotation Y values, and again for these two values we can use clockwise, counterclockwise or short to get where we're going. It doesn't matter you can use it either way. Now I mentioned that the directional rotation property was required if we're going to put this inside an object like this. But we can animate these two items separately without putting them in an object. So since they're in an object right now they require the directional rotation plug-in, but if we get rid of this and just point to those two values we'll get rid of the directional rotation altogether. And as well as this this extra item here. We now have two rotation values and we can watch it, and it's still the same. Now if we were using these animations but we wanted it to be in radians instead of degrees, we would need to go back and hit commands Z a few times, we need to go back to the point where we were using the directional rotation. And then inside the curly brackets for that, we could say, useRadians with a capital R, and set that to true. And when we do that, it's going to treat these numbers here like radians instead of degrees. But for what we're doing in this particular animation here. We don't really require any of that complexity here, so we can just use the basic rotation method and we're gonna rotate it just using these suffixes. So now that we understand the basics of how this directional rotation works. In the next lesson, we're gonna create a really nice animation where each of these rings is kind of gonna be randomized a little bit. And it's gonna animate to those randomized states or randomized rotations. So we'll get to that in the next lesson. Thank you for watching, and I'll see you then.


