
 Lessons: 12Length: 1.1 hours
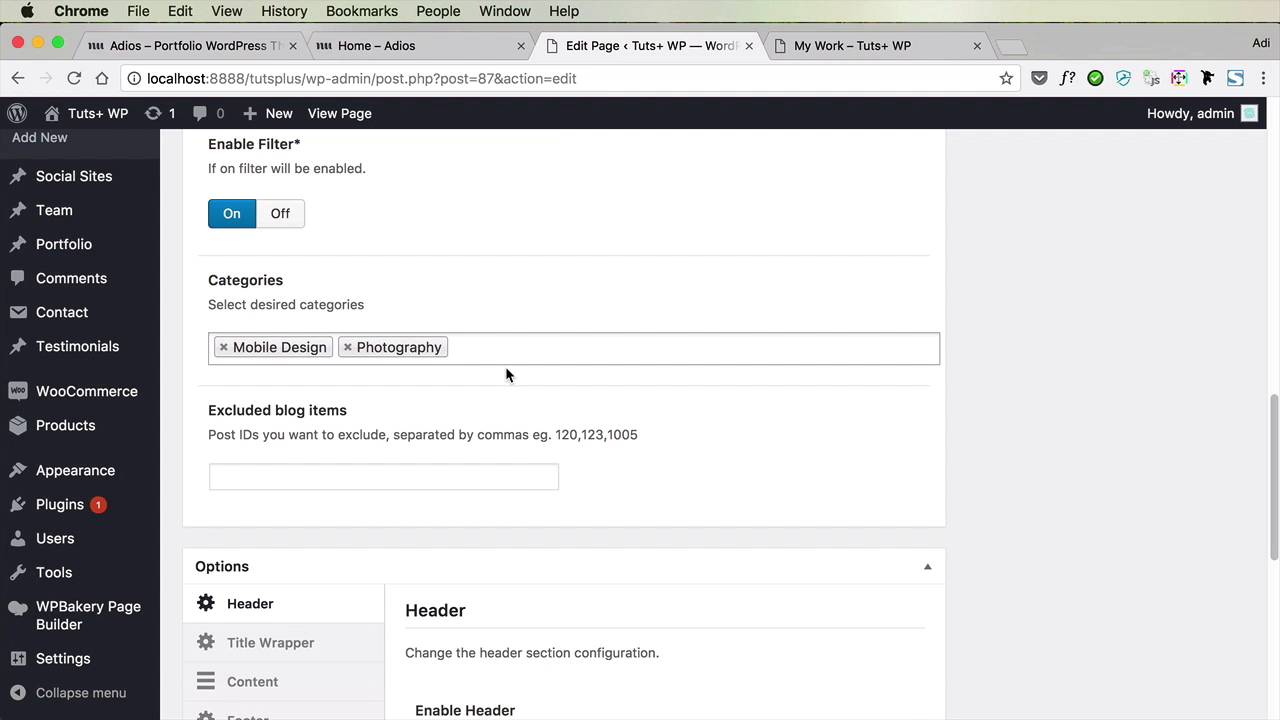
- Overview
- Transcript
3.5 Customizing the Portfolio Page
The portfolio page will present the projects from all the various categories we’ll be creating. It’s super easy to do, so let’s get started.
1.Introduction
1.1Welcome to the Course00:43
2.Getting Started
2.1Setting Up the Local WordPress Environment08:41
2.2Installing the Adios Portfolio Theme05:17
2.3Loading the Demo Content02:47
3.Customizing the Portfolio
3.1Creating the Navigation08:14
3.2Editing the Homepage Structure04:17
3.3Customizing the Homepage Slider05:14
3.4Customizing the Rest of the Homepage12:57
3.5Customizing the Portfolio Page04:51
3.6Customizing the Blog Page03:59
3.7Customizing the Contact Page07:11
4.Conclusion
4.1What’s Next?01:43
3.5 Customizing the Portfolio Page
The portfolio page will present all of our projects from all of the various categories that we'll be creating. It's super easy to use, so let's see how we can customize that. So we'll go to our portfolio page from our navigation. And the first thing I wanna do is get rid of this Intro text. So we'll go to page, we'll find My Work, which is our portfolio page, and we'll go to Portfolio Options right here. We can choose the portfolio style. Currently it's set to Masonry, but we can change it to whatever we want. Whether or not we enable the filter, and the filter being this one right here, we can choose to only display posts from select categories. So let's display posts from Mobile Design and Photography because these are the categories that I added personally. I can also exclude certain categories. And then, on the header, I said I wanted to get rid of this Intro. Well, that's actually very easy to do. We just go to, let's see, Title Wrapper. And we'll simply delete this Subtitle text. Then we'll hit Update and that text is now gone. And that's pretty much it, really, for this portfolio. There are not a lot of things that we can do to it. For example, this project opens in its own page. And I've actually shown you this before, how it creates a nice slide, or a slider. And then you also have access to previous projects that you can open right here, or to next projects. So just by choosing the type of layout that we want for our portfolio, all of our work was done, basically, because everything was configured in advance by the demo content. Now, of course, you can go in here and you can change all of these options to configure the footer page as you see fit. But for me personally, the way it looks right now is perfect. And just to go over it once again very quickly, here's how you add a portfolio item. You go to Portfolio > Add New, you give it a title, let's say Background. You add the new category, if that's what you want. Or you can simple use an existing one, like for example, Graphic Design. And then you add one or more slides. In my case, I'm gonna add a single one. Let's call this Abstract Background. And then you choose where that portfolio project will link to. A Single Page will open in a dedicated page where it shows details. Lightbox, it opens in a lightbox. External URL just goes to an external URL. Now if you were gonna open this in a single page, you have access to the project details. You can add your client name and your designer name. So let's say your client name is Envato and your designer, this is the Designer Title, let's say Adi Purdila here, it's my name. I'm gonna set a featured image. And I'm gonna publish it. So now if I refresh my portfolio page, Now let's also show that category My Work. All right, so I wanna show the Graphic Design category as well. So I'm gonna hit Update and then refresh. And I have the Graphic Design category. So when I click this, it goes into a dedicated page. It shows me my clients, it shows me the designer, and the category. And of course, if I have multiple slides, they will create a nice slider right here. And with that, the portfolio page is complete. Let's move onto the blog page. That's coming up next.


