Lessons: 8Length: 1 hour

Next lesson playing in 5 seconds

Cancel
  • Overview
  • Transcript

2.1 Intro to CSS

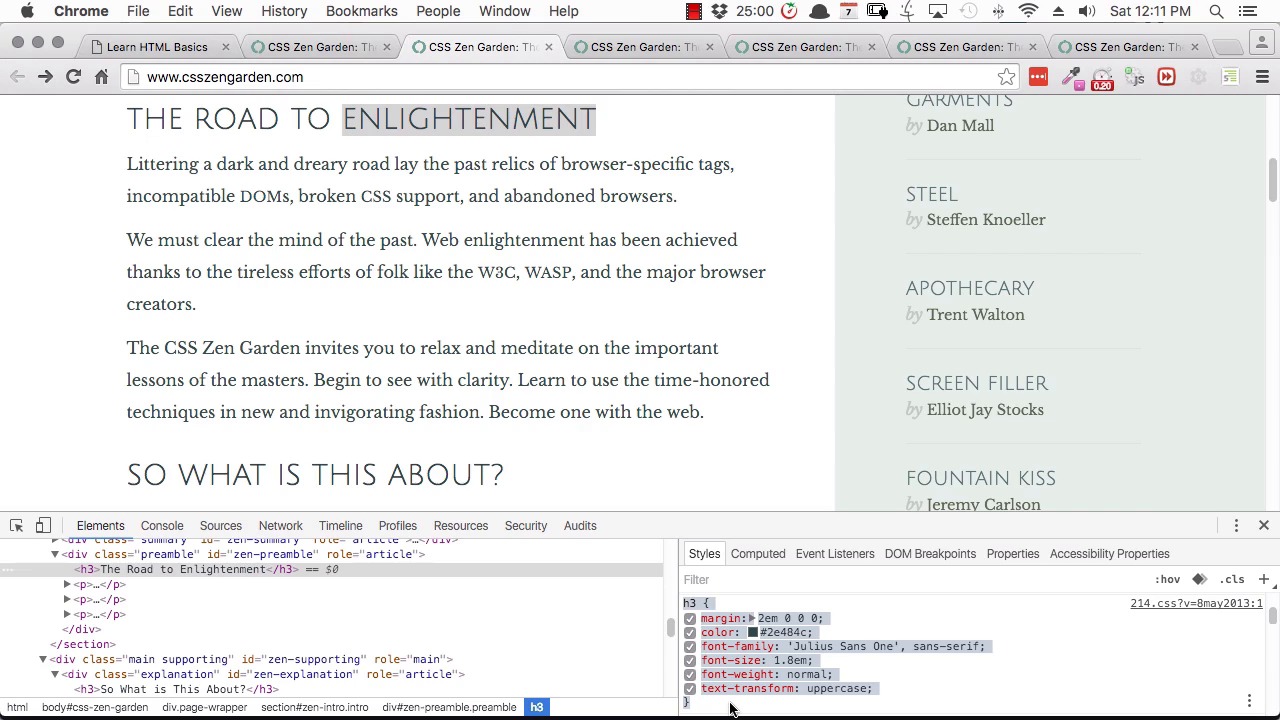
Before we begin learning CSS typography, let’s start with an introduction to exactly what CSS is and how it works. In this lesson you’ll learn how CSS affects the way a website displays, what CSS selectors are, what CSS properties are, and the coding syntax you’ll need to know to write your own CSS.

Related Links

2.1 Intro to CSS

Hi, this is Kezz Bracey. Welcome to Start Here, Learn Topography CSS. And this is the second course in our Start Here series. And the last course, you learned the basics of HTML, and this is what you created It's a simple H.T.M.L. page using all the most common H.T.M.L. elements. However as you can see it's still just basically black and white. There's no unique look and feel there's no styling, and that's where C.S.S. comes into play. The CSS stands for Cascading Style Sheets, and the most important word in there that you want to pay attention to is style. CSS is what you use to add style to a page you would otherwise just have plain content. So this series we're going to have three courses on CSS. And this first one is going to be concentrating on typography, after that we'll move on to layout, and then finally we move on to coloring. But before we can do any of that we need to give you an introduction to what C.S.S. is, and the most important parts of working with it. So this lesson, we're going to go through what C.S.S. is the kind of effects it can have on a website, and we're going to step through the essentials of C.S.S. syntax, and then that information will carry through this course and the two courses that we have coming up after that. So the best way to understand the effect of CSS is just to see what it can do. So to give you a little reference, and a little bit of basis of comparison way back in the day, we never used to have CSS. If you wanted to make a website look good, basically what you had to do was you had to create a design in Photoshop, and then you had to cut it into pieces and each one of those pieces had to sit inside a table cell and often because you would use graphics to do things like headings to make that they looked nice. You wouldn't even have text that was readable by search engines, but then along came CSS. And it gave you ways to make you designs look nice and to make everything still search engine readable without needing to depend heavily on embedded graphics. And when CSS first came onto the scene one of the first shots that still around today that showed everybody the power that it had with CSS then gotten. Now you'll notice he at this is our HTML page that we made in the last course. Now this is CSS Zen Garden with no CSS applied. As you can see it looks quite similar to what we had by the end of our HTML basics course. Just plain black and white with all the appearance set to default. Now this is CSS Zen Garden with CSS applied. As you can say it's very, very different, you have color, you have font styling, you have background images, you have style. Now the cool thing about CSS is all of your styling card can be placed into a self-contained document, a stylesheet, and that style sheet is separate from your HTML. So what that means is you can apply a new stylesheet to the same HTML and have a completely different style for your side. If you go to CSS Zen Garden you have a browse through all of these links down the site. These are all applications of different style sheets, to this exact same original HTML. And let's have a look at some of the examples. So this is one example looking obviously completely different to the one that we just saw. Here's another example. Now all the HTML is exactly the same, the only thing that has changed is the CSS. So here's another one completely different every time. So CSS allows you to keep your HTML exactly the same, but have an absolutely different style applied to the website. So looking at that, you can see the kind of power that C.S.S. has. Alright so now let's move on to the basics of how C.S.S. works, and just like we did in the last course when we was starting to look at how H.T.M.L. works. We're going to use the chrome dev tools inspector. So go to csszengarden.com. Now scroll down, until you can see both of these headings here. And then right click one, and then Inspect it. Then just adjust, so you can still see both of these headings. All right so now we can have a look, and we can see here that these headings a both h3 headings we'll check this one too. That's also an h3. Now over in the stylist tab on the right we can see the CSS that's being applied. Now this card here comes straight out of the attached stylesheet, which is this file here. If you want have a look at the whole file you can open that up in a new tab, and this is all the C.S.S. code that has been applied to this website and there is our H3 code. So just hit back and keep looking in our inspector. All right, so now if I change any one of the properties in here, if I change any of the code here, it's going to affect every age three element on this page. For example, here we've got the font size specified for our h3 headings. Now if I change that, watch the font size of the heading change. So I've increased that from 1.8 to 2.5, and now all of the h3 headings have increased in size. So the basic format that you've got here is first you have a Selector. So this is going to select every age three element on this page, and apply all of the styling here that's between this opening curly bracket and closing curly bracket and in between those curly brackets. You have CSS properties on the left here in red, and then you have the corresponding values on the right. At the one that we just changed and something you'll be looking at closely in this course is the font size. So on the left we have the font size property and on the right, we have a value of 2.5em. Now something to pay attention to here is you'll notice that to every one of the properties on the left,there's a colon. And after every value there's a semi-colon and that's how you prevent one rule from just running into the next rule, that's how you separate each part of your CSS. So to recap so far, you start with a selector then you put opening and closing curly brackets inside that you place a property followed by a colon, and then a value followed by a semi-colon. Now with this code the selected that we're looking at is an element, and you're familiar with elements from the last course. We went through working with each of the elements, paragraph elements and a few different others as well, but that's just one type of selective that exists in CSS. The other that you'll be using most commonly is classes let's just drag that window up a little bit and have a look at some classes. You can see as you go through. This code here, you can see this attribute multiple times class, and whenever you see that the name that is specified as the value of the class attribute. Should match up with the select that you find inside you see assists. So here we've got a div with the class participation, and then sure enough I have her on the right in our styles tab. We can see a selector div of the class participation. Now the way that you recognize a class in CSS is that there's always a dot in front of it. If there's no dot, then the selector is just a straight element, like this one here. There's no dot here, so we know that this style is just gonna apply to every single div element but in this style. There's a dot before the word participation right here, so that means that this style is going to apply wherever we see this participation class applied to a div. Now if that feels a little bit overwhelming right now don't worry, because we're going to go through this a lot in this course and in the subsequent courses. So you find yourself becoming familiar with it very quickly. And there are other types of select is that are also available in CSS, but in this course and in the too after this would just going to be focusing on elements and classes a selectors. And I just starting out working with CSS that's really we should put all of your focus, then you can work with the more advanced selectors is a little bit later. All right, so now that you've seen the basics of how CSS works and the kind of differences that you can achieve with styling, you're ready to move on to learning how to create topography CSS. I've just briefly covered what CSS. Properties are and in the next lesson, you're gonna start working with some of those properties. And we're gonna begin with the most important properties for typography, and then the other font properties. So you'll be learning your first full CSS properties, and they're gonna be font family font size font white and font style. And those four properties are going to give you a foundation in working with CSS topography. So we'll see in the next lesson.

Back to the top