Lessons: 9Length: 48 minutes

Next lesson playing in 5 seconds

Cancel
  • Overview
  • Transcript

2.2 Modifying Color

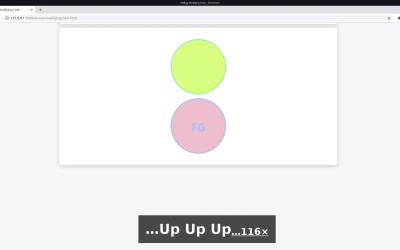
With VisBug, you can modify the colors of background and foreground elements visually. You can either directly set a color of your choice via a color picker, or use the “Hue Shift” tool to dial through various hue, saturation and lightness values until you hit the color you like most.

Let’s see how to use these color modification tools in this lesson.

2.2 Modifying Color

Hey, welcome back to VisBug Quick Start. In this lesson, we're gonna look at all the different ways that VisBug gives you to modify the colors in your sign. There's basically two ways that you can modify color. After selecting an element, you can bring out a color picker and then you can use that color picker to modify your colors. Or there's also a hue shift which lets you use keyboard shortcuts to modify saturation and brightness and hue and the opacity and things like that. So first up we'll look at directly setting the color using the color picker. So we're just gonna start by selecting any element. You don't actually need to have any particular tool active here to make this work, so I'm just gonna select this element. And then you'll see down on the left here we have these two little icons have appeared. This is showing us the fill color, and this is showing us the border color. So then if we click one of them, it'll give us this little color panel, and then we can drag around to choose a new color. So you can see there that I've got a little bit of a problem where this color picker is over the top of this element that I'm trying to work with. For me, I'm working on Linux at the moment and I'm finding that I can't move that color panel. So if you run in to the same issue, just make sure that you scroll the content, so we can see it before you open up your color picker. So in this panel, you've got the same type of color picker that you'd find in a graphics application, and you can change the hue and would not to anything that you like. So I don't know let's pick something a little bit less. Little bit less gross and garish. And then you can do the same thing with the border. And you change up your color to whatever you need. So that's pretty much all there is to directly setting a color. Let's take a look at the hue shift tool, which is pretty cool. So I'm just gonna select the second element here, and once again it's given us all the colors here. This time it's also flagged a text color. So I have this text here, correlates with this color here, and we've got our background and border color. Now I'm gonna activate the hue shift tool, which can also be activated with h. And from here, I can use different keyboard shortcuts to modify this color. If I hit the right arrow, it's gonna increase the saturation of the color. If I hit the left arrow, it's going to decrease the saturation. There's only gonna be one unit of saturation at a time. And if I wanted to go a bit quicker, I can hold down Shift, to make it jump in ten-unit increments. So if I hold Shift and left arrow, you can see how that goes all the way down to gray. And now I can take the saturation back up again by hitting the right arrow, and make it go fast by holding down Shift as well. So we can go all the way back to that brighter blue. With the up and down keys, I can control the brightness. So I can decrease the brightness, so that basically just adds more black into the color, and I can increase the brightness. Something to be aware of there is that if you take in the brightness or the saturation all the way down to zero, you're going to lose the hue. So now if I go back up, it's just gonna take me to white. So if you're using this tool, you wanna stop just a little bit before you get to black. And to take the brightness back up again, same thing. Just with the up arrow key and holding Shift if you wanna make it go faster. I'm just gonna hit Alt + Delete to reset that. I can also modify the hue. So without modifying the saturation or the brightness, just change the hue. And do that, again with the up and down arrow keys but this time holding down Ctrl. So if I go up, I can change the hue. You can see that going into purple, and gradually going through the different hues. Or I can speed it up by holding Ctrl + Shift, now going in ten-point increments, and you can see that color changing a little faster. And just like before, if you wanna go back the other way, then just hold the down arrow instead. And then the last modification that you can make, you're gonna be holding the Ctrl modifier again, and this time hitting need the left and right keys to modify the opacity. So if I hit Ctrl, I'm also gonna hold down Shift to make it go faster. And gonna the left key, and you can see that that took the opacity all the way down to zero. Then to go back up the other way, Ctrl + Shift to go faster, and then the right arrow key, and we can get all the way back up to 100% opacity. So that's left and right arrows for saturation, up and down for brightness, Ctrl with up and down arrows for hue modification. And Ctrl with left and right arrows for opacity modification. And you've seen there that so far we've just been modifying background color. But you might instead wanna modify the foreground color, so the text color. So if you're using this hue shift tool, what you want is to change which one of these two is showing up as pink here. And you do that by using square brackets. So I'm gonna hit the right square bracket, which is gonna change me into having the foreground active. And now I'm gonna modify the hue of that foreground. And then I can hit the left square bracket to go back to modifying the background color. All right, so we're just clear that again with Alt + Delete. We're just gonna cover one more thing in this video, and that is adding in drop shadows. Strictly speaking, this isn't color modification, but it fits better in this video than the others we have coming up. So your shadow modification tool is here. Once again, you have a bunch of keyboard shortcuts that you can use to add in and control the styling of drop shadows. The first of those keyboard shortcuts is to control for the X and Y position, so the horizontal and vertical position of the shadow. And you position the drop shadow just by using the arrow keys. So if I hit down, you can see that we have that shadow showing up here. I can move it over to the right a little bit. Right now it's just completely unblurred, so it just looks like a big blob. So I'm going to add in some blur by holding down Shift and pressing the up button. Or if I wanna decrease the blur, I can hit Shift down. Just go with about that, that probably seems right. Now we wanna spread that shadow out a little bit. So we'll still be using the Shift key, but this time we're going to use the right arrow, and it spread out the shadow. So it's a bit of a larger size, if you wanna shrink it again, Shift and left arrow. So that's a fairly nice soft shadow. Actually, this is a good time to mention that if the selection box of the element that you're working on is in the way. Just hold down Ctrl, and that will hide it so you can get a good look at what you were working on. The shadow is looking pretty nice but we just want it to be a little more subtle, so we're gonna bring down the opacity. To do that, we're gonna hold down Control and hit the left arrow. So there you can see that's fading out, that shadow, so now it's nice and subtle. If you wanted to bring that opacity back up again, then we would hold down Ctrl, and hit the right arrow key. So that is how you use VisBug to add in a drop shadow. I've just kept this example fairly simple, with just a couple of elements to modify the colors on. But you can imagine when you combine these color modification tools with the selection tools that we covered in the last lesson. You might select every instance of a button, for example, and then be able to tweak the color of every single button all at once. Or you might wanna change every single link on your site, or anything that has a common color all throughout your site. You're gonna be able to bring these two aspects of VisBug back together, and make a lot of significant changes all at once. All right, next up we're gonna look at using VisBug to modify type, using it to change actual text content, and using it to change your font styling. So we're gonna go through that in the next lesson. I'll see you there.

Back to the top