
 Lessons: 7Length: 30 minutes
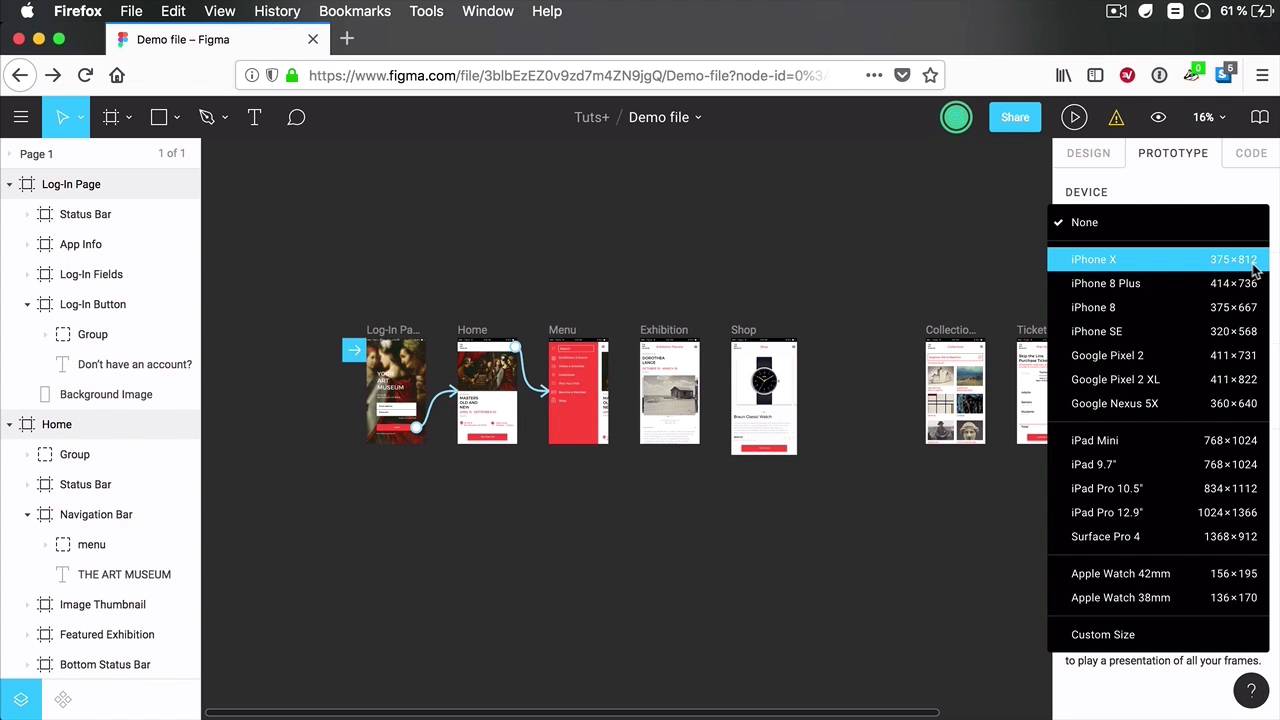
- Overview
- Transcript
2.1 Device Frames
Prototyping will allow you (and others) to interact with your product in a real-life scenario. As we use so many devices nowadays, it’s important to test our product on those actual devices.
This is where the device frames feature comes in handy. In Figma, you can simulate how your project will appear when viewed on a mobile phone, a tablet, and so on.
Let’s check it out.
2.1 Device Frames
Prototyping is a process that will allow you to test your product, whether it's a web app, a mobile phone app, or a website, to test it in a real life scenario. And part of that is testing it on different devices because nowadays we use so many devices. We have smart phones, tablets, laptops and desktops, huge ultra-wide monitors, right? So it's important that we test these things before delivering the final project. Now this is where the device frames feature from Figma prototyping comes in handy. Because it allows you to add device basically, to preview your product in an actual device and see how that looks like in terms of screen width, screen height, of course, and overall feel. It's just like looking at the actual device when previewing your product. So let's check it out and see how that works. Back in Figma, if we select or we click outside of any frame and we go to the Prototype tab, we see a Device section here. And upon clicking it, we find a list of presets. We have a bunch of mobile phones starting with the iPhone X, iPhone 8 Plus, 8, SE, and so on, some Google Pixel phones. And alongside them we have their actual dimensions, so width times height, this is in pixels. And then we have some tablet presets, we have some iPads, Surface Pro from Microsoft. And then we also have two presets for the Apple Watch. Also, we can specify a custom size. But for now, let's say I want to preview this app on a device, let's call it the iPhone X, right? And these are the dimensions, 375x812. If we take a look at our frames here, we see that the width matches, so 375. But the height is a little bit shorter than the actual frame, but that's fine. Let's see how that looks like. So what you do is you select iPhone X. You can select the model, Silver, Space Grey. Let's go with Silver. And you can actually see a preview here of the actual frame. And then you can also specify the orientation, so you can either go portrait or landscape. Let's go portrait for now. So what you do then is you simply click the Present button. And instead of this playing your file just normally like you saw in the previous lesson, it adds this nice device around it. All right, and now you can scroll through your art boards or your frames. That is pretty cool. You wanna test it in a different device, well simply select a different device, let's say this iPhone 8. Again, you can choose the color that you want, you can choose the orientation. And you hit Present, and there you go. Now you can see exactly how your app will look like on an iPhone 8. And the rest of the prototype works just fine. If you remember in the previous lesson, we linked this Log In button to the home screen, so when we click it, we're taken to the home screen. We linked this to the frame containing the side menu right here, and that works too. And overall, this adds to the whole experience of using your product on a variety of devices. So device frames are a very handy feature for prototyping. It definitely takes your presentation to the next level. Now, coming up in the next lesson, you'll learn how to link to external websites directly from your Figma prototype. See you in the next lesson.


