
 Lessons: 7Length: 30 minutes
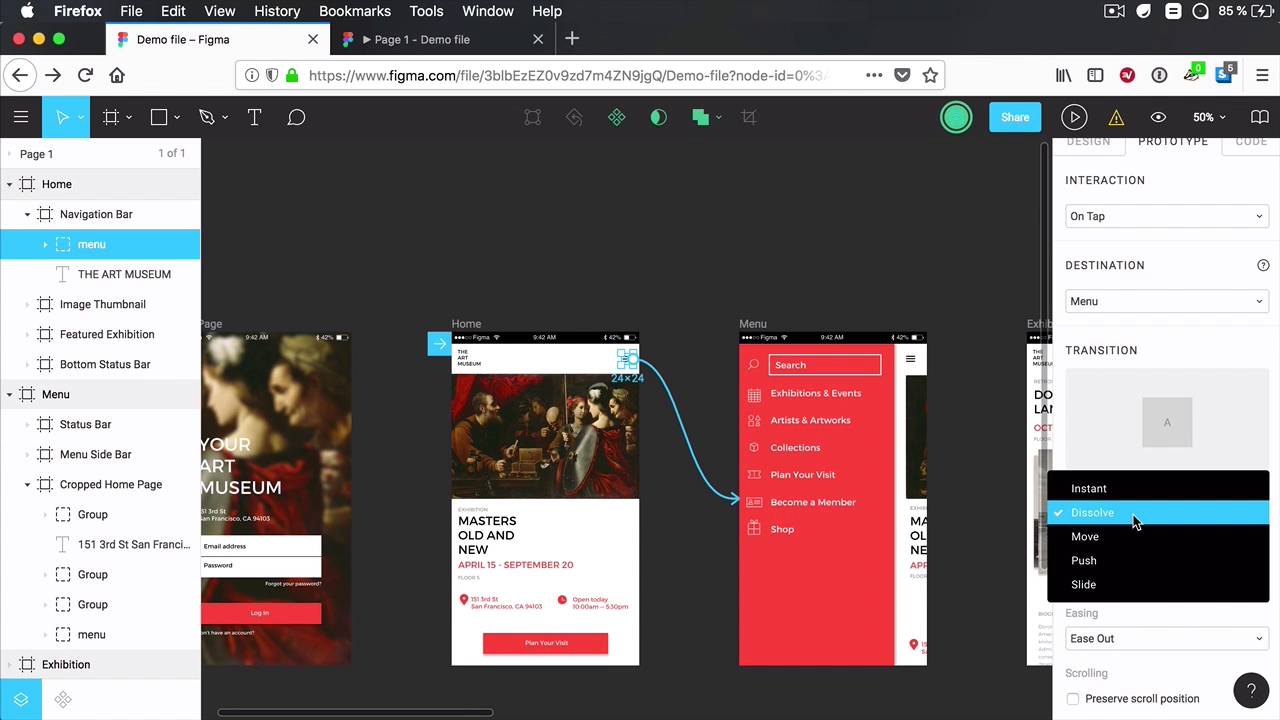
- Overview
- Transcript
2.5 Interactions and Transitions
In the final lesson of this course, you’ll learn about interactions and transitions. These two features really help you get a very realistic feel of the final product.
2.5 Interactions and Transitions
In the final lesson of this course, you will learn about what I consider to be the best features of Figma Prototyping, interactions and transitions. And these will really help you get that super realistic feel out of your product, of the prototype basically. So let me show you how you can use them. First of all Interactions, what you saw so far in all the examples I showed you only used a single interaction, and that was a click. So when you click on the button, it takes you to a different frame, to an external website, to whatever. But you're not limited to using clicks. You can use mouse over, mouse enter, mouse leave. You can use all sorts of different actions. So here's how you do it. Let's say that when I click on this button here, takes me to this page. Well, right here on the top under prototype, in the interaction section, we can see that by default On Top is selected, but I can choose While Hovering, okay? And you can see that the interaction is now changed here as well. It says While Hovering, just a visual reminder to tell you what's happening. So now when I click the Present button, I no longer have to click on this button, I can simply, Do a mouse over. And there are a lot of options to choose from. I can select While Pressing, Mouse Enter, Mouse Leave, Touch Down, Touch Up, it's really, really cool. Now, obviously, most of these options are available for desktop use. So when you actually have a mouse to work with, like for example, While Hovering, While Pressing, Mouse Enter, Mouse Leave. But you also have options for mobile, like On Tap, which is the equivalent of On Click, Touch Down, Touch Up. So that you can use this functionality for a lot of different things. And those are interactions. Now, what about transitions? Well, we can see the transition section here, and a transition will basically tell you how you go from frame A to frame B, right? Is it straight away? Or do you want to maybe add some sort of effect like a slide in, or like a fade in? Well, now you can do that with Figma Prototyping, and it's super easy to use. So let's say that I have this menu button and I wanna go to here, right? Well, under a transition, the default behavior is instant, and you can see a preview here, right? So it goes from A directly to B, and you can see that in the prototype as well, right? So click, and it immediately changes the frame. But I can also change the behavior from instant to, for example, dissolve. And you can see a preview here, it's basically a fade in, or a cross fade, I guess you could call it, all right? So now, it's not instant, it has that fade in, fade out effect. And let's also add an action here to go back to the previous screen so you can see this better. Now, for most of these transitions, you also have some options. You can choose a duration, by default, it's 300 milliseconds. And you can choose the easing, Ease In, Ease Out, Ease In And Out. What else can you do? You can do Move. So in this case, by default, it goes from right to left, but it can also go left to right, top to bottom, bottom to top. You can choose the direction from here. So let's select the default one, let's check it out. Yeah, we now have a nice animation. And it goes in reverse when I go back to the previous screen. So just by doing this, it's like you're working with the actual product. What else can you do? You can do your Push or you can do Slide. And you can see a preview of those here. So that's Push, that's Slide. A tiny bit of difference between these. When you do Slide, frame B comes over frame A, and frame A gets faded out. When you do Push, basically frame B pushes frame A to the side. So let's do Push here, and that's how Push looks like. And you can go and play around with these transitions, change their properties, and just make sure you choose one that fits your product nicely. And that's about it for interactions, for transitions, and in fact for this short course. Thank you very much for watching. I hope you've found it useful. Let us know in the forums if you have any questions. Or if you enjoy working with Figma, what is it that you like about prototyping in Figma? Let us know, we would love to hear from you. Until then, I'm Adi Purdila, thank you again for watching. Have a nice day, bye.


