- Overview
- Transcript
3.8 Preparing for Dynamic Data
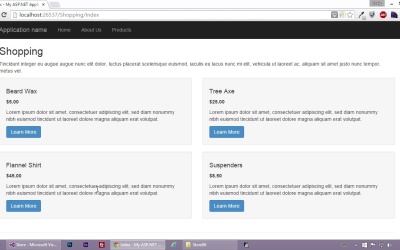
Since this is a course for designers, we won’t be doing any database programming. But in this lesson, we’ll learn how to create our first model, which we will eventually use to keep track of product information.
1.Introduction1 lesson, 02:19
1.1Introduction02:19
2.MVC Basics4 lessons, 15:13
2.1Introduction to ASP.NET and MVC03:48
2.2Views06:00
2.3Models02:17
2.4Controllers03:08
3.Designing Within MVC14 lessons, 1:58:58
3.1The Visual Studio Environment05:10
3.2Creating an MVC Project03:40
3.3Basic Pages06:47
3.4Viewing Your Work04:14
3.5Using Bootstrap08:44
3.6Linking Views08:03
3.7Using Layouts05:53
3.8Preparing for Dynamic Data09:14
3.9Creating Dummy Data09:04
3.10Displaying the Data10:15
3.11MVC ViewModels16:03
3.12Setting Up the Product Detail Page11:04
3.13Pulling in Data for the Product Detail Page09:41
3.14Wrapping Up the Product Detail Page11:06
4.Conclusion1 lesson, 01:11
4.1Conclusion01:11
3.8 Preparing for Dynamic Data
Hello and welcome back to ASP.Net MVC for designers. In this lesson, I wanna start preparing for dynamic data in our Views. And what I mean by that is, I want to get us a little bit closer, or get our developers a little bit closer, to where they need to be. For example, let's say that we have a product list page, where we have a list of all of our products, and eventually all of those products are gonna be pulled from a database. Now we're not gonna do any database programming in this course, but we can at least get our Views prepared to pretend like they're receiving live data. And the way we're gonna do that is we're gonna create some dummy data that we're gonna pull in and loop through in our view. So this will involve a little bit of programming, but we're gonna keep it really simple. Now if you're a designer and you're intimidated by programming, and you don't really wanna touch any programming at all, Then you would probably just use whatever HTML you needed to display the page. You would just probably go ahead and type out all the HTML that will be needed to display the first ten products or so. However, if you're willing to challenge yourself a little bit, we can take this a little bit further And get our developers a little closer to where they need to be. In the company where I work, for example, we have a designer that enters in most of the HTML for all of the MVC sites that we work on. And that designer actually does what we are about to see here. So this is a real life example of something you might do as a designer, if you are working in MVC. So let's start off by making another copy of our site. I've gone to the project files folder and I'm going to copy Store05 and paste it. And we're gonna rename it Store06, so all the changes we make in this lesson will be saved in that Store06 folder. So, let's go into that folder and open up that solution, and then I'll close off this other version of Visual Studio that we've got here. And in our files, I'm going to go to our views, our shopping views, our shopping folder here and open up index.cshtml. So let's say that on the main shopping page we want a list of our products. So you might call this index.cshtml. You might call it productlist.cshtml or something like that. So right now, all we have is an h2 and a paragraph. Below that, I wanna paste some code to see what our products are going to look like once we've listed them out. So I'm gonna jump over to another document I have open. I'm just gonna copy some code. And then we'll skip a couple of lines and I'll paste it here in this document. So this code is using a few Bootstrap classes. For example, it's using the Row class, which we've seen before. I've also added a class of my own, called Products, for that row. And then for each item in that row, for each product that we're displaying, I've also applied a class of Product singular. So, each of these Products here is going to take up half the width. We've set them all to call xs6, so each of them is going to take up half the width of the screen. So, it's going to be a two-column setup. And then we have, basically, a product name, a price and a short description, as well as a learn more button. So another Bootstrap class we're using here is this Well class which puts all of this content inside a well or a rounded rectangle with a light grey background. And then we're using a couple of Bootstrap button classes here to create our buttons. And we'll see what that looks like when we test our page. So let's do that by hitting control F5. So I'm going to drag this new window over and we can see what our page looks like. I'm going to get rid of these two other tabs here and we can see again the two column setup with our lumberjack products. We've got some beard wax, a tree ax, a flannel shirt and some suspenders. So what I want to do, is I want to think ahead a little bit. Right now, all of this html is just hard coded in there. But remember, in the future, all of these products, all of their descriptions and their prices, they're all going to be pulled in from a database. Now, we're not gonna do any database programming, as I mentioned before, but I do want to pretend like we're using a database. And you'll see what I mean as we go along. So what we're gonna do is we're gonna create a model for the products. And this model is going to basically just specify a few properties. We're gonna specify a title or a product name, we're gonna specify a price, a description, and then a product ID. And I know the idea of creating a model sounds kind of intimidating if you're a designer, but it's really not all that hard. So let's jump back into our MBC project and you'll notice we have a model's folder. Well, I'm going to right-click on that folder and we're going to add a new model so that to Add > New Item. And right now the web category is selected. I wanna jump up to code, and I just want to create a class here. And I'm gonna call this class Product.cs. So let's add that and all I wanna do here is to add a few properties to our class so here's our class public, class Product. And I realize you might not understand a lot of what's going on here and that's okay. We're just gonna add a couple of simple properties and it's gonna be pretty easy if you just follow along with the syntax I'm using here. So these properties are going to define different aspects of our products, such as the Product Name. So the way we're going to create a property for our Product Name, is I'm going to type in PROP and then I'm gonna hit Tab twice. And you'll notice that it creates a property for us. Now there are a few elements to creating this property that we need to explain. First of all, it's a public property, which means that it's going to be accessible from anywhere including from our controller or our Views The second item here which by default is set to int is our type. So, if it's set to int, that means it's gonna be an integer. If we want it to be a string of text, we're going to change this to string and then we can hit Tab a couple of times to move over to the name of the property. For this name we can give it any name we want to we just need to make sure we've not using any special characters or anything like that. We just need to keep it simple. So for the name of this particular property, we're just gonna call it ProductName. And you'll notice I capitalized it and I also capitalized every word in that particular property name. And I'm not gonna go into any detail on the get/set because it can be a little confusing if you're not a programmer by nature. So we'll just pass that by for now, just know that it needs to be there and we'll just go on to the next line. So you could do what I did before where you type in Prop and then hit Tab a couple of times. Or If that doesn't work for you, I've had times where it didn't work for me. You could just type it all out. So, it's just as easy as what we see above. So we type in public, first of all, and then the type. So the next thing I want to include is a price. And normally, this would be a numerical value and then once we pulled it into the view, we would format it for whatever currency we're using. But I don't wanna get into that much detail here. We'll leave that up to the developers. For now, I just wanna set it up as a string as well. And we'll call it "product to price" and we'll put a "get in the set there" as well, so we notice we've got curly brackets and then "get, semicolon, set, semicolon." Now, those can get a little more complicated than what you see here. But again, we'll leave that up to the developers. So, then, we'll have another product here. I'm gonna set that up as a string, as well. We'll call it product description. And, again, we'll put a getter and setter in there. And then, one more property, and I'm gonna call it. I'm gonna leave this as an int, and I'm gonna set this as Product ID. And that's really all we need to create our model. We just need to put a few properties in here. And obviously as you might guess, it can get a lot more complicated than this. But for what we're doing, as a designer, just getting the pages prepared, this is sufficient. Once the developers get to it, they might go in and add more to the model. They might expand these Getters and setters a little bit. Who knows. That's not really up to us. We're just designers. We're just trying to get the page set up in a way that the developers can jump in and get started coding all of their business logic or whatever it is they need to do. So that's a good place to stop for now now that we've got our model set up. I'm gonna go ahead and save that file. And in the next lesson, we'll move forward and create some dummy products in our controller. So thank you for watching, and I'll see you then.