
 Lessons: 5Length: 41 minutes
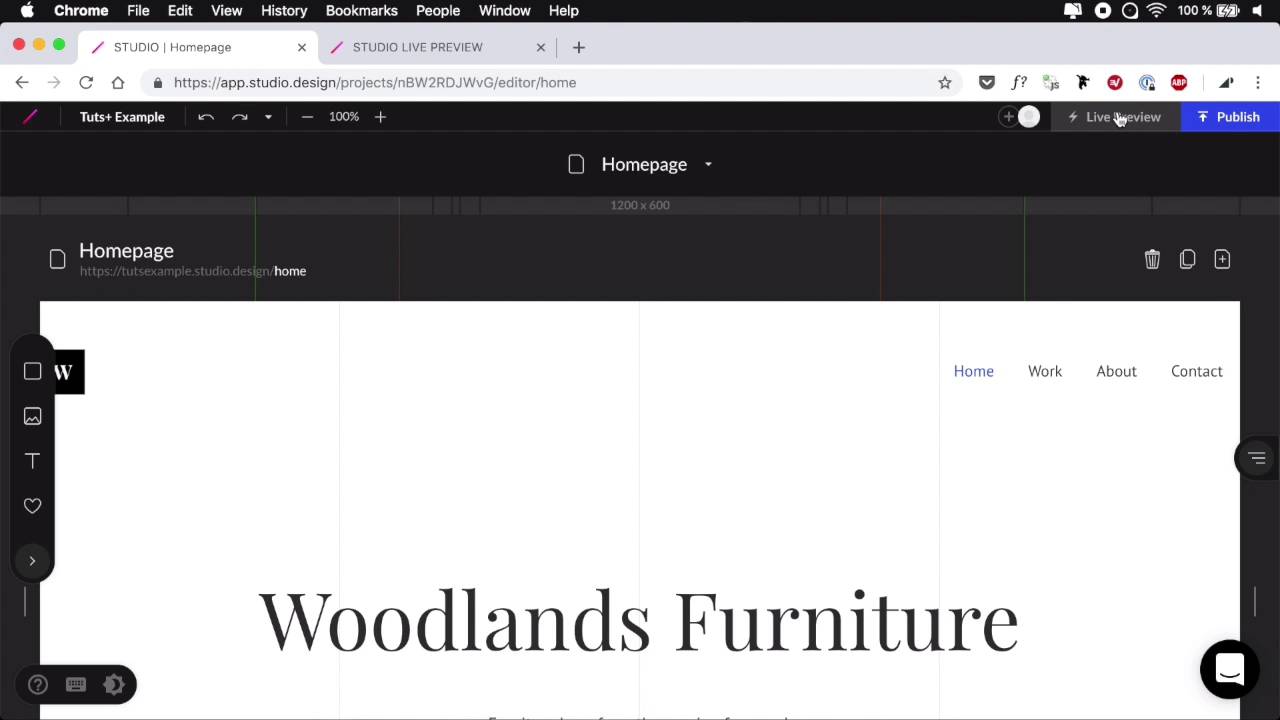
- Overview
- Transcript
2.3 Going Through the User Interface
Before we start building anything in Studio, we should get to know the user interface and all the tools we have at our disposal. Let’s do that right now.
2.3 Going Through the User Interface
Before we start building anything in STUDIO we should get to know the user interface and other tools that we have at our disposal. So let's go ahead and do that right now. Now we gonna start to write here in the STUDIO Dashboard where we have a list of projects and we have the ability to create new ones. Now before we do that, let's take a look at the options that we have on an existing project. So, when we hover on an existing project we have the ability to go to the project Dashboard and go to the project Editor. And we also have the ability to delete or archive that project right here. Now below, we have the name of the project. And also if it's published, we have a link to it. So let's go to the project Dashboard. In here there is a lot of stuff that we can do, you can edit the project name, you can tweet the publish settings. So if you wanna change the domain or subdomain name we can do that right here you can unpublished, if that's what you want. Further down we have a QR code for the Live Preview. And we also have some setting here. It's the same thing, basic QR code to scan with your phone and a link. And you also have a button to copy that link. Now, on the left side, we have the project thumbnail. And this is generated by default but we can upload our own if that's what we want. We simply hover on it, click, and that's gonna ask us to upload a new image. And that's gonna be replaced. In the members tab we can see all the people who have access to our project and just like in the interface I showed you previously, you can go right here and add the new member. Here we have access to all of the pages from our project and this is the place where you would edit the title tag, the description meta for your entire website. You also have the ability to add a favicon and social cover. Now apart from that, you also have per page access to these properties. So for example, if I had another page here, I could click this button, and I can edit the title description and a social cover individually from the general settings. Then we have access to Forms, this is really cool. There is actually a form component in STUDIO. And once you register that, you can come back here and edit some of its properties. It's really nice. And we'll actually see more about that in the next lesson. Then you have access to the apps section. As I was saying, if you purchase the publish package, you get access to Google Analytics, Tag Manager, SearchConsole and a few others. Get apps that you can integrate with your website. And then finally, Plan & Billing, if you want to Upgrade, this is where you have billing info, billing history, and the sorts. Now, if you want to switch from the project Dashboard to the project Editor, all you have to do is click this button which has Edit Design, and you can also find this button right here. So, Edit Design and this will take you to the project Editor. If you wanna go back to the project Dashboard you just click the title. And from the editor if you wanna go back to your overall STUDIO Dashboard you just click the STUDIO logo right here. That's pretty cool. All right, let's jump into the Editor and have a look at the STUDIO UI. And we're gonna start from the top. Here we have the project the bar. And the project bar from left to right, we have access to this STUDIO Dashboard, access to the project dashboard, we have zoom in and zoom out, or zoom controls. This is really neat, this is version history. Okay, so if I want to change something, let's say I wanna change the text here and add this. I'm gonna get a history entry and I can hover my mouse down and up to go through that history, and that is super, super handy. In my case maybe I don't want that change. So I'm just gonna scroll below that point. On the right side we have access to my profile settings, we can also toggle Darkmode on and off from here, and I can Logout. And then I have the section for adding more team members to the project. This is the button that generates a live preview, and this is the button that takes us to the publish screen. Now this right here is a page selector. So currently I have two pages, one is the Homepage that you see here right now and one is the model menu that you see right here, and a responsive mode. This is considered a page, it's actually a model but it's considered the page and we can access it anytime we want. And from here we also have the ability to add a new page to our product. And when we do that we're asked do we want to page or do we want model, that's cool. Now this section right here, becomes the Style bar, when we select an element. So this tile bar will contain various controls that are relevant to what we just selected in the canvas. In my case here, I have access to padding and fill border and shadow properties if I select a piece of text, I'll have access to more properties like where the do I want this displayed the position Z index and then the letter spacing, line height, font size, font family, font weight. Font style, do we want italic or not, text alignment, text color. That's really, really cool, so this is the style bar. Now below this, we have the responsive bar which comes with predefined sizes for the various devices that are in the market today. And you can simply click on any of these and the page will resize accordingly. So you can check out how it's gonna look like on various screen sizes. That is cool and super, super handy. Then, let's come down to the left side. Here we have what's called the elements panel. As I was saying previously, it has four predefined elements. We have rectangle, image, text and an icon. But we can click this button to expand it and show us the entire collection of elements we can use. So we have a couple of elements here on the top. The ones that I just mentioned are the basic ones. But we can also include iFrames from Google Maps or maybe video service providers. And we can also include forms and we'll do that in the next lesson. And then we also have access to a couple of templates. How cool is that? Then we can add images, and these are all taken from Unsplash, you can see the photos and also the collections, and you can also search for a specific photo. Then, we can grab some icons and, of course, everything is gonna be in vector format, nice and crisp, totally editable. We have access to icons from Material Icons and Font Awesome and again, we have a search bar to find exactly what we want. Apart from this we can also upload our own images. So for example we're designing our website but we have a logo that's been given to us by our logo designer. Well, we can upload that here no problem and we always have access to it. On the right side, we have the Layers panel. Again, this is an expand and you can see a hierarchy of all the elements in your page here. Hovering on them, we'll highlight them on the Canvas, and you can also click to expand and gain access to its children, that is very, very nice. Now, on the bottom-left, we have this floating menu that gives us access to the help menu, and then we have access to the keyboard shortcuts, just as a quick reminder to help you work a little bit faster. And the Light/Darkmode toggle that I showed you previously. On the bottom right we have the live chat or support. And in the middle of course, we have the Canvas. The Canvas which contains all of our page elements, the Canvas which can be resized just like this. And of course if we scroll a little bit up we can also see a list of our pages, and we can quickly switch between them. The current name of our page which is editable. And also the link that's gonna be generated once we publish our website. And then some controls here on the right, we can delete, we can duplicate, and we can add a brand new page. So that is the STUDIO UI and I think it looks very nice, very clean, definitely very, very easy to use. Now that we know our way around, let's go ahead and build a simple webpage in STUDIO. That's coming up in the next class.


