Lessons: 20Length: 1.9 hours

Next lesson playing in 5 seconds

Cancel
  • Overview
  • Transcript

3.2 Day 2: Nesting

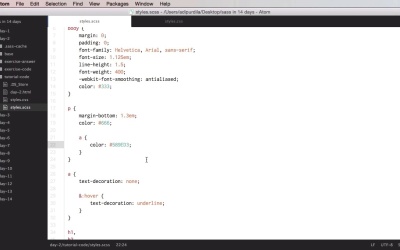
Welcome to day two. Today, you'll learn about a very important aspect called nesting. This is missing in regular CSS, but it's a really great feature and can be a real time-saver. So, let's go ahead and learn when and, most importantly, how you should use nesting. In sass, nesting is basically when you write a selector inside another selector. So, lets actually see an example, let's first see what we are dealing with here. We have an .scss file here with some generic styles, mainly for typography. We also have an html file here that looks something like this. We have some headings, a navigation, and then some more headings and some text. So this is a very text-heavy page. Now, what is this nesting all about? Well, I think the easiest thing to do here is just to give you an example. So, we have a paragraph and an anchor tag here at the root level, but let's say that I want the anchor tags inside the paragraphs to have a certain color. So normally, in CSS, you would do paragraph A and then color, and you would put in a value. Well, in sass, and I'm going to refer to sass as the language not necessarily the syntax. In sass, you can do something like this, you can go inside a paragraph and you can type a and then you can type color and just write the value that you want. And this bit, as you see it here, will be compiled to paragraph and then paragraph a. So this is the correct CSS but you're kind of taking a short cut. You are writing less code in sass which is a very, very good thing. So this is what nesting is about basically. And you can go as deep as you want with the nesting. For example, if you have a navigation, you can target the well and then the li, and then the a, and then whatever kind of elements you might have in that a. Now, we'll discuss best practices for this in just a little bit, but for now I wanted to move on and show you how to use the parent selector ampersand. So the parent selector is actually quite easy to use and quite easy to understand. Let's take for example this anchor tag, and let's say I want to add a hover state to it. Well, I can use nesting for that in this form. &:hover, and I can say for example, text=decoration: underline, right? Let's see what this compiles to. It compiles to a:hover and then the property. So, I think you can deduct already that the ampersand is actually replaced by the parent selector, and you would be right. That's exactly what happens. And you can do a lot of things with it. For example, maybe wanna target the anchor text with a specific class. Well, in that case you would do & with the class of, I don't know, red for example, and that would essentially target all the a elements that have the class of red, this &, as I said will be replaced by the baron selector. In fact, let me give you a very quick example so you can understand this better. So I'm gonna say here that The parent selector can be used in a few different ways. And for that I'm just gonna reference a demo element here. And I'm gonna start with this. &-child, for example, and we're just gonna set an arbitrary margin of .5ems. Now, I'm gonna duplicate this, and I'm gonna delete the dash. I'm gonna duplicate it again and I'm gonna put a dot here. And then again, and I'm gonna put a space and a dot. So, what does this compile to? Well, the first one, which is the &-child, creates this, demo-child, which is a new selector entirely. This will select the elements with the ID #demo-child. The second one, which is &child, creates a new selector as well. It's just like the one above but without the dash. The next one, &.child, creates or targets the element with the ID of demo, and the class of child. And finally, the one with the space and the dot, targets the element with the class of child that has the parent, an element, with an ID of demo. So as you can see, you can do a lot with this parent selector. In all cases, this will get replaced with the parent selector. Now, the ampersand doesn't have to be at the start of the selector. It can be after it. So, for example, and I'm just gonna show it to you here, you can go to let's say this container, and you can do something like this. .boxed-layout &. And then you would do a bunch of styles for this. And let's actually add some styles and see how this compiles. Let's have a look. So, we have .container, and then we have at the root level of our style sheet, .boxed-layout .container. So this targets the container that has a parent, an element with a class of .boxed-layout. Now, you might ask yourselves, well, why or where should I use this? Well, if you're familiar with libraries like modernizer, then this will come in very handy, because what modernizer does is it tests your browser for specific features, and depending on the availability of certain features, it adds certain classes to the body. For example, no css transforms, if your browser doesn't support css transforms. So by doing this, you can actually write styles specifically for certain body classes. For example, if you're using a tool that detects older versions of Internet Explorer, you can do something like .ie8 & and then your styles. And this will basically compile to target the container elements that belong in a page or in a body tag with the class of ie8, which is very, very handy. And the benefit is that you keep all your styles here, so they are easier to manage. Now, let's say that you want to target a specific element with a specific class, for example, the body. Well, you would do &.boxed-layout, and maybe set a background color like this. And this will compile to body with the class of boxed-layout. So as you can see, there are lots of uses for this selector. You can even do more complex selectors. For example, using the child selector here I can select the header or the first header in our container, and then maybe we wanna select the h1. All right, we can easily do this. And this will compile to, let's see, container > header h1. Now, what if you wanna go deeper? Well, you can do that, no problem. Here's an example here. We're targeting the nav, then the ul, then the list item, then the anchor tag, and then the hover state or the hover pseudo class of the anchor tag, and then the after pseudo element of the list item, and so on. Now, once we get to this point we really have to be careful and consider some best practices, because nesting is great, but if not used carefully it can complicate things really fast. For example, if I had a really complicated html structure and if I were to mimic that in sass, that might prove to be really hard to maintain after a while. Especially if the dom structure will change, you also have to change that in sass. And that can be a real pain sometimes, so you really have to be careful just how deep you're nesting. As a general rule, I guess about three or four levels is all right to nest, as long as the third or the fourth level is about pseudo classes or elements, just like we have here, all right? So we have one level, two, three, and then four. This is a pseudo class. So I guess this is fine, but nesting even further than this is not really recommended. So, from this we can actually get a best practice, and that is that nesting is best used for pseudo classes and pseudo elements. And also, nesting and the parent selector, this, the ampersand, they can be greatly used when you're styling, based on the upper context. Just like we did here. Also, when using the selector, you have to be careful about creating files that cannot be searched properly. And what do I mean by that? Well, if I were to come in this file, because I remembered that I had an element called demo child. Well, if I search for demo child, I wouldn't find it here because demo child is actually generated by these two lines. So, you have to be careful about that. And that's what you need to know about nesting and the parent selector. Now, for your exercise, you are going to find a CSS file that's compiled from an scss file. And your assignment is to create the original scss file by using nesting and the parent selector. Good luck. And that was nesting, a very powerful feature, but you do need to be careful on when to use it. Day three is about nested properties, that's coming up next.

Back to the top