

- Overview
- Transcript
3.1 Animate on Scroll
In this lesson you’ll learn how to animate DOM elements when the page loads, as well as when the items being animated scroll into view.
Useful Resources
1.Introduction
1.13 JavaScript Projects for Beginners00:52
2.Project 1: Create a JavaScript Countdown Timer
2.1Creating a Countdown Timer04:18
2.2Coding the Countdown Timer03:54
2.3Calculating the Difference10:04
3.Project 2: Create a Scroll Animation
3.1Animate on Scroll19:02
4.Project 3: Create a JavaScript Calculator
4.1The Calculator Starter File09:20
4.2Calculating Totals07:16
4.3Programming the Number Buttons13:15
4.4Finishing the Calculator13:44
5.Conclusion
5.1Final Thoughts00:42
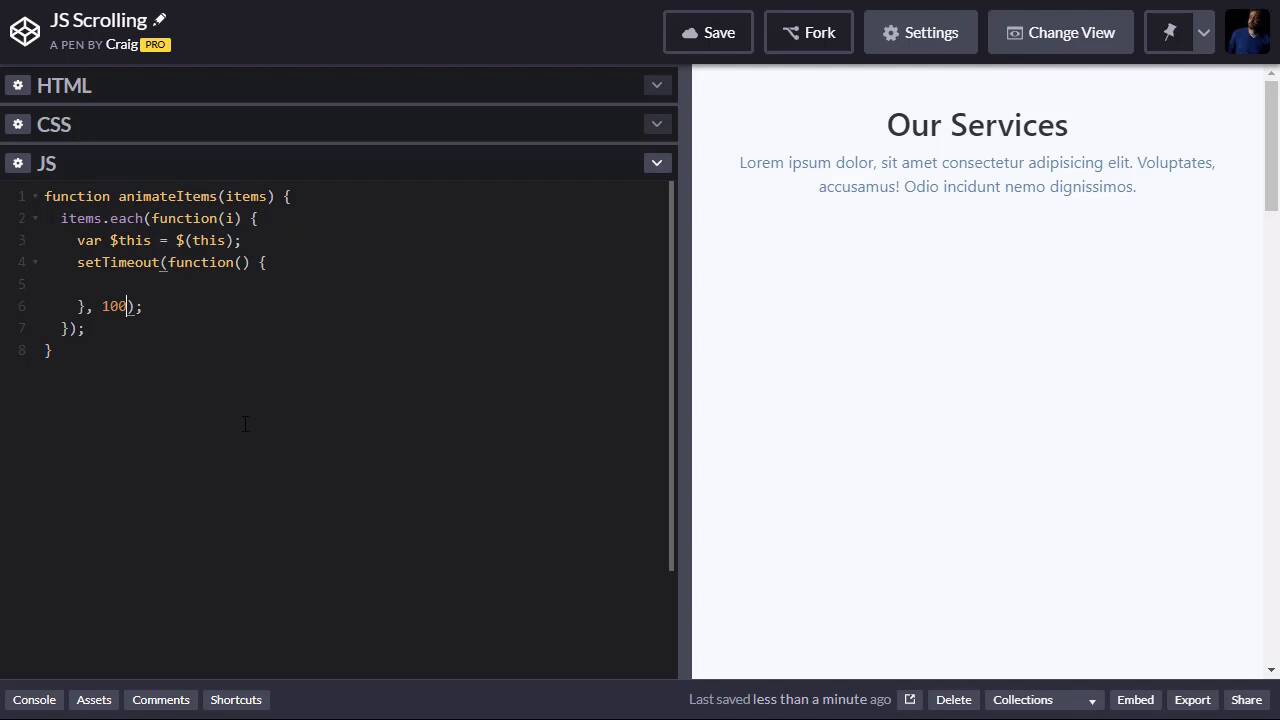
3.1 Animate on Scroll
Hello and welcome back. In this lesson, we're going to create an animated effect in two different sections of our page. So the first section is up here at the top. You'll notice we have this big blank area, that's where some items are going to animate. And as soon as the page loads, but then we also wanna animate some items in whenever they scroll into views. So we're gonna scroll down on our page. And when we get down to this feature section, we want to see some more animations there. So let's talk about how to make this happen. Now, you can find the URL for the starting code pen in the course notes for this lesson. Once you open that up, go ahead and click on Fork to create a new copy and we'll get started with this new copy. So in our settings, you'll notice some basic things in our CSS. We have bootstrap, we also have font awesome, because we have a few icons that we're gonna be using. We've got JavaScript in the JavaScript tab, I should say, we've got jQuery pulled in. And that's about it for that. So in our HTML, we just have so basic HTML Bootstrap markup to set up all of our content. And in this section here, we've got a container that has few rows in it. And in these rows, we have a few cards. And so these cards are gonna be the first thing that we animate on. Now, you'll notice in our CSS that we have a few things set up here. First of all, this features section, you'll notice that we set the opacity to zero, the position to relative as you might imagine. That's gonna be one of sections that we're gonna animate on, that's why it's currently invisible, that's why the opacity is set to 0. And then if we scroll down a little bit, you'll notice that the card class inside our services section also has an opacity of 0 and position of relative. So we're looking for the card class inside the services class and we're looking for the feature class as well. So inside our HTML, in this first container here just underneath where it says our services, we've got each of these cards, okay? And you'll notice this section has a class of services. So again, if we look at this rule, we have a class of services and inside that, we're looking at each card inside those services. So we're gonna animate these cards onto the screen. And we can see very quickly what that's gonna look like. You'll notice I've created a rule for the card class that also has the animate class attached to it. And for the feature class that also has the animate class attached to it. And so as you can imagine, if I just add the animate class to one of these cards here, it should animate onto the screen. So let's talk about the animation. So we have opacity of 0, position of relative. And if we scroll down a little bit, you'll see this keyframes animation here. So if you've never used keyframes, you can do a search on tutsplus.com for animating with CSS. And specifically, we're using a keyframes animation and we've given it the name of entrance. So basically, the way this works if you've never done this before is we have some from properties and some to properties. So we're animating from in opacity of 0, to in opacity of 1, which will in effect just fade the item in. And then we're also animating the top property which is the top position. So if we set our top position to 100 pixels, that means were gonna nudge that item down 100 pixels if it's position is set to relative. So that's why we had to set the position to relative up here. So we're gonna animate that top position from 100 pixels to 0. So it's basically going to move up as it moves into place and fades in. So it's going to do two things at once. It's gonna fade in and it's gonna move into place. And so again, we've given these key frames animation a name of entrants. And you'll notice that for the card class with the animate class applied to it, we're gonna call on that entrance animation that we created down here. We're gonna set the animation-duration to half a second or 0.5s. And then we're gonna set animation-fill-mode to forwards. That way when it's done animating in, by default, if we don't set that to forwards, it's going to turn itself back off. The opacity is gonna go back to 0 after it animates in, we don't want that to happen. So if we set the animation-fill-mode to forwards, then when the animation finishes, it will stay at whatever the to state is. So the opacity will stay at 1 and the top position will stay at 0. And the great thing about this entrance animation is we're gonna use that same animation for our features section down here. And we've applied that to both the card class and the feature class if they also have a class of animate. So again, we can see what that looks like if we scroll all the way up to the top here and let's go into one of our cards here inside our services section. And where it says div class = card, excuse me, I'm also going to add a class of animate. And when we do that, we'll see that that particular item animates in. So that's good, let's get rid of that. So what we're gonna do is in our JavaScript, we're gonna cause this to animate. We're gonna add that class in JavaScript to our cards to get them to animate in, and we'll talk about how to do that in just a second. But let's scroll down one section we haven't looked at yet is the our features section. So let's just scroll down and take a quick look at that. It's set up very similarly to our first section. So there's our commitment and here's our features right here. So in our features class, we have this section called features, inside that, we have a number of divs with a class of feature. And these are the divs that we're going to apply that class to as well. And we'll see what that looks like after we create that animation. So let's get started. There's really not a whole lot to do here. We have a section here and a section at the bottom. Each of these sections has multiple items in it. And I don't want them all to animate on at the same time cuz that'll be kinda boring. I want them to kind of stagger as they come in. So we'll see one start animating and then maybe like a split second later, another one starts animating and we'll just kind of stagger in that way. So what I wanna do is I wanna create a function called animate items. We're gonna be animating multiple items at once. So I want to pass into this function a list of items. So we're just gonna create this variable here called items and we're gonna pass those items into this function. Then using jQuery, we're gonna loop through those items. And we're going to basically create a timeout which is gonna cause a slight delay before that particular item starts animating. So the way this is gonna work, if we want to loop through a set of items in jQuery, we point to that set of items which we gave the name Items, and then we say .each. And then inside parentheses here we're gonna place some function. So we'll do function, open and close parentheses, and then opening and closing curly brackets there. Now one more thing I wanna do, you don't have to put anything inside these function parentheses here. But for this particular instance, I want to. I wanna pass in a variable called i. And what that will serve as is it will serve as a counter. Anytime you put a variable inside this function when you're using the each function, that variable will act as a counter. So the first item that we point to whenever we start looping through these each function, the first time we loop through it, this i is gonna be equal to 1. And it will continually increase as we go. I'm sorry, it will be equal to 0, because these works kind of like an array, a 0 based array. So it's gonna start off as 0, and then it will increase by 1 every time we loop through this function. So we're gonna loop through. And each time we loop through an E2 access, whatever the current item is, cuz I wanna tell the first item to start animating on. So let's create a variable to store that item and let's just call it this. And the way we access that is we type in a $ sign, and then inside parentheses we type in the word this. Now, you can call this whatever you want to over here on the left. I like to put a $ sign in front of my variables that represent jQuery objects, just to remind me that it represents a jQuery object. But this would be the same as just giving it any other variable name. Okay, so I'm gonna call it $ sign this and we're gonna to use that to point to this object or whichever item we're currently looping through. Then we're gonna create a timeout which is basically gonna create a short delay. So we're gonna create this setTimeout function. And so we're gonna say setTimeout. And then inside that, we're gonna create a function, open and close parentheses, and then our opening and closing curly brackets for that function, semi colon at the end. And then after the function, after the closing curly bracket here, we're gonna say comma space, and here's where we would put our delay amount. So if we wanted it to delay by 100 milliseconds, we would just type in the number 100 there. Well, I want the first one to delay 0 milliseconds, I want the second one to delay 100 milliseconds, the third one to delay 200 milliseconds. That way, each item will come in a little bit later than the item before it. And that's where we're gonna use this i counter up here. So all we need to do is multiply 100 by that variable i. And then each time we loop through this, i is gonna be one number higher. So the first time we loop through this, i is gonna be equal to 0. So there's gonna be 0 delay before the first item starts animating. Then the second time we loop through it it'll be equal to 1. So 1 times 100 is 100. The second time I loop through it, there will be a 100 millisecond delay. And then for the next one, a 200 millisecond delay, etc., etc. So now for this function, all we wanna do is we wanna point to this object and add the animate class to it so that it will start animating. And that's really easy to do. We're gonna point to the item, this., and then jQuery has a handy method called addClass with a capital C in class. And then inside quotation marks we'll type the name of the class we wanna add to that item. We're gonna add the class name of animate to it. So now we can pass in any list of items into this function, into this method, and it will stagger the animations for those items. So let's see if that works. I'm going to call on the function, animate items and I'm gonna pass into it our cards, okay? So we're gonna pass into it the CSS selector for the class of card. And let's see if that works. And I did not do that right. We need to pass into a jQuery object. We need to pass into it the jQuery object that represents the class of cards. There we go. So we should have two sets of parentheses. And there we go, we saw that happen. So let's save that real quick. And then I'm gonna right click and reload the frame so that we can watch that happen again. And there we go. So each animation is staggered. It comes in just a little bit after that first animation. So now, I wanna do the same thing whenever we scroll down to the features section. And once this feature section is fully visible, then I want to pass the feature items into that animate items function in order to animate those. So just to be careful, since this card class is a generic Bootstrap class, you probably wanna be a little bit more specific than that in case there are other items with the class of cards somewhere on your page. So we might look inside the, if we scroll back up to the top of the services section here and we would just animate the cards inside that services section. So .services .card, and then that would give us the same animation. Okay, so let's move on to the next section. Again, I wanna wait till we scroll down to the features section before we animate those. And I wanna wait till they're fully visible before we start animating them. I don't want to animate them as soon as we see the tops of them in the browser window. I wanna wait till we see the whole section. So let's start by creating a scroll function for our window. And the way we create a scroll event listener in jQuery, is we're gonna pass in the word window into our jQuery selector here. And we're gonna do .scroll. And then inside parentheses there, we're gonna create our scroll function. Open and close parentheses, opening and closing curly bracket, semicolon after that closing parenthesis at the bottom. So first of all, we wanna check to see if our feature section is fully visible. And really, these are just three items that are next to each other. We don't have multiple rows here. So we could probably just check to see if one of them is fully visible. If the first one in the row is fully visible, and if so, then we can animate everything. So I'm gonna create a little helper function to help us out with this. We're gonna create a function called isFullyVisible, and we're gonna pass into it some kind of element in our DOM. So what I wanna do is I wanna make sure that the bottom of the element that we pass into this function, we wanna make sure that the bottom of that element has come into view. So that will come into view about right here. So let's create a variable that stores the bottom of the elements. So we'll just call it bottomOfElement. And let's expand this out for now. And we're gonna set the bottom of the element equal to, we're gonna point to the element itself first of all, .offset().top. What this does is, it gives us the offset position of our element. So we're pointing to a particular element here, whatever element we passed into this method. We're pointing to that element. And we want to see how far the top of that element is from the top of the browser window. And that will tell us the offset for the top of the element but we need to know the offset for the bottom of the element. So all we need to do is to add onto this number the element's height. And the way we get that is, let's say +, and then point to the element again, and then .height, open and close parentheses, semicolon to end our statement. So this math right here will give us the offset position from the top of the screen in pixels, the offset position of the bottom of the element that we want to animate on. Once the bottom of the element has come into view, then we want to return true. isFullyVisible is meant to return a true or false value, a boolean value. So what we're gonna do is we're going to create another variable called isVisible. And we're gonna set this equal to a comparison. So we're gonna compare the bottom of the element. Remember, we created this variable called bottomOfElement and that gives us the y position of the bottom of that element. And we wanna make sure that it's less than or equal to the bottom of our screen at the bottom of the viewable, visible area of our screen as we're scrolling down. So when we get to this point right here at the bottom of this text here, well, so actually I scrolled down too far. At the bottom of that highlighted text, that would be the bottom of our screen. And we wanna make sure that the bottom of the element is less than or equal to the bottom of our screen here. So let's spell this out a little bit. So we have bottomOfElement is less than or equal to, and then what we're gonna do is we're gonna do window, .scrollTop with a capital T, open and closed parentheses. So that will give us how far down we've scrolled in pixels. But then we wanna add onto it the window height. Because window.scrollTop will just give us how many pixels down we've scrolled, but that'll give us from the top of the screen. We want the bottom of the screen so we need to add onto it the height of the window. And this opening parenthesis here actually needs to be right here. Cuz we're gonna add window.scrollTop() + window.height, open and close parentheses, and that should give us what we need. So we wanna see if the bottomOfElement is less than or equal to that value we calculated. If so, it will be true, if not, it will be false. So then we're just gonna return the value of isVisible. We're gonna return either true or false whatever this calculates out to be. So let's go back into our scroll function and we're gonna say if, and then we need to run this isFullyVisible() method. So if isFullyVisible(), and we need to pass into it the element that we wanna check for. And we wanna check for the very first item that has a class of feature. So the way we access an item with a class of feature using jQuery is we type $('.feature'). But we just wanna check the very first one. So I'm gonna say .first open and close parentheses. So let's go ahead and create our opening and closing curly brackets for this if statement. And if this is true, if the very first feature item is fully visible, then we want to animate it. So we're gonna run our animateItems method again and we're gonna pass into it all of our items that have a class of feature. So let's see if this works. We see our initial animation that looks good. Let's scroll down. And when we get to the features section, that animates on as well. So as you can see, we're able to reuse a lot of code in this JavaScript in order to get it to work right. We have this animateItems function here where we just pass into it a list of items. And then that function will take care of the rest of it for us. So we don't have to type all of this logic over and over again. So anytime you could reuse code like that, it's a very good idea to do so. So again, that's how you can animate items using JavaScript and using Windows scroll events. Thank you for watching, and I'll see you in the next lesson.


