Lessons: 9Length: 1.6 hours

Next lesson playing in 5 seconds

Cancel
  • Overview
  • Transcript

2.1 Auto-Animating Position, Size, and Rotation

Welcome back to the course. In this lesson, we’ll learn how to auto-animate the position, size, and rotation of elements in Adobe XD. As the course progresses, you’ll see more and more complex uses for auto-animate, but everything starts right here with these three properties. So let’s get started.

Related Links

2.1 Auto-Animating Position, Size, and Rotation

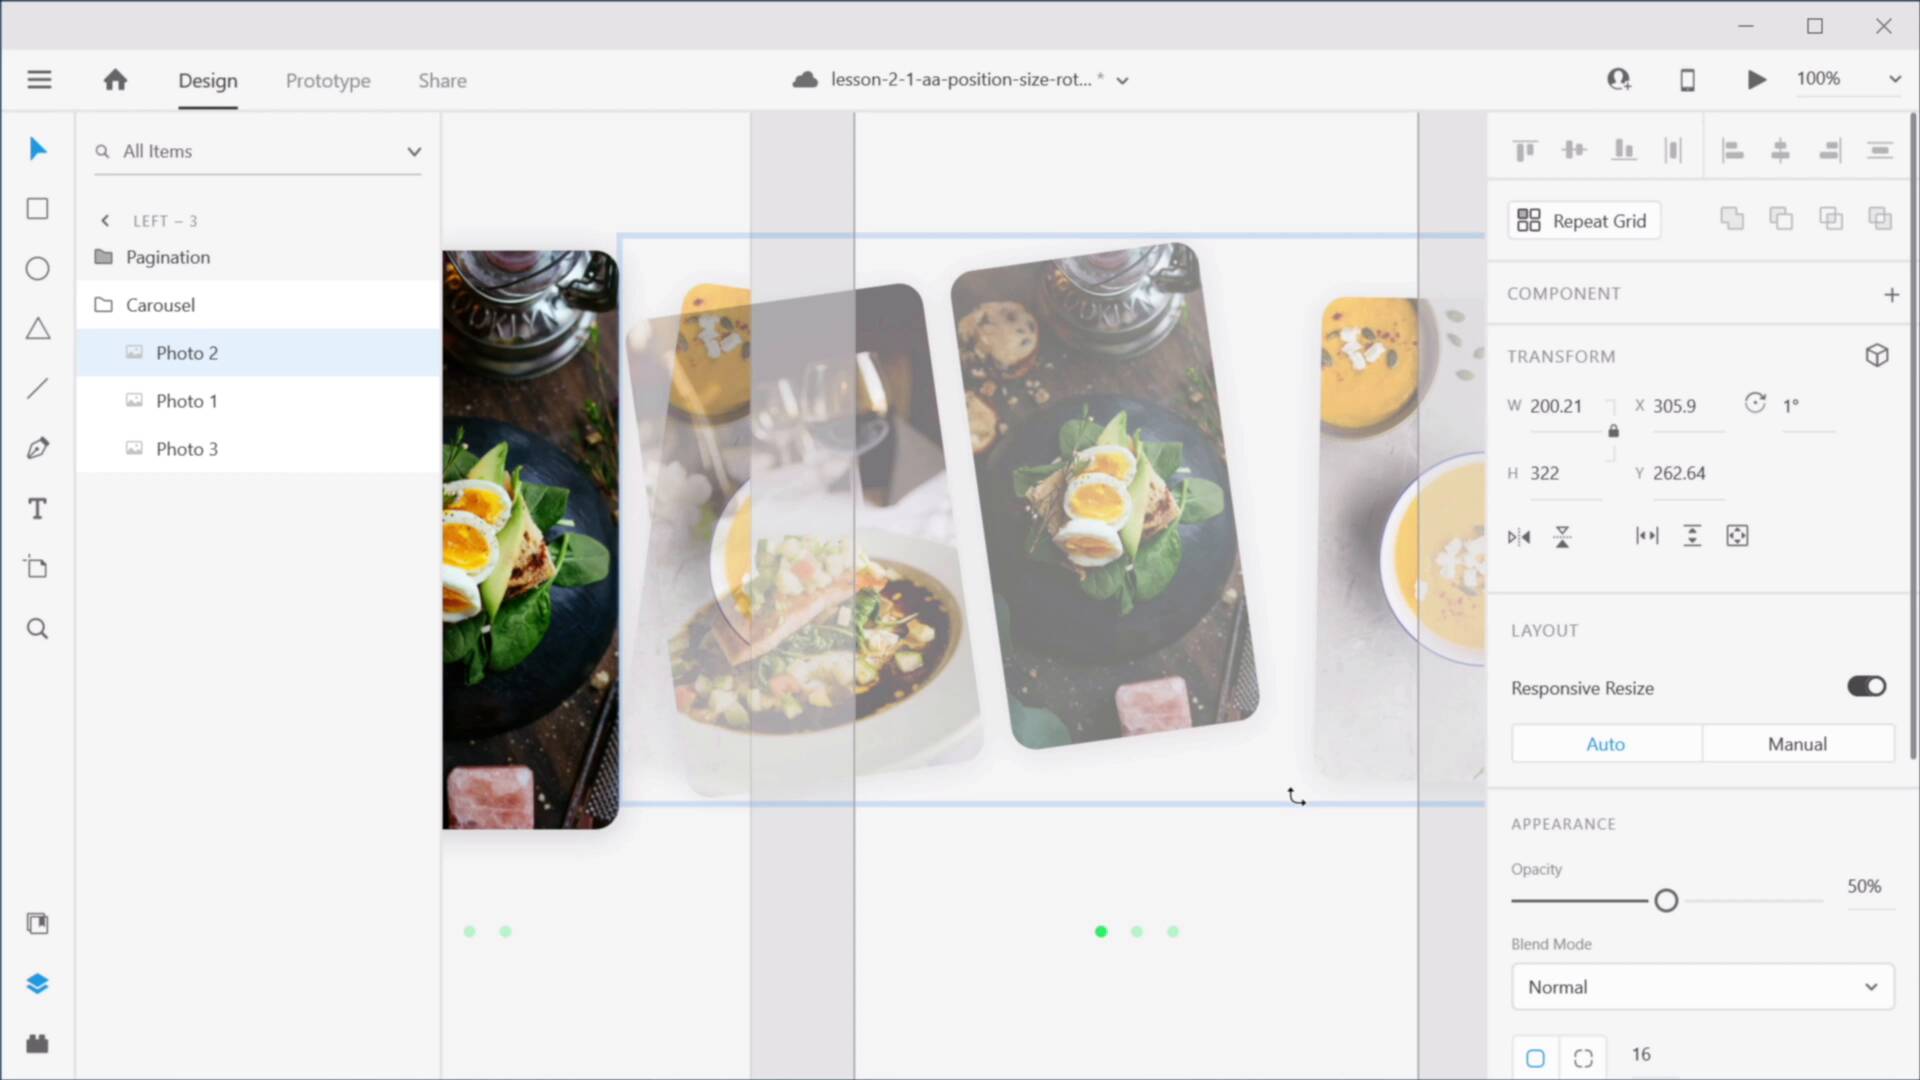
Welcome back to the course. In this lesson, you'll learn how to auto animate the size, position and rotation of elements in Adobe XD. And as the course progresses you will see more and more complex uses for auto animate but it all starts right here with these three properties. So let's get started. Now this is the project we're gonna be creating in this course. It's a simple slider that works something like this Of course this is a prototype inside Adobe XD and it uses auto animate to change the size, position and rotation of these three elements. So let me show you how we can do that. I've prepared a blank canvas here and these are the three elements that we need to use. Now these are all shapes that have an image as a background. And throughout the course you'll find links to all of the resources and all of the images that I'm using listed in the lesson notes. So then we'll begin by dragging this right here in the middle and I'm also gonna drag in the next image, like, so. But this next one, I'm gonna rotate eight degrees. You can see that in the inspector here, and I'm also gonna make it a little bit smaller, something like 322 pixels. Let's align that to the middle. And I'm also gonna lower its opacity to 50%. And then I'm gonna drag it right here. And I'm gonna do the same with this image. So eight degrees rotation, 322, 50% opacity. Now I'm gonna take these three and I'm gonna group them up. And I'm just gonna move this so it's right in the middle there. Okay, so that looks pretty good. Now let's go ahead and quickly create the pagination for that. We're gonna grab the Ellipse tool, draw a circle that's eight by eight, remove the border. For fill color I'm using this one dd 760 and I'm just gonna duplicate that. Command D or control D. Place these at 16 pixels and lower the opacity to about 30%. Let's duplicate that again. Let's group these up. We'll call them pagination. And this will call carousel or slider or whatever you wanna call it really. What's important with auto animate is that you keep the same layer names between art boards. Okay, so this is the first art board done. Let's go ahead and duplicate it two more times. On the second art board we need to highlight the middle element, right? So what I'm gonna do is I'm gonna select the first one, I'm gonna rotate it negative eight degrees, height 322 and opacity 50%. So basically, it looks something like this. Only it's rotated in the opposite direction. Let's move this down a little bit. And let's reset the rotation on this middle elements. Let's make it 386. And let's increase the opacity to 100%. So now we're gonna move that right there. Move this a little bit like so. And now I'm gonna move the whole thing in the middle, something like that. And let's just make a few quick adjustments here align everything in the middle. And I'm gonna place those like so and that one like so. And now finally let's align this to the middle. And also I forgot to align the pagination to the middle. So let's do that and let's also set a 64 pixel distance between the element above like that. Okay, so that's our board number two for artboard number three, let's actually duplicate this one. And I'm gonna lower the opacity here, so, I'm gonna turn this middle one into an inactive, or give it an inactive state, that's -8, 322, and let's make this one active. So, reset that. Reset the size and the opacity. Select everything like so. Move that and let's move this in. And that should do it. Now, we just need to update our pagination. So, on the first artboard, this is fine because it points us to the first image. The second artboard I'm simply gonna lower the opacity here to 30% and back to 100% for the middle one and then here 30% and 100%. Alright, so now we have these three artboards. Now to create that nice animation, we'll jump into the prototype tab, will target the first elements, we'll drag. Well, actually we need to target the second element. Excuse me. So we need to drag this to the second art board, trigger is gonna be tap, action is gonna be auto animate, easing. I usually prefer to go ease in and out and we can go for 0.4 seconds. Now from the second artboard. If I click on this element, it should take me back to artboard one. If I click on this element, it's gonna take me to artboard three. And actually, let me space these out a little bit. So it makes a bit more sense just like that. And then in artboard three, the only link we have here is from this element to artboard number two. All right, so with that said and done, let's select left one and hit preview. So now that is our prototype. And by doing this we auto animated the size because it goes from this bigger size to a smaller size. We auto animate the rotation because right now it's at zero degrees rotation but as soon as I change that goes to minus eight. And also it auto animates the position because these elements are moving around. And that's the way auto animate works really XD looks at two artboards and it finds the elements with the same name, inside those artboards. And then it detects what changed between artboards. In our case, we're changing size, position and rotation. But we're also changing the opacity for these elements and opacity is a property that is supported by auto animate. And I've just realized this now, I made a small mistake when resizing this element. So let's jump back to our design here. So the active element should be 240 by 386. This one is actually 200. I forgot to check this lock aspect icon, so I can just quickly change that back to 40, And then we'll put this in the center. And let's see this one. This one is the correct size. And one last thing I'm gonna do, actually, is to change the triggers here, the trigger duration I mean from 0.4 to 0.8, because I think that's a bit smoother. So let's change these 0.8 and let's change this one as well. So now, this is how it looks like, it's very smooth. I'm not sure if you can see how smooth it is because this is usually recorded or rendered at 30 fps for the video but when you're looking at it on a regular display at 60 fps or 60 hertz, this is a super smooth animation. And that's how you can auto animate the position, size and rotation of elements in Adobe XD. Now, did you know that you can combine masks and auto animate, or you can and you can actually create some pretty cool animations with them. I'll show you more about that in the next lesson.

Back to the top