Lessons: 9Length: 1.6 hours

Next lesson playing in 5 seconds

Cancel
  • Overview
  • Transcript

2.2 Combining Masks and Auto-Animate

In this lesson, you’ll learn how to combine masks and auto-animate. You can use these techniques to create some very cool animations, so let’s get started.

Related Links

2.2 Combining Masks and Auto-Animate

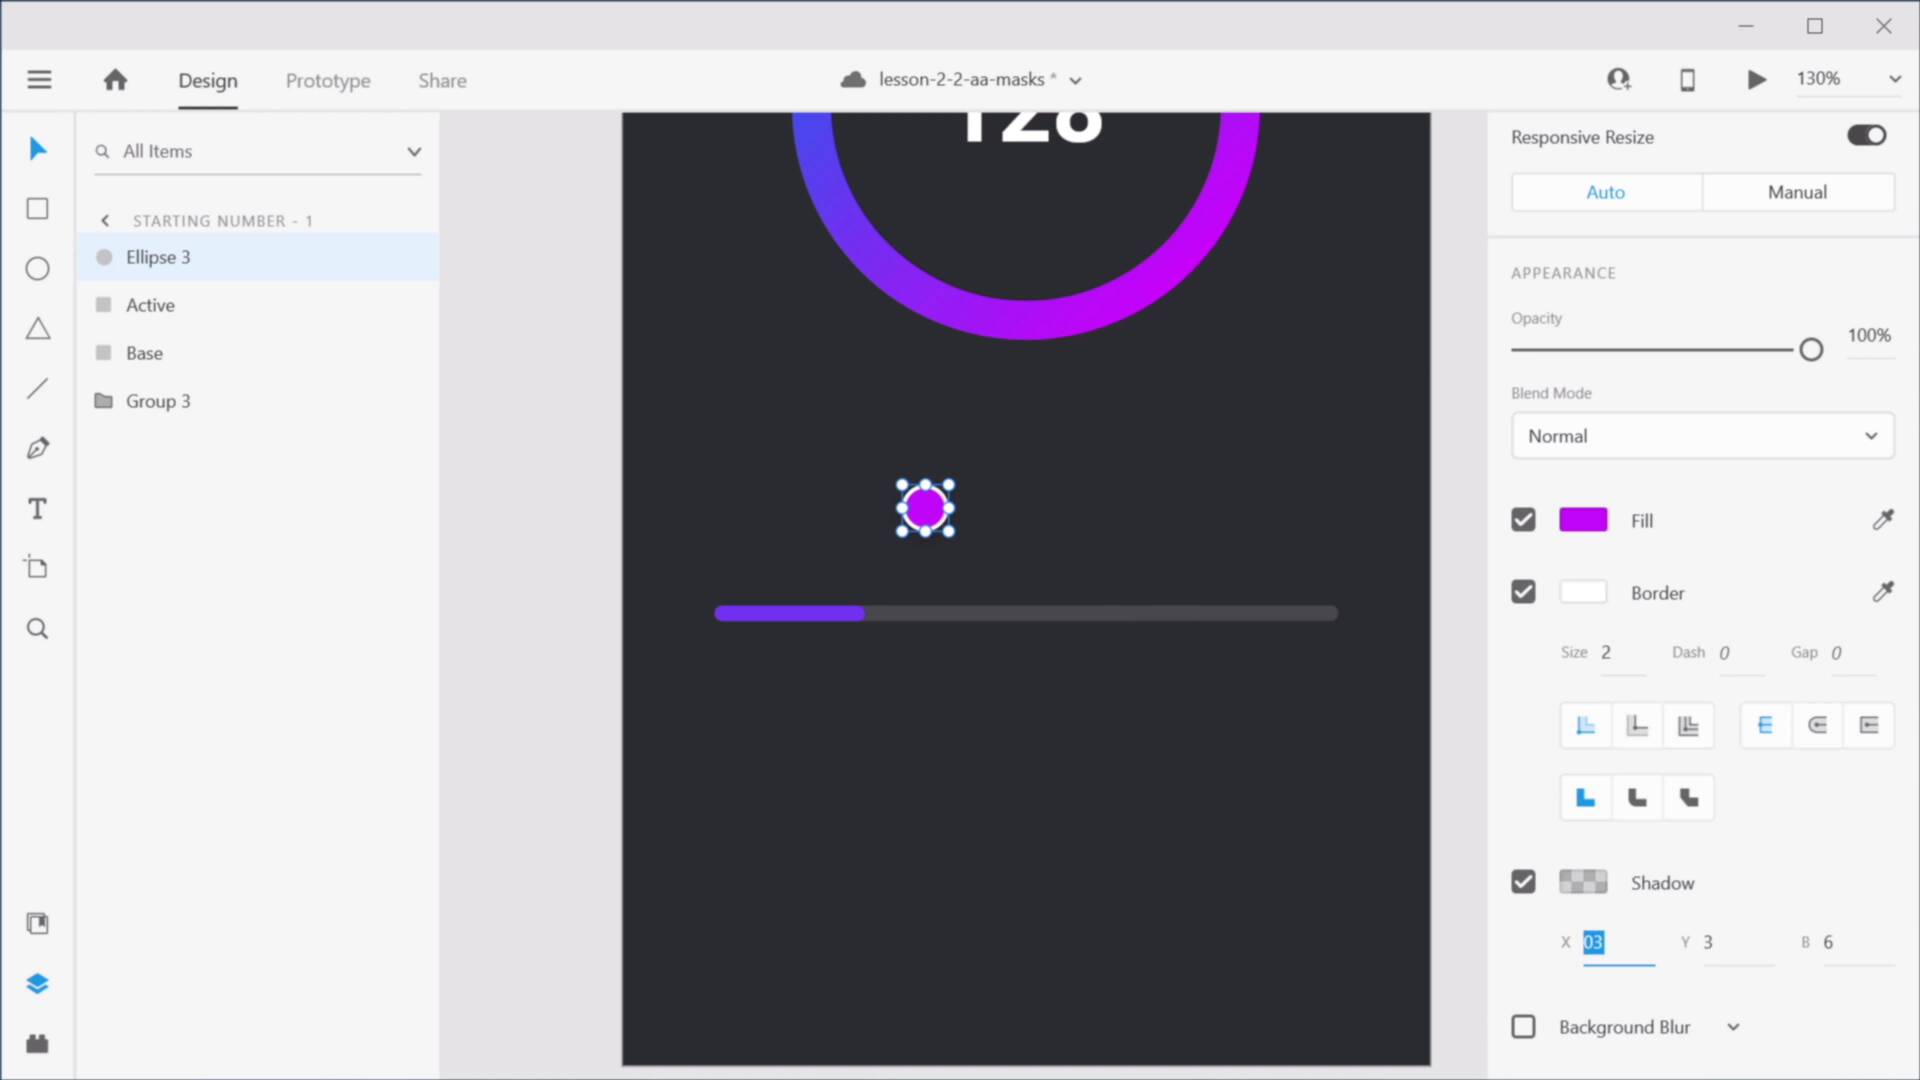
Welcome back to the course. In this lesson you'll learn how to combine masks and auto animate. And with it, you can actually create some very cool animations. So let's get started. This is one of the two examples I'm gonna show you in this lesson. And I want you to pay attention to this slider right here. And see how it works when I change the slide, see that? That's pretty cool, isn't it? It's a very nice effect. Again, this is a prototype in in Adobe XD. So let me show you how I did this. I have an art board setup here with three pictures. As you can see, some decorative elements here at the bottom, and I'm gonna start by drawing a rectangle, like so. I'm gonna set its fill to 333. Border, I'm gonna remove it, and I'm gonna make it 160 By 40. And for border radius, I'm just gonna go the max value of 20. Next, I'm gonna grab the rectangle tool again, make a rectangle that's 32 by 16. Again, I'm gonna round off the corners, remove the border and for fill I'm gonna set this 6C6F60. And then I'm gonna position this 16 pixels from the left side and in the middle. And I'm gonna call this Dot 1. I'm gonna call this Slider bg or Slider background. Next I'm gonna duplicate these dots two more times. The one on the right again 16 pixels from the edge here and the one in the middle I'm just gonna align it in the middle with the background. And let's properly name these. This is Dot 2, and this is 3. Next, I'm gonna duplicate one of these dots. And I'm gonna move it up. We're gonna call it Dot bg. And I'm gonna resize this to the full extent here, and I'm gonna give it a different color. And that color is 62A973. Now I'm gonna duplicate this once more and I'm gonna call it Dot mask, obviously, you can call this whatever you want. And with the Dot mask, I'm gonna resize it, to what spans two of these dots, like so. So then, just for clarity, let me change the color here to red, it doesn't really matter. What we're gonna do now is I'm gonna take the Dot mask and Dot bg while making sure the Dot mask is the first layer. And I'm gonna right click Mask with Shape Or Shift+Ctrl+M. So now I have a mask group one, let's rename this to Mask. Now, in order for the first element to be visible or the first dot, I need to move this Dot mask to the left, for that I'm going to lock the Dot bg's position. And I'm just gonna use my arrow keys or you can also use the mouse to move this to the side. So it just covers this first dot. All right, so now let's take this. Let's actually group it up. And let's call it Pagination. So now we can go ahead and duplicate this two times, and we'll make the necessary changes. In the second artboard I want to see the second image, so let's move it like so. And also I wanna see the middle dot, and to do that, I'm gonna go in here. Under the mask, I'm gonna move the Dot mask So that it only covers. The middle. Dot. And then I'm also gonna resize it like so. Okay? And on the third art board I want to show the third image. So we're gotta move all of this to the left, and then select the Mask, select the Dot mask and then I can move it to the right side, so that it only covers the third dot. And it looks like so. So now let's go into prototyping. And we'll select the dot, this will go to this art board, trigger is tap auto animate for action. Ease in and out for easing over let's say 0.4 seconds. From the middle art board the first one goes here. The third one goes here. And from this third dartboard we do this, and we do this. So now if we do a little preview. You'll see that we have achieved the exact effect that you saw in the initial demo. So this is possible because we used masks. We have this nice animation on the slider. It's almost like the dot you click on, kind of borrows this active colored shape from the one before it. And it's a really, really cool effect. And we can also go in, I actually forgot. To target this one from the initial artboard. Let's link that to number 3 here. So now I can move like so. And that is, the first example that I wanna show you. You can do a lot of things with masks. And one of the cooler animations is for numbers. So you can animate numbers by using masks, and it's gonna be like one of those countdown timers that you probably saw around. So I have a starting demo here. But first, I wanna show you what we'll be creating. So we have the simple artboard and you'll see that as I drag the slider, the number here animates along with it, and it goes the other way around. And of course, you can go as slow as you want. But achieving this effect is actually very, very simple. So let me show you how you can do that. So we're gonna start right here, and I'm gonna start with the slider. So grab the rectangle tool, draw a rectangle that's 320 by 8. And for fill I'm gonna use 48494E. Remove the border, round off the corners and let's position it in the middle, something like that. Now, I'm gonna duplicate this again. So, this is the Base, this is the Active and I'm just gonna resize it, like so. Let's actually sample a color from here. So that we have a starting point for our animation. Now for the slider dot, we're gonna grab the ellipse tool, draw a circle that's 24 by 24. For fill color let's use, I don't know maybe this pink. Border it's gonna be 2 points and let's make it white. And let's also add a shadow to it. 3, 3, and 15. So now, I'm just gonna position this like so, and I'm gonna call it Dot. And then I'm gonna group these up. I'm gonna call them Slider. All right. So the way this works is very simple. On the slider. On the slider dot actually, we're gonna add a drag interaction. And whenever that happens, we're gonna animate this number. Now the way to do it is to first split it up in three separate text areas, because right now is just a single text area. So to do that, here's what we'll do. Let's go ahead and copy it and bring it out here. And I'm just gonna change its color so you can see it more clearly. So then let's duplicate it. I'm gonna say 1, let's duplicate this. 2, duplicate it again. 8, okay. So the number we're trying to get to is, what did we have here? 524. So we're gonna do the following. We're gonna select the 1, we're gonna do a repeat grid. And we're gonna drag down. And I'm also gonna reduce the spacing between these items to 0. And we're gonna say 2. Oops. 3, 4 and 5. That's bring the opacity back to 100%. Right, so I created a group that goes from 1 to 5, because 5 is the first number, or the first digit from the number we're trying to get to. And this group is gonna move up, like so, and it's gonna be animated. Now, for the other ones, I'm gonna do the same thing. Repeat Grid, and I'm gonna drag all the way down. But this time we have. A few more numbers to go through. So we'll do 3, 4, 5 all the way to 9. And then we'll start again from 0. And to make things a little bit easier for us, let's actually ungroup this grid and let's group it up as column one. Let's ungroup this, first, let's make it a little bit bigger. Let's ungroup it and we'll call this Column 2, and let's start working on those numbers. So 9, then we go 0, 1, 2, 3, 4, 5, and so on until we get to 9 again, like that. Now, here, we need to know the ending number, so it's 128, 524. So the middle digit here is 2. So we'll need to duplicate. Three more digits here. And we're gonna say again 0, 1 and 2, right? So the very last digit that we're gonna write here is the digit that we want our number animation to stop at. Finally, for our third digit, let's actually make things easier for us. I'm gonna duplicate this, like so. And here we're actually starting at 8. So let's move this up. And I'm actually gonna. Delete these elements. Okay? So, we're starting at 8, we need to add a couple more groups from 0 to 9, but the ending number here is 4. So we have 8, 9, 0,1,2 all the way back to 9 and then we start again. So, let's do this. Let's select these duplicate. And actually I made a mistake there. I should have started with 0, like that. So duplicate drag it in, and let's do that one more time. Of course you can add as many of these groups as you want to make this, animation more realistic. And the number we need to end at is 4. So I'm gonna drag 0 1 2 3 and 4 duplicate and bring it all the way down. Cool. And this right here it will be called Col or Column 3. Okay. So that is our number. Now what we're gonna do is we're gonna take this, group it up. I'm gonna call it Number. And then I'm gonna drag a rectangle. Something like that. And sort of rectangle that's basically gonna cover the number. So then I'm gonna take this and the number, right click and select Mask which Shape. This is barely in the screen here, but you can see it Shift + Ctrl + M on a PC and I believe it's Shift + Command + M on a Mac. So Mask with Shape. And now the only thing that we're seeing is the starting number. So let's go ahead and copy this and bring it in inside of our number here. Just paste that in. Like so let's delete the old number. Let's call this Mask and, let's fill this up with white. So now, to achieve the effect that we want, we're gonna duplicate this artboard. I'm gonna move the Dot to a new position. And actually, let's first increase the width of the slider. And I'm just gonna move the slider like so. And then to show the new number we've got to go inside the mask and. I'm simply gonna move it like so. And then I'm gonna move this one. I'm actually gonna use my arrow keys because it's a little bit easier. So I'm just holding down, Shift and arrow up. Like that, and I'm gonna do the same thing here, Shift arrow up until I get to 524. Just like that. All right? So now let's animate it. We're gonna go into Prototype. And I'm gonna target the slider Dot, drag to the second artboard. Trigger is gonna be drag. Action is gonna be auto animate. And for this one we can actually not specify an easing. And, then we're gonna go to the second art board and, do the exact same thing in reverse. So, now if we preview this. There it is. It goes from 128 to 524. Very, very smooth animation. And this was all possible, thanks to using masks. And these are just two examples of what you can do with masks and auto animate. So give this some thought. And you'll see that this is actually a very, very powerful feature that's available in Adobe XD. All right. So with that out of the way, let's move on to the next lesson where you learn how to add multiple interactions to the same element. So I'll see you there.

Back to the top