


- Overview
- Transcript
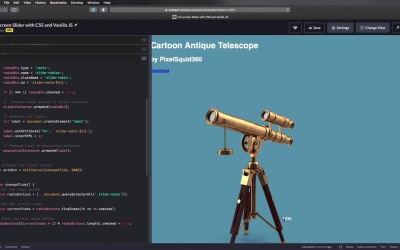
3.2 Adding an Automatic Slide Change
In this lesson, we’ll add some JavaScript code that will automatically change slides after a set interval of time. This is pretty easy to do, so let’s begin.
1.Introduction
1.1Welcome to the Course01:27
2.Let’s Create a Simple Slider
2.1Writing the Markup07:11
2.2Writing the Basic CSS13:43
3.Let’s Add Some Advanced Functionality
3.1Simplifying the Markup With JavaScript13:16
3.2Adding an Automatic Slide Change12:35
3.3Adding Better Styling to the Slides08:31
3.4Styling the Pagination06:03
3.2 Adding an Automatic Slide Change
Welcome back to the course. In this lesson, we're gonna add a little JavaScript code that will automatically change the slides after a set amount of time. This is pretty easy to do. So let's begin. For that, we're gonna add this code in the init slider function. And I'm gonna say the following, Automate the slider change. And I'm gonna create a variable called autoRun. And that's gonna be equal to setInterval(changeSlide, 5000). So what's up with this? Well, this basically means that we're starting the setInterval function, and we're passing in changeSlide, which is the name of the function, and 5000 milliseconds. That's the amount of time it takes to change the slide, right? So this function changeSlide will be executed once every 5000 milliseconds or five seconds. So let's go ahead and define that function. Here's how it's gonna work. We're first gonna get all of the radio buttons in an array. Then we're gonna get the current index or which of the radio button is checked. And then we're gonna check the next radio button. So we're gonna do that with actually a lot of ES6 code just to make this easier. First we're gonna get the radio buttons. So I'm gonna create a constant radioButtons =, and this might seem a little bit weird for you if you haven't used any ES6 syntax. document.querySelectorAll.slide-radio because that's the function, sorry, class name for every radio button. And that's it. Now, this right here is called the spread operator. And this is an ES6 feature that basically explodes an array into its components. So document.querySelectorAll will return a list of items. By using the spread operator, we're destroying that list of items, and we're getting each and every item separately. And because we added an array here, we're basically creating an array with those items. That's all there is to it. Now, let's get the current index, and for that I'm gonna say constant, con stant. Current index will be equal to radioButtons.findIndex. And this is where it's gonna seem even weirder. This right here, what I just wrote is called an arrow function. It's also something new that was introduced in ES6. But it's basically a simplified version of a regular function. rb, you can call this whatever you want. rb is just a parameter. And rb.checked is what the function returns. So here I'm basically saying okay, find me the index of the item that matches this description. In other words, find me the radio button or find me the index of the radio button that is checked. And that value is placed in the current index constant. And now, all I have to do is check the next radio button to change the slide. It's really very simple. So check the next radio button. For this we're gonna do the following, radio buttons[(currentIndex + 1), Modulo radioButtons.length.checked = true. All right, so let's give this just a second and see if it works. It should change the slide, there we go, every five seconds. So let's do that one more time. All right, so you're probably asking me Adi, what is up with this bit? Well let's start with this bit actually. So radioButtons, and I'm passing a value here, .checked = true. Does this make sense? I can basically say radioButtons[1], and that's gonna select the element on position 1, and that's gonna set the checked attribute to true. And as you can see this works, because it just changed to the second slide. If I set radioButtons[2], checked = true, it's gonna change to the third slide because in a JavaScript array items start at 0. So I have the first element 0, the second 1, at the third at position 2, and so on and so forth. Okay, so so far this seems pretty easy, right? Now the thing is, how do I get this next radio button. Well, it's actually very simple. Let's start with the first slide, right? So we are on the first slider, let me actually put a really high value here so I can explain things a little bit better. Okay, so we're on the first slide. The timer starts. And when the timer hits 50,000 milliseconds in this case, this function is called. So we're getting the radioButtons, we're getting the currentIndex, which in our case is 0, okay? Because we're on the first slide. And then we're doing the following. CurrentIndex which is 0 plus 1 that equals 1. radioButtons.length equals what? 4, because we have 4 radio buttons. So then we have 1 modulo 4. And that's gonna be equal to what? That's gonna be equal to 1. Because if you don't know, modulo is what gives us the remainder of a division operation. And as a general rule, if you do x modulo y, and x is smaller than y, then the result of that operation will always be x. In other words, 1 modulo 4 is gonna be 1, 2 modulo 4 is gonna be 2, 3 modulo 4 is gonna be 3, 4 modulo 4 is gonna be 0, because 4 divided by 4 gives us a remainder of 0. So that's how this whole thing works. When I'm on slide two, for example, what do we get? The current index will be 1. So this value here will be 1 plus 1 that's 2, modulo 4, the result will be 2. So we'll then have radioButtons, select element two .checked will be true. So I hope that makes sense. There's a little bit more math involved in here. But it's also a very elegant solution. And by doing this, you ensure that no matter how many radio buttons you'll have, this function will continue to work. So now, let's bring this back here to 5000 just like the way it was, and our autoRun feature is now functional. Every five seconds, the slide will change. Now, we can actually do something very simple here. We can pause the autoRun when we hover on the pagination. And this could be useful for, when you want to maybe read the contents of that slide. You can simply hover your mouse over the pagination and the automatic slide change will be paused. This is the reason why I used a variable, this variable, for set interval. Because I can now reference the set interval, and I can pause it. So I'll say something like this, Stop auto run at mouse enter. And I'm gonna say this, pagination.Container.addeventListener( 'mouseenter". And here, I'm gonna pass in another arrow function. And I'm gonna say clear timeout autoRun. And actually this doesn't pause the autoRun it just stops it completely. So all I have to do now is start it again, when we leave with our mouse cursor from the paginationContainer. So I'm actually gonna copy this. And I'm gonna say Start auto run at mouse leave. So paginationContainer.addEventListener('mou- seleave'. And here instead of this, oops, clear timeout, I'm gonna say autoRun will be equal to setInterval, (changeSlide, 5000). So I'm basically restarting the autoRun. And actually we need another parenthesis here. Great, so now let's see if everything works properly. Let's see the slide change, good. So now when I hover over the pagination, the slide should not change automatically. Let's wait for it a little bit longer. And yeah, it's now stopped. And now when I move my mouse away, one, two, three, four, five, and there we go. The autorun starts again. And with that, all of the JavaScript code for this project is now complete. Hopefully it wasn't too complicated to understand. I've used some, let's call it newer, more up-to-date syntax, JavaScript syntax for this project. But it's not really complicated once you get to know these ES6 features. You'll see that they are actually very elegant and they allow you to write code much more efficiently. Now everything works on our slider, we have the auto run, we have the pause on mouse over. So everything is good, except of the way it looks, right? It doesn't look that well, so how about we add some better styling in the next lesson? I'll see you there.


