

- Overview
- Transcript
2.2 Installing UIkit
Welcome back to the course. In this lesson, you’ll learn how to install UIkit and how to get started using this framework. Let’s begin.
Related Links
1.Introduction
1.1Welcome to the Course01:43
2.Getting Started With UIkit
2.1What Is UIkit?02:36
2.2Installing UIkit06:29
2.3Building With Default Components18:49
3.Customizing UIkit
3.1Installing UIkit With Sass Sources05:00
3.2Customizing Components With Sass13:47
2.2 Installing UIkit
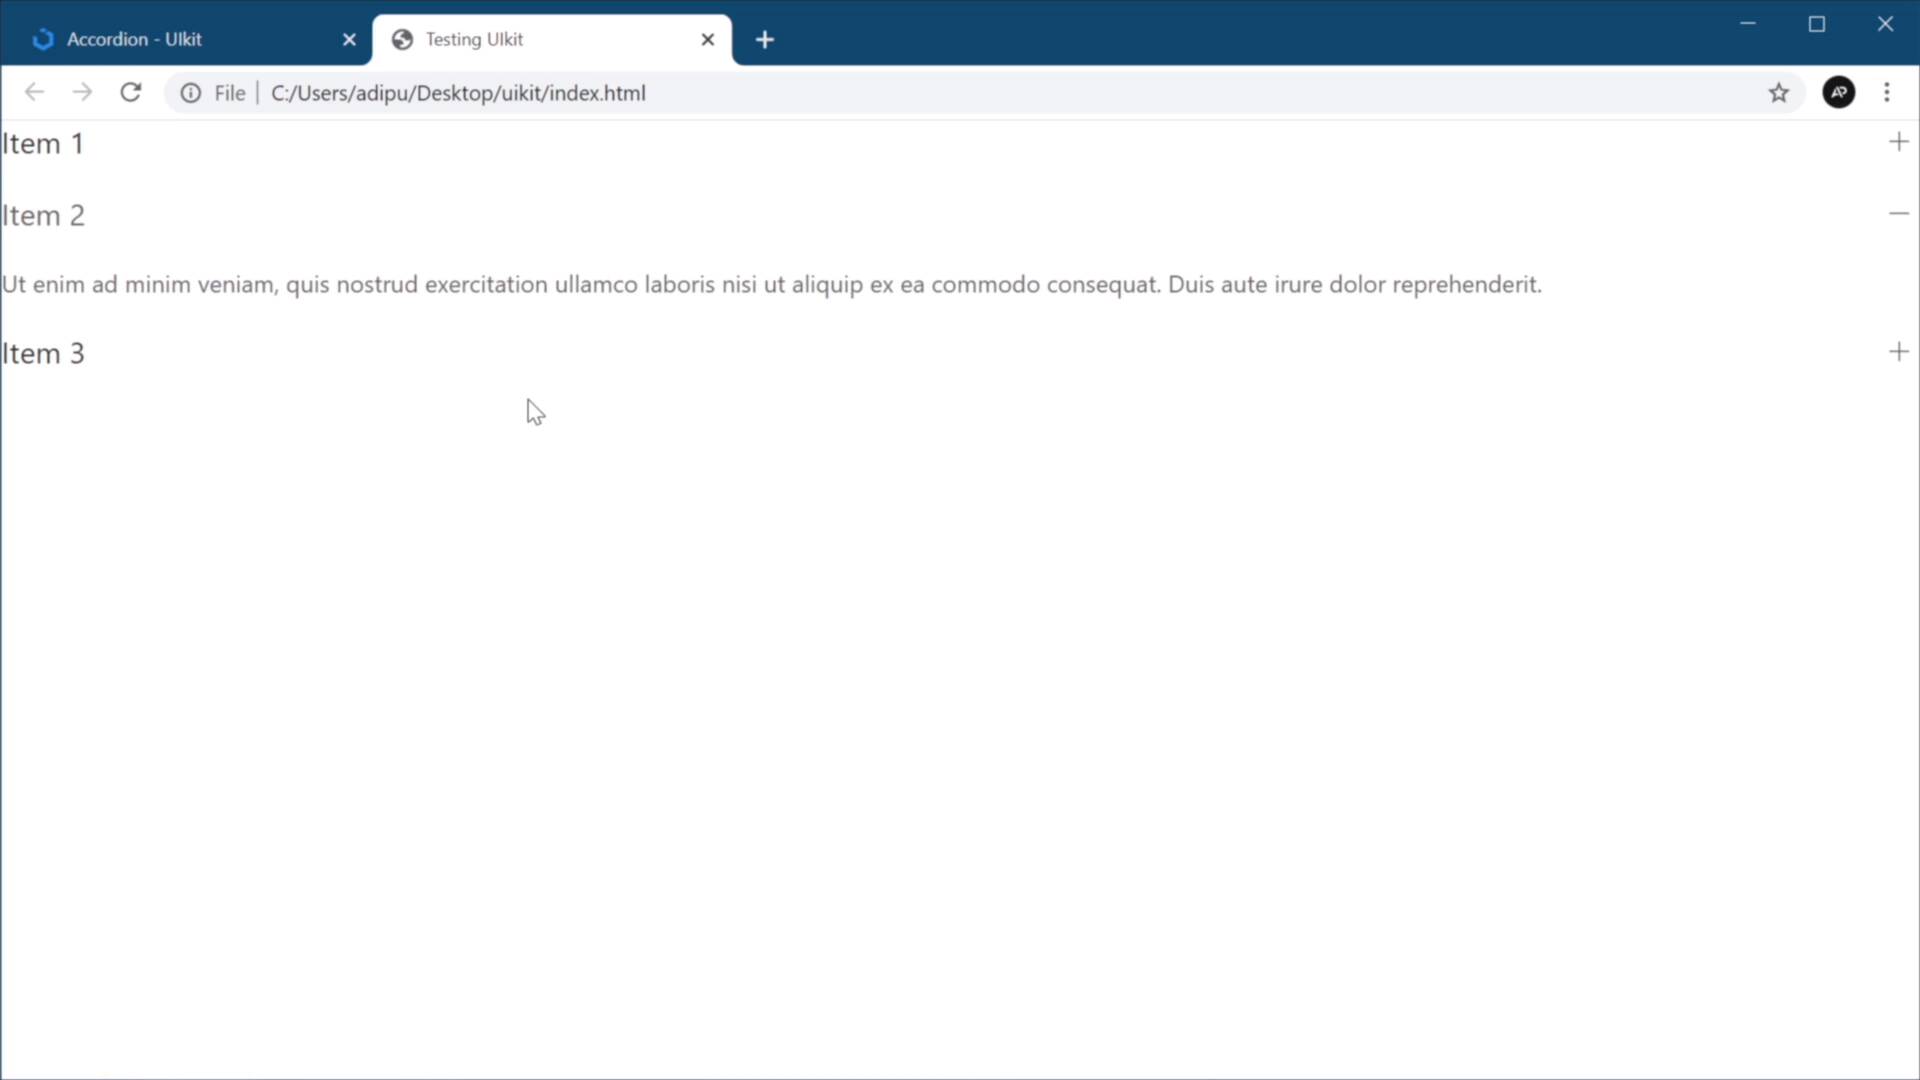
Welcome back to the course. In this lesson, you'll learn how to install UIkit and also how to get started using this framework. So let's begin. You can get the framework by going to getuikit.com. At the time of this recording, this is at version 3.6.17. There is also a version two which you can still access by clicking this button here. But obviously, we'll be using the latest version. So to install UIkit, the first method is to download the prebuilt files. You can do that by clicking the Download button. That's gonna to download a zip file, which includes two folders for the CSS and the JavaScript. Next you would need to extract those files, and I extracted them and a special folder on my desktop that I'm gonna be using for this demo. Here we are in Visual Studio Code. Obviously, you can do this in your code editor of choice. And the next step is to obviously create your HTML files. So let's create an index HTML. Let's add some starter markup here. And the next step would be to load the framework CSS. For that, we'll just say link, and the href will be css slash and we'll be loading uikit.min.css, so the minified version. Obviously, you can load the other one if you plan on making some changes to the file yourself. But for production purposes, it's always a good idea to include the minified files. And finally, we need to load the JavaScript files. So this is gonna be UIkit JS. Here, we're gonna have two scripts. The first one will be js slash, we're gonna load uikit.min.js. And let's go ahead and copy this. And for the second file, we're gonna be loading the icons because the framework actually comes with a built-in icon a library. And we include that by loading this file right here, and that's it, you're done. Now to test things out, I'm gonna jump back to the UIkit under Documentation and I'm just gonna grab an Accordion component. The documentation here is very helpful because it gives you access to the markup and you can also copy some of this demo markup and use it directly in your projects. So I'm just gonna paste that and save. And now let's open up that file in a browser window like so and we are up and running. This accordion control is now properly styled and it functions perfectly because the JavaScript for it is already written. Now the second method of installing UIkit is loading the files from a CDN and a CDN stands for Content Delivery Network. It's basically an external servers that host certain types of files. In our case, it hosts the CSS and the JavaScript files required for UIkit to work properly. And the CDN in question is called JSDelivr. Now to give the correct links, you would need to go again to the Documentation. Under Installation, if you scroll down a bit, you will find all the necessary links right here. So you can simply copy these. And instead of loading these manually from the files that we downloaded previously, right? You can just paste those in and you're good to go. You'll see that the demo page we created, if we do a refresh, will work just the same. And we can now go ahead and delete these local files because we no longer need them. Now, if you're wondering which method you would wanna use, well personally, I would recommend the second method because you don't have to download anything. Plus using a CDN can improve your website's performance because you're loading some of the assets from an external source. And usually these CDNs are properly configured to deliver these assets really, really fast. The downside of this approach is that, if you don't have an Internet connection, like for example, if you want to work offline, then you won't have access to these files. In which case, the first method would be better for you because you can download these files and you can work anywhere on your local machine without having a connection to the Internet. So it really depends on your use case, go ahead and pick the method that works best for you. Now, apart from these two methods, there is actually a third one and that is to clone the entire UIkit repository from GitHub. And that will give you access to all of these source files. We'll be using this method later on in the course when we'll do a bit of customization on the CSS files. So if you want access to the source files, that's the way you're gonna get them. If you're using method one or method two that I showed you in this video, you'll gain access to the prebuilt files only. So make sure you keep that in mind. All right, so now that you successfully installed UIkit, let's put it to good use. In the next lesson, we'll build a very simple page with it using some of the components that I showed you earlier in the course. So I'll see you there.


