

- Overview
- Transcript
3.1 Installing UIkit With Sass Sources
In this lesson, you’ll start learning how to customize UIkit; it all starts with the source files. Let’s begin!
1.Introduction
1.1Welcome to the Course01:43
2.Getting Started With UIkit
2.1What Is UIkit?02:36
2.2Installing UIkit06:29
2.3Building With Default Components18:49
3.Customizing UIkit
3.1Installing UIkit With Sass Sources05:00
3.2Customizing Components With Sass13:47
3.1 Installing UIkit With Sass Sources
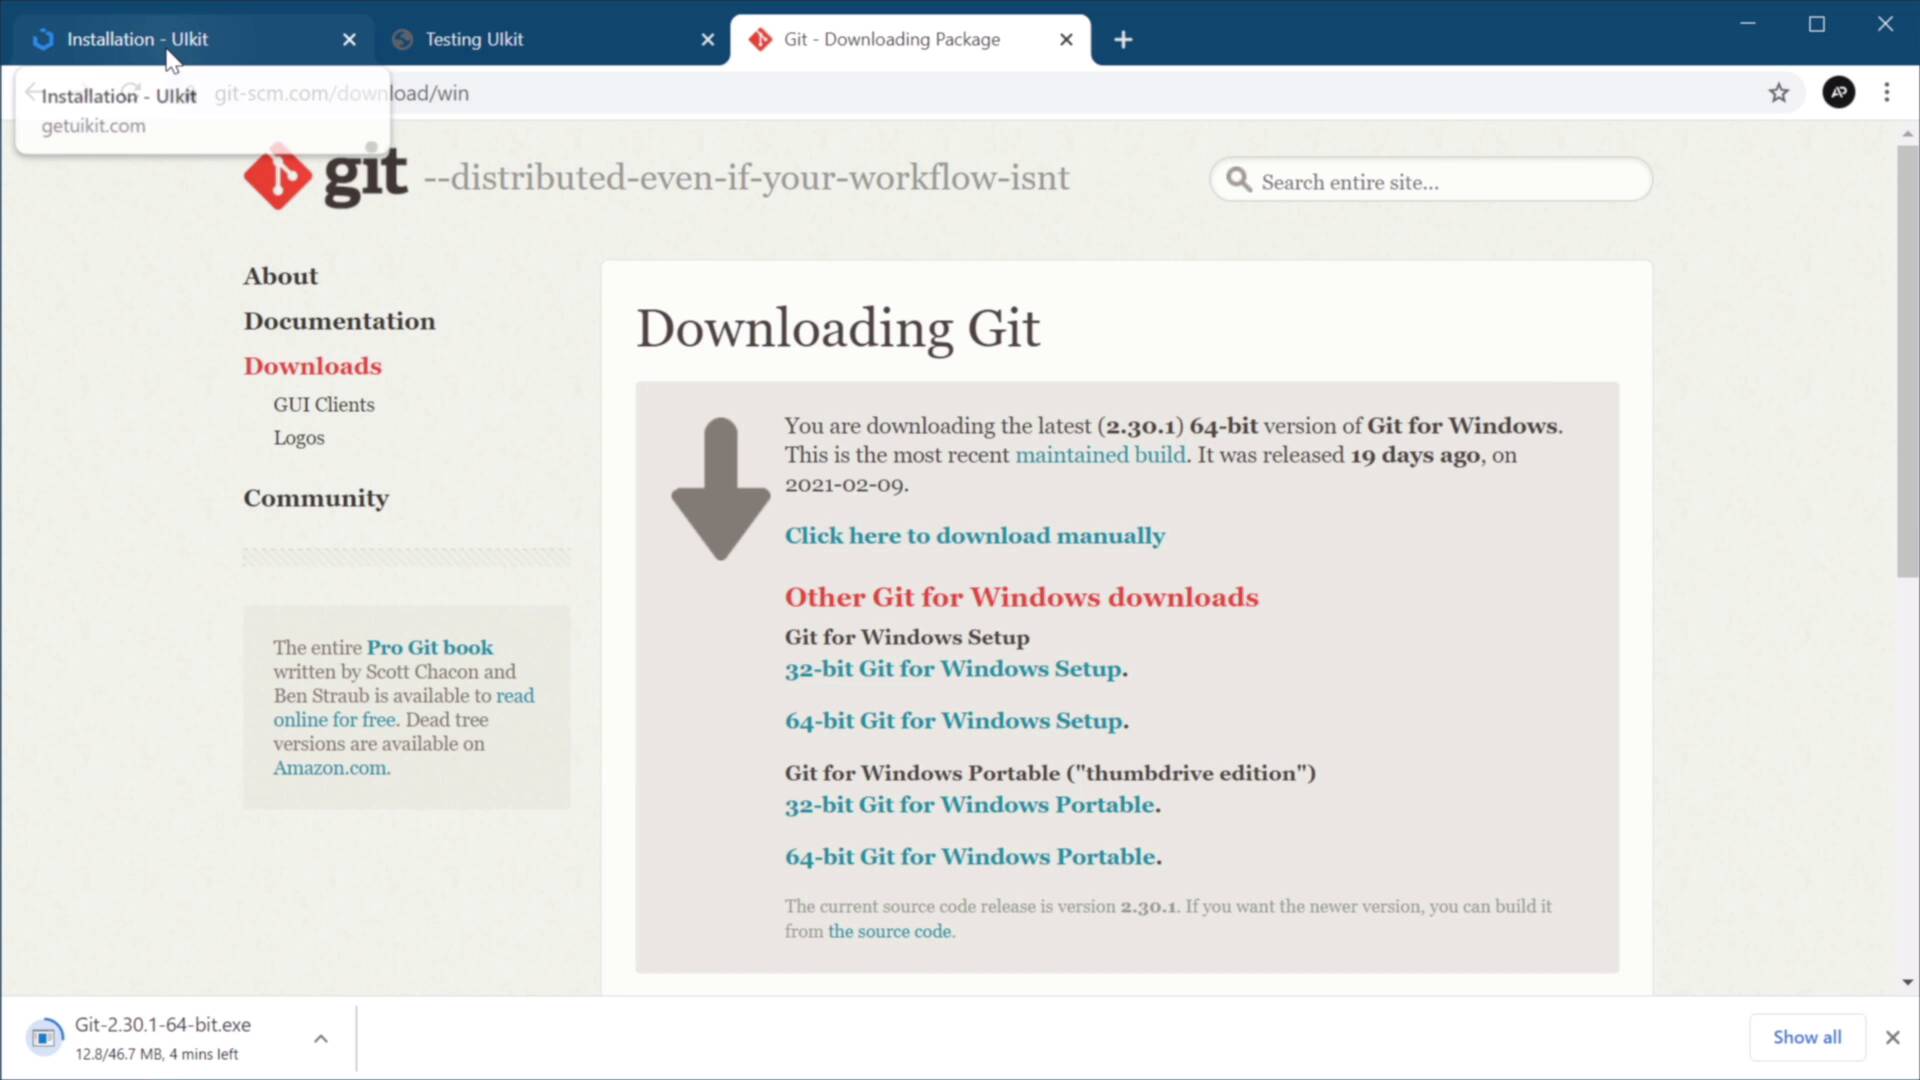
Welcome back to the course. In this lesson, you're gonna learn how to customize UIkit. And it all starts with the SASS files. Let's begin. Now, before we start, I would just like to mention that for any customizations, you can use the premade CSS files, and you can edit those directly. But it's not the most efficient way, because UIkit comes with SCSS, SASS, and LESS files. So SASS and LESS, these are preprocessors. They allow you to enhance your CSS files by offering some features that are non-existent in CSS. And using SASS or LESS allows you to split up your files into multiple partial files, and that makes it super easy for you to organize your project. UIkit does exactly the same thing. So let's go ahead and get the source files so you can see what I'm talking about. First, you can go to Documentation under Sass, because that's what we're gonna be using to demonstrate. But you can use LESS, if you prefer, it's all the same. And actually, we need to go to installation, not Sass, excuse me. We need to copy this command here that says git clone and the address to the GitHub repository. Next, we're gonna open up a terminal window. I'm gonna navigate to my desktop and UIkit folder, and I'm just gonna paste them that command, git clone and the address of the repo. If we're getting an error here, like I am, it means you don't have Git Installed on your system. Now, if you're using Mac OS or Linux, it's pretty simple to do, you just write a command line on Windows. The best way to install Git is to go to git.scm.com/download/win, and you would just select the addition of Windows you're using. In my case, I'm using 64 bit. So let's wait a little bit until that finishes downloading. Now if you don't want to use this approach, while this is downloading, I'm gonna show you another way. And that is to go to the UIkit website and you would go to Git Hub. And right here where it says code, it can actually download a zip file of this repository. That is an alternative if you don't wanna use the command line. Git just finished installing for us, so let's go ahead and install it or it actually finished downloading. Now we need to install it here. It's a simple installation just next next next next, make sure this is selected here, and then hit Install. All right, so once that's installed, you can now go back to the terminal and repeat the same command and it's still giving me an error. Let's try this. Let's open up actually a different terminal, command prompt, for example, and let's paste then the same command. I've actually had issues with the windows terminal recently, okay? So that works. Now we just need to change directory to desktop and UIkit and repeat the same command. And now this will download that repository and it's gonna place it right here. See, in this folder called uikit. Let's wait for it to be complete. Takes a bit longer because I'm using a very slow Internet connection on this computer. But once that's done, we now have access to all the files inside repository. So if we open up UI kit, under SRC, and SCSS, we can find all the source, all the SASS source files for UIkit. And if you open up variable CSS, for example, you can see all the variables and there are a lot of them, all the variables that are being used in this framework. And under components, you will see that every single component has its own SCSS file. Or you can see the variables that are being used and also the actual CSS code. All right, so now that we have access to the source files for the framework, let's do a little bit of customization to our simple page. That's coming up in the next lesson. I'll see you there.


