
 Lessons: 13Length: 1.3 hours
- Overview
- Transcript
2.3 Adding the “Hero” Panel Entry and Template
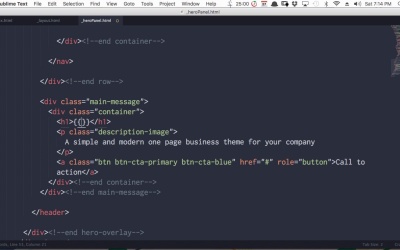
Having completed the content structure we need for our “Hero” panel, let’s go ahead and create an associated entry. Then, we’ll create and load in a template that will handle the display of the “Hero” panel on our site.
1.Introduction
1.1Building Landing Pages With Craft CMS00:51
2.Building Landing Pages With Craft CMS
2.1Setting Up the Template Essentials09:36
2.2Setting Up for the “Hero” Panel Entry08:52
2.3Adding the “Hero” Panel Entry and Template10:27
2.4Setting Up for the “Features” Panel Entries03:53
2.5Adding the “Features” Entries and Template08:57
2.6Setting Up for the “Pricing” Panel Entries05:18
2.7Adding the “Pricing” Entries and Template13:33
2.8Setting Up for the “Footer One” Panel Entry01:27
2.9Adding the “Footer One” Entry and Template03:53
2.10Setting Up for the “Footer Two” Panel Entry03:56
2.11Adding the “Footer Two” Entry and Template05:52
3.Conclusion
3.1Wrapping Up01:43
2.3 Adding the “Hero” Panel Entry and Template
Hey, welcome back to Building Landing Pages with Craft CMS. In the last lesson, we finished setting up everything we needed in the back end to be able to create our hero panel. So in this lesson, we're gonna go ahead and create the associated entry, then we're gonna cut up a template to show it off on the front end. So let's go into Entries in the back end here. And now you can see we've got this new thing that showed up on the left. We've got Structures, which wasn't there before, and Home Panels, which wasn't there before. And this is where all of the home panels that we're gonna set up for our home page will appear. So we'll just click into that. We're gonna make a new entry, and if you hit this little drop down list here, you'll actually be able to bring out the exact thing that you're trying to create. And what we wanna do is copy over the content from our static HTML page into our back end. So we're just gonna copy and paste, just gonna capitalize that P. Now we're gonna add an asset, so we're gonna upload this image into our site. So we hit the Add an Asset button, this is the field that we just set up earlier, we're gonna browse for the hero image we want. And you can just find it in the image folder of the static template that we've been working with. Then that's been uploaded, and we'll select it. Now we fill in the description field, we'll just fill that in with this line here. We're gonna add some text to the button. We're just gonna say, get a quote. And then we'll add a button URL. So for our purposes, we'll just fill it in with a placeholder of a hash. So then we're gonna save that, now that content is in there, and that's ready to be seen on the front end. To make that happen, we're gonna need to code up a template. So we'll jump into our templates folder, and what we're gonna do is create a separate partial template file for each one of our panels. So make a new HTML file. We're gonna name it with an underscore, because this is a file that we're gonna be loading indirectly, rather than having the CMS load it directly. And we're gonna name it heroPanel in camel case. Then we'll open that up for editing. And we'll set its syntax to Craft-Twig. Now we need to pull the hero panel entry that we just created out of the database and show it in the front end. And the way we're gonna do that is with a for loop. So we'll set up a for loop, and we'll end the for loop. We're wanting to get entry, so we'll use entry here. And as far as what we're gonna iterate through, we're gonna drill down into the specific entry type that we've just created. So first we'll put craft, then entries to allow us to dig into the entries in the system. We don't want just any entry though, we want one from a specific section, and the specific section that we want to bring it from is homePanels. If you remember when we set up our sections, we set this handle here to represent our home panel section. So that's why we're using it here. And then inside the homePanel section, we're looking for a specific entry type. So we'll add type, and looking back at our setup again, The entry type we want is heroPanel. So now that's gonna dig in to this specific section and this specific type, and it's gonna pull out the entry that we just added in. And for this entry type, we wanna bring over all the HTML that creates this panel here. So we wanna copy it all over from the index.html template inside our bootstrap site. So we're gonna highlight everything starting here, this div with the class hero-image all the way down, Until you see this comment here that says end hero-image and copy that. And we're gonna paste it inside our for loop. And most of what we have here is not gonna need to be edited. Just using the HTML exactly as it is in the original design. But there are a couple of things we wanna replace, and that is the dynamic information that we're bringing in from the fields that we created in the last lesson. So let's start with the text fields that we added in. So first, we're gonna replace this with a dynamic title. We do that by adding a pair of curly brackets, inside, we're gonna add entry. And if you remember above, that's the placeholder name for the entry that's being pulled out of the database with this query here. And then after that, we'll add a dot and title. We're gonna do the same thing down here for our description. Under here, we'll just replace title with description. This here is the code for our button. So we're gonna replace that with the handle for the button URL that we set up before, which is buttonUrl. Now if you're not sure what handles you should be using, just go ahead and jump into your settings anytime you need to. In this case, we're going into the field. So here is our buttonUrl field, and that's the handle we need to use. There's our button text, and that's the handle we need to use for that one. We'll replace this text with entry, dot, and then the handle that we just grabbed from our settings area. So now there's one more thing that we need to update to make it dynamic, and that is this background image here. We want this to be dynamic, depending on what the user has added in that asset field that we set up. Now you might think that you could just say entry.heroImage, but that actually won't work. And the reason is, every asset field might contain more than one image. So what this retrieves is actually an array of values. So you need to dig into that array to pull out the image that you want. So we'll delete that for now because we're gonna replace it with something else in just a moment. In order to start iterating through our array of assets, we're gonna need another for loop. This time, we're gonna say for asset in entry.heroImage. So now this asset is gonna hold the URL of our hero image that we are trying to get at. So what we're gonna do is set a variable, something that's only gonna work inside this template. So we'll say set, And then our variable, just to keep things simple, is gonna be called heroImagem And we're gonna get the asset URL. So now this heroImage is gonna hold the URL of the image we want for our background. So now we'll add that down here, and this will output the URL of the image that we want. And there's only one thing left to do. With Twig, if you set a variable inside a for loop, its scope is gonna keep it locked inside that for loop. So to make sure that we can access it outside the for loop, before we go into the for loop, we're gonna set that same variable. But we'll give it a value of an empty string. Then the for loop will overwrite its value, it will be accessible here, and it will be correct here. So now that's our hero panel template. It is all finished. The only thing we need to do is make sure that it's loading in correctly. And when you arrive at the main domain of a Craft CMS site, it will automatically load up the index.html template. So we're gonna need to edit that to load in our hero panel. So let's grab that template. And we'll set its syntax to Craft-Twig. Just get rid of these comments. We don't really need those, and then this is almost exactly what we need. At the top here, it's extending our layout template that we did earlier on. Now we're just gonna get rid of this content here. We don't need that. What we do want to do inside our content block here is start loading in the partial files for each one of our panels. And we're gonna do that by using include. So we'll type out include, And then all we need to do is add in the name of our template. So now when someone lands at the main domain, this template is gonna extend on our layout template that we created earlier, and it's gonna load in our hero panel template that we've just created. So let's see how that looks. And there we go. So we've got our whole hero panel is all set up, and that's the basic process that we're gonna be using for the remaining four panels in our original Bootstrap site. So in the next lesson, we're gonna move on to creating this second panel here, which we're calling the features panel. So I'll see you in the next lesson.


