
 Lessons: 17Length: 1.6 hours
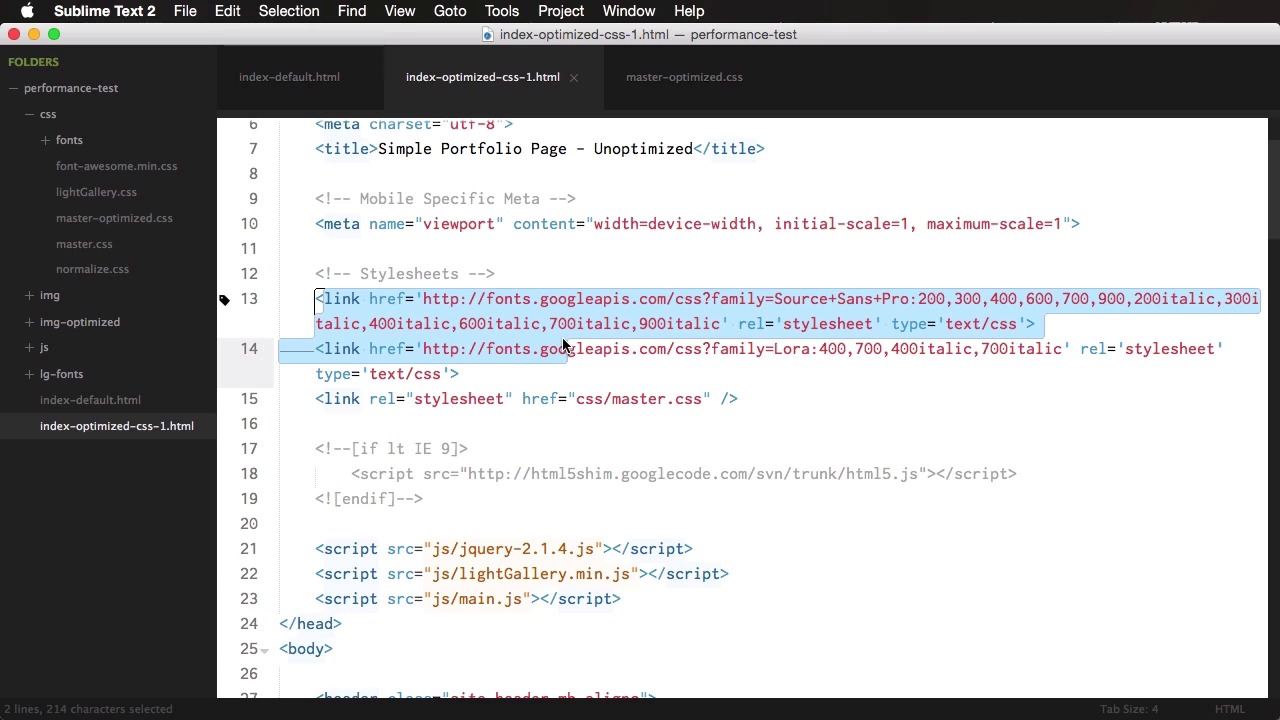
- Overview
- Transcript
4.3 Render Blocking CSS
CSS will delay your web page from being displayed as soon as it’s encountered. This happens because the browser needs to download it first, then read it. It cannot start rendering the page without having read everything first.
So, how can you prevent this? There are a few ways to do it. Let’s see what those are.
Related Links
1.About Website Performance
1.1Welcome00:34
1.2What Is Website Performance?03:42
2.Tools for Measuring Performance
2.1Overall vs. Perceived Performance02:32
2.2Google’s DevTools14:30
2.3Google’s PageSpeed Insights03:22
2.4YSlow and Pingdom Website Speed Test08:51
3.Overall Performance Optimization
3.1Server-Side Optimization05:06
3.2Reducing HTTP Requests03:56
3.3Image and Webfont Optimization07:37
3.4JavaScript and CSS Optimization03:31
3.5Moving Assets Externally03:23
4.Perceived Performance Optimization
4.1About Perceived Performance02:39
4.2Critical Rendering Path03:45
4.3Render Blocking CSS17:20
4.4Render Blocking JavaScript11:44
5.Platform Optimization
5.1Optimizing WordPress Websites02:27
6.Conclusion
6.1Final Words01:00
4.3 Render Blocking CSS
CSS will delay your web page from being rendered as soon as it can. And that's happening because the browser cannot start rendering content unless it downloads and parse, or reads, all of the CSS files. So, how can you prevent this from happening? There are a few ways. First of all, be careful how you reference your CSS files. You can do it in a number of different ways, but probably the worst method is by using the import command. CSS imports look something like this, and they'll usually be found near the top of your CSS files. And this is bad because it means an extra round trip to the server to get an additional CSS file. So, the browser downloads the original CSS, reads it, finds the import, and then makes another request to the server for the new file. So, two requests instead of one, which is not good. So, avoid loading CSS this way. If possible, inline it, if it's a small amount, or put it all in a single CSS file. Then, there's the question of conditional CSS, and that is CSS loaded only under certain conditions. For example, take this situation we have a main CSS file and then one for print. The problem is the browser needs to download both of these before it can render the page. And the print.css is useless at this point, so we got to take it out of the critical rendering path. How we do that is very simple. We make it a conditional CSS by adding a media rule like this. Since we've labeled this with media print, modern browsers know that the print file is not required to render the page, so it will still download it but in a non-blocking way. Another situation is this, browsers will understand that this CSS only applies when the page has a minimum width of 1200 pixels. Therefore, it won't download it before rendering if its not the case. Now I want to tell you about something called critical CSS. And this is something that helps tremendously with optimizing the critical rendering path. Critical CSS is basically CSS that only styles that initial view. So, only the content above the fold. A good practice for this is to inline that critical CSS directly in the HTML document. So you would take the critical CSS from the main CSS file, inline it and then the rest of the CSS will be loaded later. That way, the initial view can be styled right away. So, let's have a look at a before and after example. Here's the page that we're going to use for this exercise. It's a very simple page. It has some text, content, Some images that open in a lightbox and then scrolling down we see some icons and more text. So let's see how this performs. If we're going to load the network here, I reload the page. We can see that we have load time of 436 milliseconds, and we have 19 requests. With a total weight of 1 megabyte. Now if we're using PageSpeed Insights we get a score of 64 out of 100 on mobile and 75 on desktop. So there are a few things we could fix here, and we'll go over those. But first, let's actually see How this page loads in a film strip view on web page does not work. All right, so, on web page test our page loaded in almost three seconds. That is a lot. And it only starts rendering at 1.4 seconds, give or take. So, let's actually see a film strip view here. So, as you can see, it starts at about 1.5 seconds here. That's the first time it displays some content. And then it loads completely at around three seconds. Now this is not very good. Let's actually see how we can optimize this page so we can get a very Fast loading time. Let's actually look at the code here and see what we got. So we have one, two, three, four, five, six style sheets that are being loaded one is normalized, then I'm using font awesome for the icons. I'm using two Google fonts the lightGallery, which is for the images here, the light box, and then the main master.css file. Using three scripts here, and then it's simple HTML code, just using some images here and there, and the rest is pretty self explanatory. All right now, the very first thing we could do here, and I'm going to reduplicate this file and I'm going to call it index-optimized-css-1. Because, we're going to do this optimization in steps, so it's important that we know what we are doing in each step so we can compare results. So on this first result, what I'm gonna start with is actually optimize the images here because the images that I'm using are quite large. You can see around 2, 3 megabytes each one. And a really quick and easy way to do that is to use a tool called Tiny Jpeg. So, we would take all of these Including the ones in the thumb directory and we're going to bring them here. And then we're gonna save them in a folder called IMG optimized. So let's see what kind of gains we can get from this. So from these here, we have saved between 49 and 65% on average on these images. So, in total, about 10 megabytes. That is very, very good. And we'll do the same for the thumbs here. The result, these are our big nature images and these are the thumbs. So you can see they are very small in size. Now, what I'm going to do is replace this bit, so img, I'm going to target all of these and I'm going to use the new path which is img-optimized. Then we can actually merge almost all of these style sheets into a single one, so. We're going to take normalize, font-awesome and lightGallery and put them inside master.css. So, we're going to go ahead and duplicate our master.css file into master.optimized. And then we're going to grab the contents from normalize, I'm just gonna paste this in here, and the contents from font-awesome. And, I'm going to place them in here and of course you can go ahead and minify this if you want, and that's highly recommended. But I'm gonna skip this step, and then the CSS from the light gallery and we're gonna put this right here. All right, so, now what we have in our CSS file is normalize, fontawesome, and then the stuff from the light gallery CSS. And then of course our normal document styles. What we're going to do now is actually remove the references from these two and from this. So already we reduced the number of http requests by three. Now finally what I'm going to do here on the CSS on this step is to actually merge these two references, or these two requests for Google fonts, because what happens is you can actually copy this bit. And then you can use a pipe character here, and paste it in. So you can merge these two links into a single one. So now let's go ahead and upload this and compare it to our default and see what kind of gains we got there. All right so this is the new optimized page, and we do have a little bit of a difference here compared to the default one if we take a look in the header here. But that's actually caused by the fact that I forgot to load the optimized master.css here. All right, so now when we refresh, we get the good version. Now let's have a look at our page in PageSpeed Insights. And as you can see, we get a score of 69 on Mobile and 84 on Desktop, compared to 64 on Mobile, so let's do this side by side. So, 64 compared to 69 and 75 compared to 84. So, already just by doing a few simple things, we were able to increase our Google score here, which is very, very good. Now, let's do a visual comparison between our default and the optimized one. So, for the label, I'm gonna put Default there and second one is gonna be CSS Optimized 1. Paste the URL and start the test. All right, so the tests are done. Let's see, so the actual render time on our optimized starts a bit later, not by much, just 0.2 seconds, but as we move on, we can see that actual text, actual content, starts rendering much faster than the default. And actually, we finish rendering at 2.2 seconds, compared to 2.4 seconds. So, we do a performance increase there. Now, something that I actually forgot to do was remove the unnecessary font weights from Google fonts. So for example for Source Sans Pro, we're only using the 400 and 700 weights along with their italic counterparts. So, we're going to do this 400, 700 and then 400 italic and 700 italic, all right? And then for Laura we are using the exact same one. So 400, 700 and italic, all right? Great. So with this in mind let's actually do another test. All right, so the results of the second test are in and now we see a big difference. The default actually starts rendering at 1.2 seconds, while our optimized starts at 0.8 seconds and it finishes at 1.5 seconds compared to 2.3 seconds on the non-optimized. So huge difference there, as you can see, just by tweaking a few different things. Now, to speed up rendering time, we can do two more things. One of which is to remove the critical CSS, that is the CSS responsible for rendering the above full content and removing it from the master file and in lining it, and then asynchronously loading our CSS file. So lets do actually the first bit. For this, I'm actually going to duplicate this file. And, it's going to be optimized-css-2. And then from this, we're actually gonna remove the following, the body, the anchor tag, the headings, and then the container. The container paragraph. So, let's just get these out of here. And we're going to paste them right here. We're going to create a style tag, base them in, and then let's see what else. The images, we don't actually have any images above the fold here, so we're going to leave that. But, we will get the sight header, I'm gonna paste that in. And then, let's see, we have soome icons, we'll get the hr, because that might be shown on different screens. So we're gonna put the hr, and then finally we have two utility classes, align and mb. So, we're going to grab those as well. Now notice I'm not grabbing the entire CSS, that kind of defeats the point of inlining the critical CSS. I'm only getting the one that is responsible for rendering the above The full content. Now, if we're going to change the master-optimized-css, like I just did, and remove the critical CSS from that, there will be problems inside the css-1 file. So, what I did here instead was I created a master-non-critical.css. That is just like the master-optimized-css, minus the critical CSS that we've just inlined here. So, inside css-2, I'm actually going to like to master non critical. And css-1, goes to master-optimized, which has all the CSS Inside it. Now, let's do some tests with these two. All right, so the test results are in. Both pages start rendering pretty much at the same time, but content is styled a bit faster on our second page. And as you can see, they both finish pretty much at the same time. All right. Now, finally, let's move on and load our CSS file asynchronously. And for that, we're going to use a function written by the guys at Filament Group called loadCSS. You can find it on GitHub. And the link is in the lesson notes. Now, this is very easy to use. You simply go into the loadCSS.js file and you would copy its contents and then inline this script in the head of the document. So, here instead of linking this master-non-critical.css file like this, you would do it like this. So we have a script with a function loadCSS. And then at the very end we're calling that function and we're passing in our master-non-critical.css. So, let's actually compare these two and see if it makes any difference. All right, the test results are in. So our css-2 file, which loads CSS asynchronously starts loading or starts rendering first. And it can actually see the content here that's being loaded. And then it also finishes before our css-1. So it is an improvement. Now let's actually compare the Default with css-2 and see where we stand. All right, so our optimized page starts loading at 0.7 seconds, compared to 0.9. And it actually finishes at 2 seconds compared to 2.3. So, that is a really, really good progress. And even take a look at when actual contents start rendering so lets scroll to the right. So as you can see the entire content that's above the fold is finish rendering get a 1.8 seconds. Whereas on the default page its not even started. It only starts at 1.9, so very, very good progress. Now that's basically it for the CSS optimization. Now the other render blocking resource is represented by JavaScript. That's coming up next.


