
 Lessons: 9Length: 52 minutes
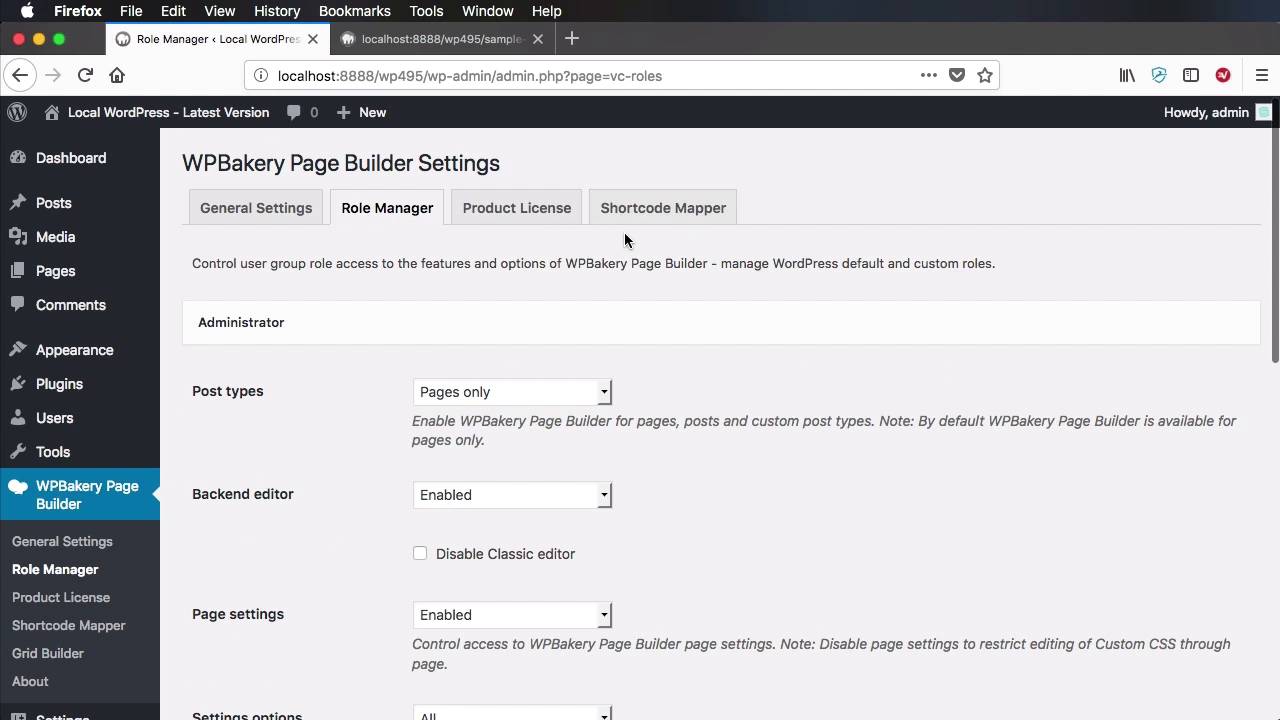
- Overview
- Transcript
2.8 Smaller Tweaks and Settings
Welcome to the final lesson of this course, where you’ll make some small tweaks to fine-tune WPBakery Page Builder for your theme. Thank you for following along with me through this course, and I hope you’re now confident enough to include WPBakery Page Builder in your own themes!
1.Introduction
1.1Welcome to the Course00:53
2.Working With WPBakery Page Builder as a Theme Developer
2.1Licensing03:04
2.2Loading WPBakery Page Builder With TGM Plugin Activation10:29
2.3Adding a New Element17:58
2.4Removing Existing Elements03:33
2.5Adding Parameters to Elements04:21
2.6Removing Existing Parameters From Elements03:38
2.7Adding Default Templates04:11
2.8Smaller Tweaks and Settings04:18
2.8 Smaller Tweaks and Settings
Welcome to the final lesson of this course where we'll make some small tweaks and changes just to further customize our Page Builder installation. So we'll start with this, we'll start with disabling the frontend editor. If you've noticed, if we go back to our pages we have two options here we have a backend editor which is the one that you see right here but we also have a frontend editor which currently looks like this. It's a bit more immersive you get a real time preview of the elements of how the page looks like and you can make edits right here without having to go back to the backend editor and making your changes there. But if for some reason, you do not want this functionality, you can disable it completely by using a function called VC Disable Frontend. So vc_disable_frontend, you call that, you save, you refresh, and now the option to edit in the frontend is gone. Personally I like the frontend editor I think it's better than the backend one, but it's a matter of personal preference. If you don't want that, the option is here for you, and you can get rid of it. What else? If we go back to WPBakery Page Builder Settings right here, you'll find two tabs called Design Options and Custom CSS. Now, if you're shipping this with your theme, you might not want the end-users to have access to these two tabs and to hide them it's really easy. You just use the function code vc_set_as_theme and that will get rid of those two tabs completely. The final tweak I wanna tell you about is for setting the default editor post types. So currently, if we go to the Role Manager, you can see that for Post types, we have only the pages selected, right, but if you want to select pages and posts and maybe some custom post types you can do that from the backend really easily. You would use the function vc_set_default_editor_post_types and we're gonna pass in an array here, so let's say that you want the editor to be available for pages but also for posts. But also maybe have a custom post type, so I'm gonna say custom_post, all right, of course you need to replace this with the actual ID of your custom post type. But now if we save, we go back, now we select custom, you will see that both of these are checked and if you had a custom post type that will also benefit from the Page Builder interface. Now this is a very nice way of simply preparing the Page Builder for your particular theme. You don't need to tell the end-users that have purchased your theme, you need to go into your old manager and check post in there, you can do it yourself from the backend and that way there is less headache for your end-users. And that was it really for the Page Builder plugin. I hope this course gave you an insight into what it takes to bundle this amazing plugin with your theme and what sort of customizations you can do to it. If you have any questions or comments, head over to the Envato forums and post there but until next time, I'm Adi Purdila, thank you for watching this course, take care.


