

- Overview
- Transcript
3.4 The Orbit Slider
In this lesson you'll learn about the Orbit slider, a carousel-type control. Let's begin.
Related Links
1.Introduction
1.1Welcome00:19
1.2What Is Foundation?08:09
1.3What's Changed Since Version 5?02:44
2.Working With Foundation
2.1Using Yeti Launch10:32
2.2Customizing Foundation03:51
3.Foundation's Awesome Components
3.1The Grid20:09
3.2The Navigation09:06
3.3The Containers13:05
3.4The Orbit Slider03:42
3.5Plugins13:24
3.6Libraries09:17
4.Conclusion
4.1Final words00:48
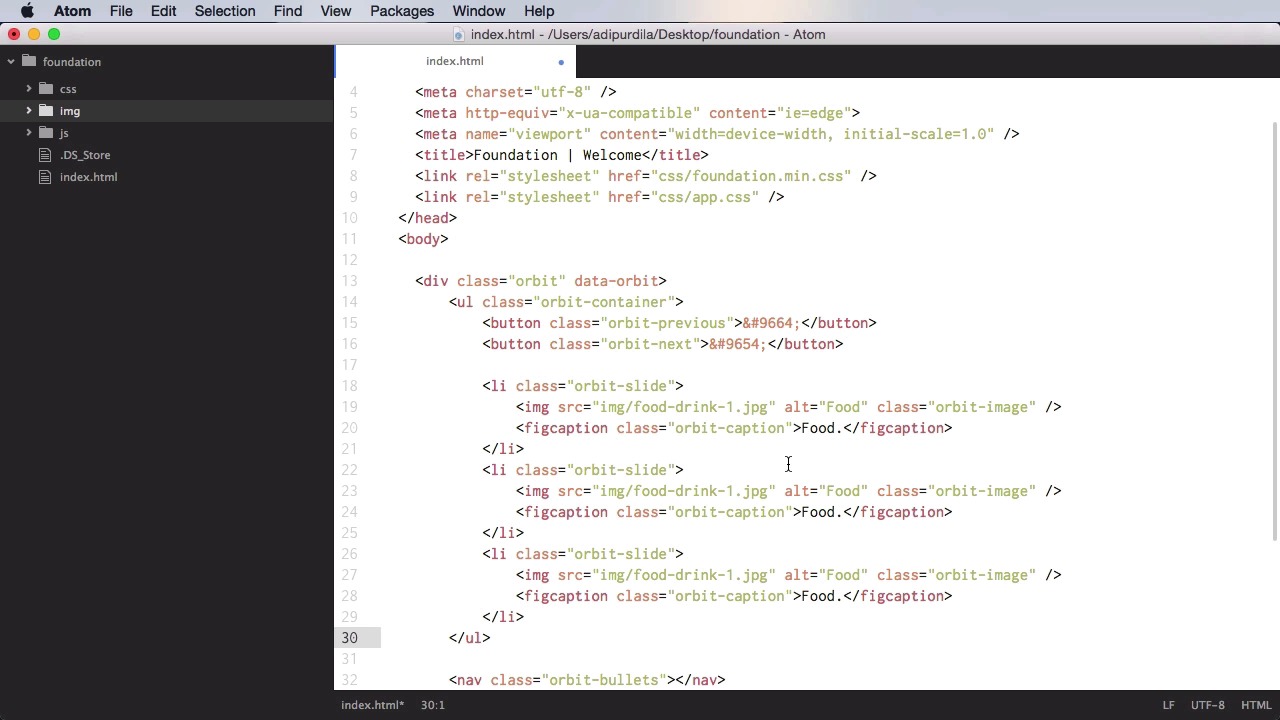
3.4 The Orbit Slider
In this lesson, you're going to learn about the orbit slider, which is a carousel type control. So let's begin. The markup for this is pretty simple. You start with a div or a container with the class of orbit. Then you set that up. Orbit. Inside you will do a ul with the class of orbit-container, and then you will do a nav with the class of orbit-bullets. This will be used for the little indicators or buttons or bubbles, however you wanna call them. That will allow you to switch or tuttle between each slide. Now inside the orbit container, you will do the next and previous buttons that will allow you to change between slides. So you will have a button with the class of orbit-previous. And for text we'll just do this bit that is just a left carrot basically, a left arrow. And then we're gonna have orbit-next. That's gonna have a slightly different code. Now for the actual slides, you'd use the classic orbit slide. So let's do a list item of the class of orbit-slide, and in here you can do an image. Let's start with this source of just point to img like this. And you can also give it a class of orbit-image. And under it you can also do a caption, figcaption, class is going to be orbit-caption and here we're just gonna say food. And then you can create some more slides. I have three images here, and then finally you can create the orbit bullets. Now for these you can use buttons, for example. We'll remove the type and name here. Instead we're gonna say data-slide=0 for the first one. Put two more, notice the number starts from zero here and since this is the first one add the class of is-active. And let's check it out. So there we have it. Slide two, slide three, and going back here, let's see. These buttons work, and you saw just how simple it was to create this slider here. Now, if you want, you can also add HTML to this. So you don't have to use images. For example, I can have another orbit slider in here and instead of images, well, we can use, for example, an h1. It's gonna say hello and then you can add a paragraph with some dummy text, right? So you can have, for example, two of these with HTML content. Yep, like this and one of them with an image. Now notice all of the slides are, or have the height of the highest slide. So if I were to remove this image entirely, the slides would resize accordingly. And that's how you use the slider. That's it for the orbit slider. Now, another cool feature of Foundation is represented by plugins. You'll learn about those in the next lesson.


