

- Overview
- Transcript
2.4 Adding Products to Our Shopify Store
Welcome back to the course. In this lesson, we’ll take care of the most time-consuming part of creating an online store: adding products. As this is a just a demo website, we’ll only be adding a handful of products, but this will give you a good idea of the process. Let’s begin.
Related Links
1.Introduction
1.1Welcome to the Course00:57
2.Building the Store
2.1A Bit of Planning03:36
2.2Creating the Store01:54
2.3Creating Collections05:45
2.4Adding Products to Our Shopify Store13:03
2.5Adding Pages03:52
2.6Installing a New Shopify Theme04:07
3.Customizing the Store
3.1Homepage18:11
3.2Collection and Product Page03:49
3.3About and Contact Page05:18
2.4 Adding Products to Our Shopify Store
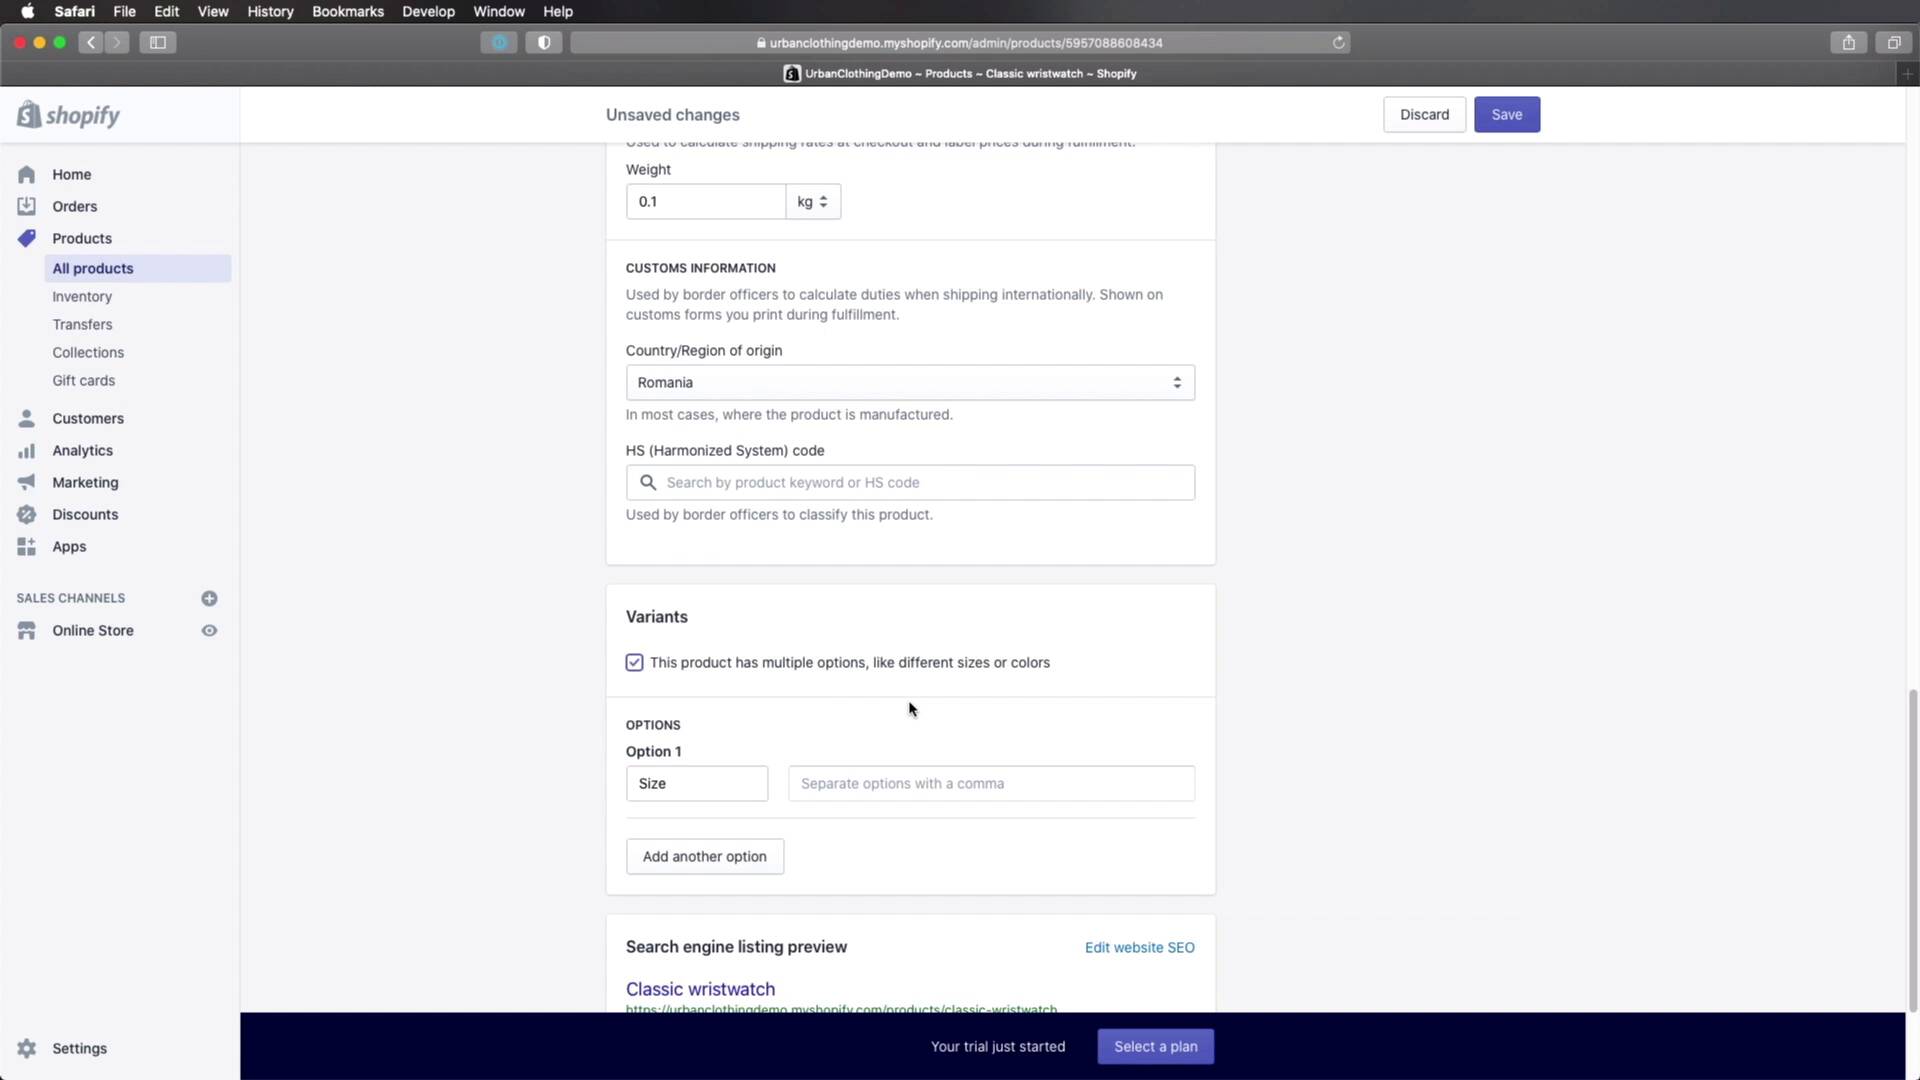
Welcome back to the course. In this lesson, we'll take care of the most time consuming part of creating an online store, adding products. Now because this is a demo store, we'll only be adding a handful of them. But this should give you a really good idea of the process behind it, so let's begin. To add products, you need to go to Products here in the sidebar, and click Add Product. Now to get started, I'm gonna open up my product images that I showed you earlier. And I'm gonna start with the very first ones, the Accessories. So for each, I'm gonna open up the description. Okay, let me actually minimize this, and I'm gonna have my two images ready to go. So then, the first one is a Classic wristwatch. Let's copy this description. And this is actually a rich text editor, meaning you can use Bold text, Italic, Underline. You can choose various presets for a selected piece of text. You can add headings, paragraphs and so on, lists, and it can also add tables. And we're gonna do that to represent this content right here. So, I'm gonna click this, Insert table, and I'm gonna click again and I'm gonna say Insert column after. So we're basically gonna create a two column layout. And then, I'm simply gonna copy the values from here, and I'm gonna paste them here. So the first is Case Thickness, 8 millimeters. And with the cursor still inside a row, you can actually click this button again and you can say Insert row above or below. So, let's insert another row. And let's see how many we have, how many rows, one, two, three, four, five. So let's insert three more. Okay, now let's copy the rest of the values. All right, so once we do that, we can go ahead and select this piece of text and we're gonna use Bold on them. You can also press Ctrl or Cmd+B to turn these into bold. All right, so that's our description. Now, for the media, we're gonna, Load these two images. Just click and drag or you can click the Upload or the Add media button and that's gonna upload the images. You can also add a media from a URL and you can also embed YouTube videos, which is pretty cool. Next, you're gonna set the price. And actually before we do that, we need to set the proper currency that we'll be using for our stores. So let's go ahead and save this product as it is. And then we'll go to Settings. Let's open this in a new tab, General. And then scroll all the way down until we find Store currency. And in here just select the currency that you'll be using. In my case, I'm just gonna make it easy and select US dollar or USD, so Save. And now we can close this. And we can come back to our product, we can do a refresh. And now you'll see that the price, under Price, the currency changed from RON, which was the currency in Romania to USD. And then we can go ahead, and next we need to select whether or not we're gonna be charging tax on this product when we ship it. And yes we will, it's a physical product. And then, under Inventory, we can set up the SKUs, the Barcodes, basically ways to keep track of how many items we have in our inventory. For this example, I'm gonna be adding a SKU or Stock Keeping Unit. This is basically an identifier that's gonna let you know what this product is all about. So I'm gonna say ACC, which is for accessory and then a dash. And then WW which is for a wristwatch and then another dash and a C, this can be for a classic, for example. How you do your SKUs is really up to you. This is one way of doing it, but you can also use numbers. You can use lots and lots of different methods. Track quantity, sure. We can check that to be able to see how many items we have left. How many items do we have available right now? Let's say that we have 10 items, and then under Shipping this is a physical product, yes. How much does it weigh? Well, let's say 0.1 kilograms, which is 100 grams. Then under Customs Information, you need to set up the Country of origin, so let's say Romania. And then you can also specify an HS code or a Harmonized System code. This is an international code that's used by border officers to classify a specific product. So you can search this on Google and you can find the various codes for various products, and you can enter them right here. Now does this product have multiple options, like different sizes or colors? Well, if we take a look at the description here, we can see that yes, we actually do have a couple of variants. So let's go ahead and add those. We have a variant for dial, two sizes and a variant for the strap length, two sizes here as well. So, I'm gonna check this box. Option 1 will be for Dial. And here you would enter your options, 36 and 40 millimeters. So 36 millimeters, we can tab 40 millimeters, and we can tab. Let's add another option. This is for the Strap length. So let's go ahead and separate those options as well. 215, 235. Oops, I forgot the millimeters. Cool, and those are our options. Now, here's the cool thing about this. When I added these variants, Shopify automatically created different SKUs for my product. As you can see, we have a SKU for the variant with 36 millimeter dial, 215 strap length, 36 millimeter/235, 40/215, 40/235. So it basically created a unique identifier for every variant of this product, which is great. Now, I can go ahead and leave the SKUs as they are or I can change them to match my own preference. In my case, I think it's much better to change the SKU to reflect the variant properties, so in here I can say 36-215. Here, I can say 36-235, Here I can say, 40-215 and here I can say 40-235, all right. So now I have these SKUs for my variants. Now what are these useful for? For example, these are also displayed sometimes on the store as product codes. So if a customer calls you and asks you, hey, do you have the following product in stock, or maybe he asks the following information and he gives you the product code. Well, right away, because you're familiar with your products, you can say that, okay, so you're talking about the classic wristwatch with the 36 millimeter dial and the 250 millimeter strap length. All right, so you immediately know which product is the client referring to. All right, so, once everything is done here, you can move on to the other side, where under Organization you can set up various product types. So here, if I don't have any product type defined, I can create one. And let's say this is a watch, so let's go ahead and add that as a product type, who's the vendor? Well, we can add Urban Clothing. To which Collection are we adding this to? Let's add it to Accessories. We can also set up tags for this product, if we want. In my case, I think this is enough information, so I'm gonna click Save. All right, so this is how you can add a product in Shopify. Now what I'm gonna do is add the rest of the products in exactly the same way. But I'm gonna fast forward through the entire process, because as I was saying in the introduction, this is probably the most time consuming part of creating an online store. So I will see you after I add the rest of the products. And I've now finished adding all of the products. If we go back to the main product page, we can see all of them in this list here. And for each, we can see the Inventory, the Type and also the Vendor. And we can filter products by using this form on the top. As you saw, once you have a system for adding the products, it's actually quite easy and it doesn't take a long time. But it's essential that you have all of the assets, all of the images, all of the product information ready beforehand. So you can just blaze through adding these products. All right, so with the products in, the next step is to define any additional pages we might want in our online store. We'll do that in the next lesson, so I'll see you there.


