
 Lessons: 11Length: 1.3 hours
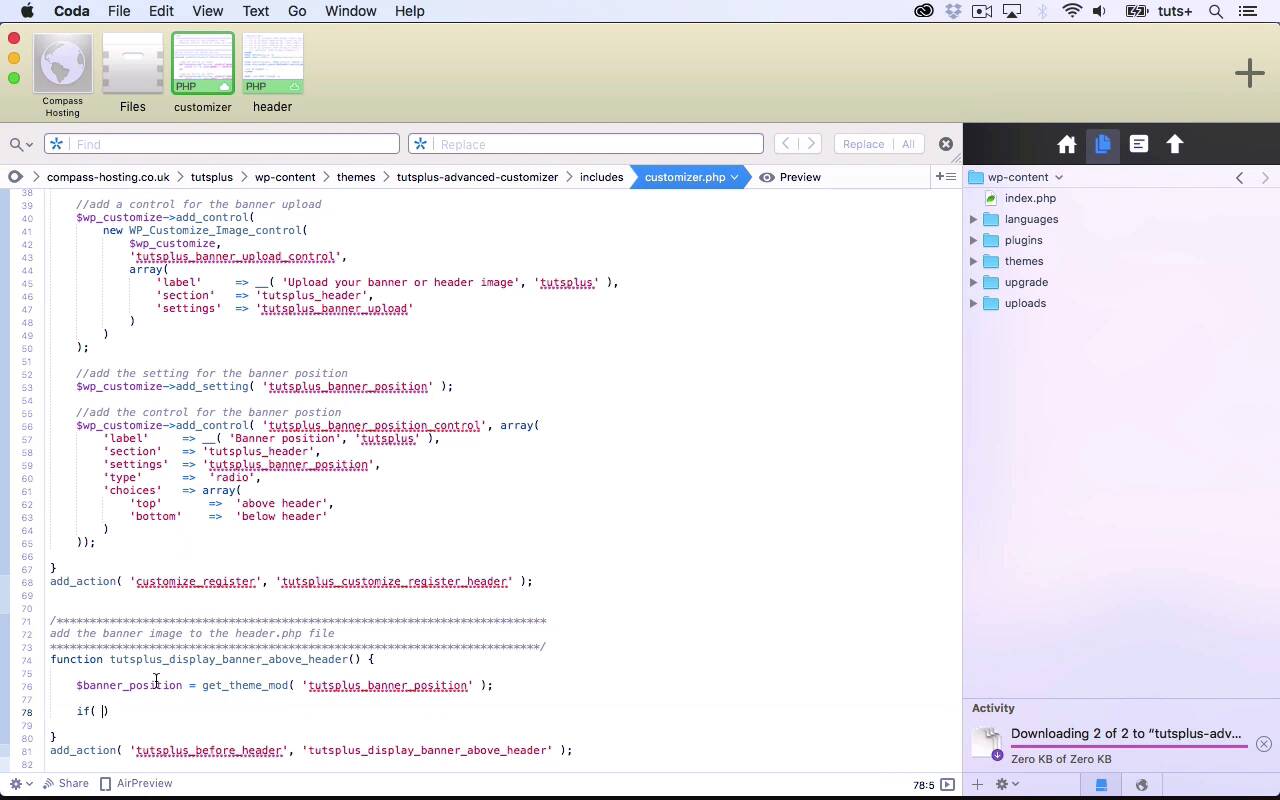
- Overview
- Transcript
2.2 Displaying Images in the Theme
In this lesson, we'll display the header image and allow the user to define where it's positioned.
Related Links
1.Introduction
1.1Introduction00:48
1.2Creating a File for Customizer Code and Setting Up Sections08:04
2.Header Design
2.1Adding Settings and Controls for Image Upload11:29
2.2Displaying Images in the Theme08:51
3.Customizing Layout
3.1Adding Controls for Layout06:23
3.2Adding Classes to Your Page for Layout Styling06:38
3.3Styling the Layout CSS Classes06:53
4.Customizing the Color Scheme
4.1Creating a Control and Settings for Color Schemes04:10
4.2Organizing the CSS11:57
4.3Adding Color Styles to the Theme Stylesheet10:14
5.Conclusion
5.1Conclusion02:55
2.2 Displaying Images in the Theme
Hello and welcome back to this Tuts plus course on the WordPress customizer. In this part the course, we're going to add our banner image to the theme because so far we have controls and settings in the customize it, to upload it, and to set its position. But they don't actually do anything yet because we need to add something to the header file. Now I'm working within a theme. I've added the customizer file as an include file in my theme and I'm gonna be editing the header file within my theme. Don't forget, if you're using a plugin for your customizer code, which is perfectly valid, you'll need to make sure if you're using a third party theme, that you create a child theme for that theme. And don't directly edit a third party theme. So having given you that warning, let's go over to the customizer. So here's my customizer code. Now I'm going to hook in this content to a hook in my header. And I need to add that hook to my header file. So I'm gonna add the hook before this header element here. And I use the do action function to do that. And I'm going to give my action hook a unique name using my prefix. So that's tutsplus_before_header. So if I want to add any content here, I simply hook it to the tutsplus_before_header hook. And I'm also going to add a tutsplus_after_header hook. And again, I'll add it after this element here, this header element. So I'm gonna copy that. Tidy things up a little bit, and then change this before to after. And then I'll save my header file. Now that still doesn't do anything, but it just gives me the code that I need to hook this in. So let's add some more code here. So I'm gonna copy this commented out text and edit it. So I'm gonna start by writing a function that is hooked to my before head hook. And I'm gonna hook that to my hook. So my first parameter will be this header name here. And my second parameter will be the name of my function. So the first thing I want to do is identify what the user has chosen in these radio buttons. And I'll do that by setting a variable and using the get_theme_mod function which fetches this theme modification, this setting. Now this value here, this parameter here, is the setting for the banner position. So it's this here. So where I've added the setting, this goes in the get_theme_mod function. And that's because that is the setting that is saved the database. So that is data, and this is display. This is the control that allows people to interact with that data. So I've now got my banner position variable, and I want to check what the value of that banner position is. So if banner position is equal to top, which is this value here and this is what's saved in the database as the value for this field. So this will be a field in the database, that's for stand up position in the WP options table, and this would be it's value top or bottom. And if the value is top, I want to output this above the header. Making sure I'm writing in HTML here and not in PHP. So the source is, again, using the get_theme_mod. So I'm going to add this as another variable up here. And this time, it's this tutsplus_banner_upload. So I've got two variables, and both of those are values from the database. So my image source here, So the source of my image here is the location of that image and that will be this tutsplus_banner_upload value. So now I'll close my div. I'll open page pay up again. And that is my function. So I'd hope that's that action. And now, if the banner position is top, it will display above the header. So let's save that and take a look in the site. So at the moment, it's showing up whether or not I do above header or below header. Now, the reason it's doing this, is because I need this to be a double equals here. I need that to be exactly that value. So if I change that and save it, and then I go below header it's not there, above header it is. So now I want to duplicate something very similar below the header so I'm gonna copy that. And then edit it. And then I want my banner position to be bottom. And other than that, it's exactly the same. Okay, that's my customizer, and I'll check below the header and there it is. So that's how you add your header file to your theme. And the reason I use the hook was so that I could set up these variables and use conditional functions in order to display it in the correct place depending on what the setting was here for this radio button. And that means I can do that all in the customizer and hook it to that hook, rather than adding a whole load of code to my header file, which wouldn't be a very tidy way of doing things. So that's the banner image setup. In the next part of the course, we'll move on to looking at layout. And we'll create a setting and control for the layout of the site. See you next time and thanks for watching.


