
 Lessons: 11Length: 1.3 hours
- Overview
- Transcript
4.2 Organizing the CSS
In this lesson, I'll show you how to organise the CSS in your stylesheet to make it easier to create the color schemes.
Related Links
1.Introduction
1.1Introduction00:48
1.2Creating a File for Customizer Code and Setting Up Sections08:04
2.Header Design
2.1Adding Settings and Controls for Image Upload11:29
2.2Displaying Images in the Theme08:51
3.Customizing Layout
3.1Adding Controls for Layout06:23
3.2Adding Classes to Your Page for Layout Styling06:38
3.3Styling the Layout CSS Classes06:53
4.Customizing the Color Scheme
4.1Creating a Control and Settings for Color Schemes04:10
4.2Organizing the CSS11:57
4.3Adding Color Styles to the Theme Stylesheet10:14
5.Conclusion
5.1Conclusion02:55
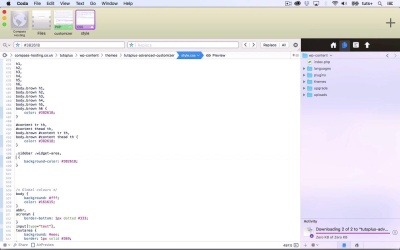
4.2 Organizing the CSS
Hello and welcome back to this Tuts+ course on the WordPress Customizer. In this part of the course, I'm gonna add some CSS. So if you remember, we added the color scheme controls in the previous part of the course. And that added class to the body element. So what we need to do is target some additional elements in order to make them either brown, blue, green or monochrome. Now at the moment, everything's brown because that's what's set up in the theme. So here I've got my color scheme. And these are the default colors, which are these browns. So I'm gonna create four versions of this, all depending on the body element and the class that it's got. So let's take a look at the style sheet and see where we've got these. So you can see we've got them on links. We've also got them on the site title and the site description. And again, those are links on the menu, on the, keep going down, headings, and on widget areas and the footer. So what I'm gonna do is separate out the color related CSS for these items. So for example here, the body and the color and the background of the body, they won't change, cuz this text color, I'm not going to change. So I'm going to add in here, All color schemes for that. So we will have links, borders. I'm gonna keep that the same as well. So links, headings, the footer, and links on hover will change. So the next thing to do is to separate out colors from the color schemes. So I'm going to isolate each of the color schemes, or each of the colors in the color scheme. So first, Let's have a look, we've got headings and links here. So we've got brown, blue, green, and mono. So I'm gonna find all of the examples of this color in my style sheet. So here we've got first a:link and a:visited, so I'll copy that. I'm gonna take away the text declaration because we don't need that to be repeated. So here I've got the default, and then I've also got body.brown a:link, body.brown a:visited. So that will be the color for links in their natural state and their visited state. So let's find the next one. So we've got the site description. Again, I'll copy that. And I'm gonna take away the text declaration. So in this one, I'll take away the color. And this time, I'm gonna copy. So that's the site title. Let's find the next instance, menu.main border. I'm gonna cut that because there is nothing else in there that needs to be used. There's the menu.main. And then we've got menu.main a. I'm gonna tidy this up a little bit so I'm not repeating things again and again. But for now, I'm just pasting it all up here. So move the menu, and then we got headings, so I can cut those. And then we've got tables. Keep it consistent. Then we've got the sidebar widget-area's background color. So I'm gonna copy that because I only want that bit. So I'll take care of everything else. And then go back down to that widget-area and take out the background color styling there. And that's everything for that color. So I've now taken away all instances of that color and put them in here, up here, where has it gone? In my, down [LAUGH] I'm trying to find it, here in my color scheme. So I'm now gonna tidy things up a bit, cuz you can see I've got color, color, color. So I'm gonna take that. And take this. Okay, and just go through and check all the commas there, because it can be quite easy when you copy and paste when you're doing CSS to miss out some commas. I haven't done that, that looks okay. And I'll take that. And we need the h1s and the h6s, etc. There's more, you see, there's a lot of things that are this color. And then those two remaining elements have got either border or background color. So let's just save that, and I'll go back to my site and check that it's working okay. So I've refreshed that and it's still working with all my brown elements. I'm gonna add some widgets so that I can see that the widget areas are working. So that's all working fine. I haven't got any posts set up, so let's change those. Right, so I quickly gone into my post admin and I had a load of posts in the trash, which I've taken out of the trash. So now you can see that my colors are all still working with this dark brown. Now I need to do this through the same process with some of the other colors. So let's open up the style sheet. So now I want color 2. So I'm gonna copy that and then paste it down here. And for color 2, let's take that out. We want that color reference. This is gonna be for links on hover. No, it's not, sorry, it's gonna be for the footer background. We don't need the color. Take that out, and check for any more instances of that color. And that's it, so we'll take that out. So that's that. And then the next one is color 3, which is links on hover. Which in our brown color scheme is this mid gray. Which is this one, so let's find instances of this. And that's a:active and a:hover, so we will move that. And then again we need to duplicate it for the brown, the body.brown. And then we'll double check to see if it's there again. And yes, it is because it's on the site title, so. And again, it's on hover for the menu, so we'll copy all of this, or rather, we'll cut it, cuz all there is is color there. So it's menu.main ul ul a. That's the first one. See if we can find any more instances of that, and that's it. So that's all there is for that color there. I can tidy this up, get rid of that and that. So remember, all of these elements are all various types of links. Now, what I'm gonna do just to tidy things up a little bit more here, Is move all the body.brown ones down. So they're separate from the ones that aren't body.brown. And I'll go up and I'll do the same thing here. So that's all the code for the default or the brown state setup in that. So what we can do for the other three is duplicate what we've got there. Obviously, we only need to duplicate the bits with the body.brown and we change that to body.blue, body.green, and whatever. So that's what we'll be doing in the next part of the course. See you next time, and thanks for watching.


