
 Lessons: 11Length: 1.3 hours
- Overview
- Transcript
3.3 Styling the Layout CSS Classes
In this lesson, you'll style the CSS classes from the Customizer in your theme's stylesheet.
Related Links
1.Introduction
1.1Introduction00:48
1.2Creating a File for Customizer Code and Setting Up Sections08:04
2.Header Design
2.1Adding Settings and Controls for Image Upload11:29
2.2Displaying Images in the Theme08:51
3.Customizing Layout
3.1Adding Controls for Layout06:23
3.2Adding Classes to Your Page for Layout Styling06:38
3.3Styling the Layout CSS Classes06:53
4.Customizing the Color Scheme
4.1Creating a Control and Settings for Color Schemes04:10
4.2Organizing the CSS11:57
4.3Adding Color Styles to the Theme Stylesheet10:14
5.Conclusion
5.1Conclusion02:55
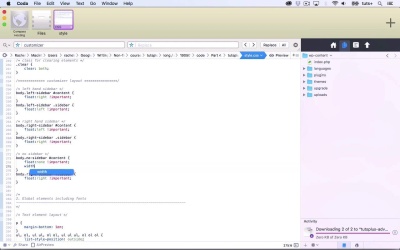
3.3 Styling the Layout CSS Classes
Hello, and welcome back to this Tuts+ course on the WordPress Customizer. In this part of the course, we're going to continue working with our layout settings. So we've got these radio buttons where the user can select where the sidebar should be or whether there should be a sidebar at all. We've added a relevant class to the body element of our page and now we need to style it. So we need to target that body class plus what element is relating to the content or sidebar. So let's take a look again at the code. So here we have, let's find it, so we've got a div class="main" and then a div with the ID of content and then a side with a class of sidebar. Now right here, because it's gone narrow, it's using a media query and it's styling it at 100% below. But if I move this across a bit, here we are, it's over here on the right, which is the default, and we want to change that so that it can be on the left or be no sidebar. So let's add some styling that targets those classes and IDs. So here's my style sheet for my theme, and I'm gonna add a section for the customizer. I've already added a comment here so I can see what I'm doing. And within that I'm going to add some comments remembering that I'm commenting in CSS and not PHP here. So first I'm going to add styling for the left hand sidebar. So that's my body.left-sidebar class. And I know it's not always good practice to include the name of the element, but I want to include that here. Because you never know my theme might have left sidebar or right sidebar or no sidebar somewhere else. So I want to make 100% sure that I'm targeting the correct element. And then I want to target content. And I want that to flow to the right. And I'm going to make it important so it overrides any styling in my theme. And then I'm going to add, I'm going to copy that and paste it. And I'm going to target the sidebar element, which is a class not an ID, and I want to float that on the left. So now if my user selects left hand sidebar, they'll get the sidebar on the left. Now, I'm gonna repeat that with the right hand sidebar. Now, it may be the default to have the sidebar on the right but I'm gonna add the styling for this just in case. So I'm gonna copy that and change that to right. And then switch these all around from left to right. Okay, and then finally, I've got my no sidebar. And then I want the width to be 100% for the content, and I want my no-sidebar.sidebar to not display at all. Display: none;. And again, I'll make that important. Now, I could alternatively use something in PHP to not display this side bar if that setting is no side bar. But I'm gonna stick to CSS here for the sake of simplicity so I've got it all in one place. Now, you may remember that when we were looking at this and I brought it in, my media queries sent the sidebar below. And I want to make sure that still happens whether we've got sidebar or no sidebar. So I'm gonna add a media query and I'm gonna base that on the size I've got for my media queries in my theme. If I go right down, here's my media query. So I'm going to, instead of using max width 480, I'm going to use min width, let's find my customizer code again, I'm going to use min width, 481 pixels. So, this code here will only relate if the screen is 481 pixels or wider. So that won't override anything within my media queries below. So I'll save that. So now, when I go back to the customizer and I select no sidebar, that's working. I go to back to sidebar on the right, it's defaulting. And sidebar on the left isn't working. So let's take a look at the code. So we got body, sidebar-left. Hang on a moment, I put left-sidebar. So let's copy that. And save that. So now, when I go back to the customizer in my site and I select side bar on the left, the side bar will move over to the left. If I select no side bar, there would be no side bar at all. And if I select side bar on the right, it goes back to the right hand side. So that's now got the layout setup in the customizer. In the next part of the course, we'll move on to working on a color scheme in the customizer. See you next time and thanks for watching.


