
 Lessons: 12Length: 2.3 hours
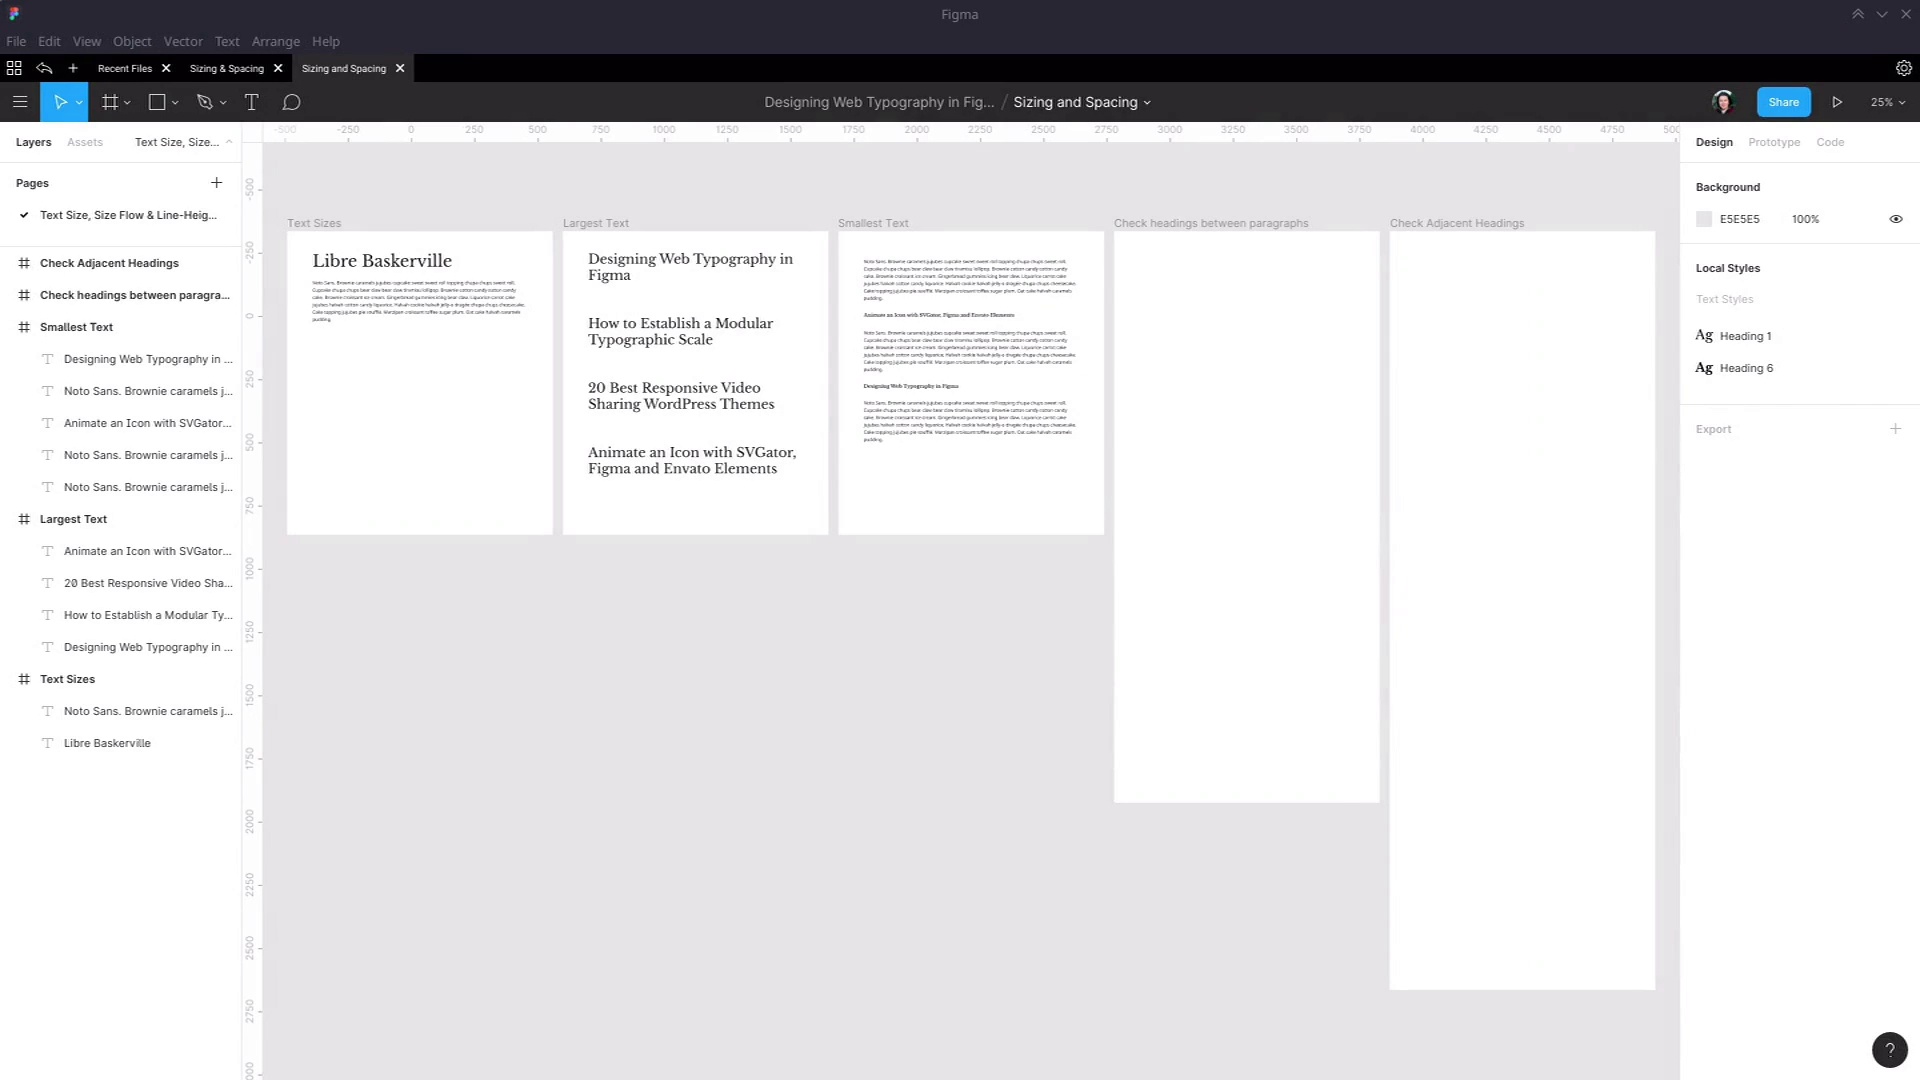

- Overview
- Transcript
3.2 Create a Size Flow
With our smallest and largest text sizes established, we’ll now create a smooth and natural flow from one end of the spectrum to the other, ensuring elements can all be distinguished from each other.
1.Introduction
1.1Web Typography Basics in Figma00:44
2.Font Selection
2.1Font Classifications16:30
2.2Font Combining16:47
2.3Font Stacks15:42
3.Text Size and Size Flow
3.1Establish the Smallest and Largest Text13:31
3.2Create a Size Flow14:42
4.Line-Height and Margins
4.1Line-Height and Rough Spacing08:04
4.2Planning Element Margins27:30
5.Additional Spacing
5.1Indentation, Letter Spacing, and Drop Caps08:33
5.2Style Modifications: White Space08:02
5.3Style Modifications: Site Layout05:26
6.Conclusion
6.1Wrapping Up01:56
3.2 Create a Size Flow
Hey, welcome back to Web Typography Basics in Figma. In the last lesson, we set up the two ends of our font size spectrum for our typographic design. We have our larger size here, with our Heading 1 style. And we have our smallest size here with our Heading 6 size and our regular text size. So now we need to scale all of the headings between Heading 1 and Heading 6. So first, we're just gonna create a couple of text styles. So we need one for our regular text. We're actually gonna use this first frame here as a place to keep track of each of our individual styles. So this one, we need to name Default Text. And we're gonna apply it to these three paragraphs. So actually hold down Ctrl to directly select an item on one of these canvases. And then continue holding Ctrl, and then also hold Shift to select multiple elements at once. So now we'll apply Default Text to those as well. Over here, we're gonna set up a representation of each of our six headings. So let's just move this down for now. So we're gonna need Heading 1, Heading 2, and then continue on until we have all the way through 6. And we already have our Heading 1 and 6 styles. So let's apply those here, Heading 1 and Heading 6. And then we'll set up a style for each one of these. So we're going to need, actually, let's just shrink all of these down a little bit, holding down Alt and sliding down. Get that about in the middle, so it's easier to scale up and down for the different sizes in a little bit. All right, so let's create another style for this one, Heading 2. And then go through and create a style also for Heading 3, 4, and 5. Okay, so now we've created a style for each one of these headings. And if you do select everything so you can look at the local styles, you can now sort these into a more logical order. You just need to drag and drop. So I'll bring the default text all the way to the bottom, and then Heading 6, down to the second last spot. That just helps, because then when you want to select a style, it'll put them in a logical order from the selection list here. And now we need a realistic environment in which to test the different sizes of the headings as we're setting them up. You recall that I said earlier that one of the things you need to make sure you think about is how each one of your heading sizes works when it's directly above just a normal paragraph of text. And also when it's directly above an adjacent-sized heading. So what we're gonna do is set up two frames' worth of text, to test both of those things. So with this frame here, we're gonna check the headings, how they look when they're between paragraphs. So we're gonna grab, we'll get our longest Heading 1 element that we've got down here. And we're gonna drop it into this frame and put it up the top. Place it at about Y 50 position. Then we need a paragraph of text. So we'll copy that, drop that in here. Now we need an h2 element and another paragraph of text. So we'll grab this, duplicate it. Hold Shift to lock this onto the vertical axis, and then drag to bring it down. Then apply the h2 style, or Heading 2 rather, to this text. And then you can adjust a little. And we're gonna repeat the same thing for each one of our headings. The heading, then a paragraph, heading, paragraph, heading, paragraph, all the way down to h6. So pause the video, go ahead and set that up now, and then we'll pick it up again. Okay, this is what you should have when you're done. I've got Heading 1, 2, 3, 4, 5, and 6, with paragraphs in between. And the other thing that we're gonna need to make sure that we're monitoring while we choose our font sizes is that adjacent heading stacking that I was telling you about. So for this, what we're gonna need is the Heading 1 and 2 elements. So we're gonna copy those and paste them into this frame. And then holding down Shift, we'll move up this h2 element below this h1. So as we're tweaking the sizes, we can make sure that these look okay together. Grab another paragraph, paste that in. And then we wanna to do the same thing for Heading 2, And Heading 3. And then we place another paragraph. So once again, repeat that process until you have, all the way down at the bottom, a Heading 5 on top of a Heading 6, and then a paragraph. Okay, and when you're done, this is what you should have. And actually, we're just gonna make one quick change. Normally, the rhythm that you see in the writing in an article where you have a heading and a subheading is that the subheading will be considerably shorter than the main heading. So we're actually gonna change the text we're using in these subheadings. And I'm gonna change it to our shortest heading here. If you wanna avoid carrying over the style that's applied to that, then you can just paste it into a text document, and then recopy and paste it. So I'm just going to, Quickly edit each of these subheadings. Now, that's made more space in between the elements, but that's fine. Because we're gonna be adjusting these text sizes, and you're probably gonna need to reposition things anyway. All right, now let's start adjusting our text styles over here, so that we get to the point where each one of our headings looks right in each of our test environments. Now, you might think that you would start from the top with your Heading 2, 3, the bigger text elements. But it's actually easier to start at the bottom. The reason is, the smaller headings are going to need to be closer together in size than the larger headings. The way that a Heading 1 and Heading 2 tag are typically used, they need to be more distinct from one another than, say, a Heading 5 and a Heading 6. You've only got so many pixel sizes in between your smallest and largest text. And if you wanna allow for there to be good distinction between your Heading 1 and 2 and 3 elements, then you're gonna have to sacrifice a little bit of the space in between your heading 6, 5, and 4 elements. So we are gonna start here, with our Heading 5 element. Now, I mentioned earlier it can help you to keep your smaller sized headings distinct from your larger sized headings, if you bold the smaller ones. So we are going to bold the Heading 5 text. I'm going in and editing our Heading 5 style, setting that to bold. And now what we're gonna do is take it all the way down to the same size that we're using on our Heading 6 tag. That's 19. And now, basically, what we're gonna do is see what is the minimum amount of size that we can add to this, and still have that Heading 5 be distinct enough from the Heading 6 tag. So let's go in and edit our Heading 5 tag. And we're just gonna start gradually dragging this up. And that is actually all we're gonna do. We're just gonna add 2 points to it, from 19 to 21, and that's gonna be enough. So let's go to 100% size by hitting Shift+0. Now you can see that when we put these elements together, there is just enough distinction. These elements are still fairly close, but that is gonna maintain its readability. You finish reading this paragraph, then you hit this next section. And you see a couple of different subsections using that h6 element. That is gonna read just fine. And then over here, let's check on how this looks with our regular text. And actually, let's make this longer. I'm just gonna add a couple of extra words onto the end of this heading, so we can make sure we're seeing how the size looks on multiple lines. And you'll actually notice that these lines are too cramped up. But we're gonna cover line height a little bit later. For now, we're just gonna focus on text size. I'll do the same thing with this heading. Okay, so both of those text sizes look really good against the default text. In both cases, it's really clear that this is not normal text, this is a heading. So you're not getting any of that confusion that you can have if the smaller headings are too similar to the regular text. All right, so next up, we've got our h4 text. So let's move this down here, and we'll start working on our h4 text. We're gonna keep the h4 text bold as well, just like our previous text. Now we're gonna do the same thing again. We're gonna drop this down to 21. And we're gonna see what the minimum number of pixels we can add is to this size and still have it be distinct. So we're gonna drag that size up again. And this time, we're just gonna take it to 24. That's it. There can be pretty small differences between these smaller heading sizes, and that's perfectly fine. Now we'll check on it over here. This is our h4 element. Let's add a couple of extra words to that one too. Let's move that up. And sure enough, that is also looking totally fine in between the two paragraphs. So that's all good. At this point, now is when I'm gonna go up to the top end again. So we've got those bottom three headings crunched down pretty much as close as they can possibly go together. And now we're kind of almost gonna evenly split the rest of the space that we have in our spectrum. Let's move this down out of the way, give this some space. All right, so now let's figure out what size we can work with for our Heading 2. Now, to be honest, this is already pretty close to the mark. We kinda want to give the feeling that if you were reading this out loud, you'd read the heading with a loud voice, and then the subheading would be read in a softer voice, as an add-on. So this is almost right, it's just a little bit too large. We wanna make sure it doesn't steal the thunder of the main headline. So we're just gonna reduce that down by a couple of points. Let's bring this one down to 40. So just as a reminder, our main heading is 52 and our Heading 2 is at 40. And I'm gonna leave this in regular font weight. We're not going to bold this. Then we'll bring it up, have a look at this next to the paragraph. That's all looking very good. And here's our Heading 2 in between these paragraphs, also looking very good. So that's all set to go. Now we only have the Heading 3 element left, and then we're ready. So for the Heading 3 element, we pretty much want to put it right in the middle of what we've arrived at for our Heading 2 element and our Heading 4 element. So let's jump in here and edit. And we'll just start dragging down until it looks right. And I think we're gonna be good at around 32. And I just sort of left that one word hanging on the end there. So let's just grab a couple more words to put in, So we can see how it looks with both of those lines. And that is looking just right. Yeah, when you do have that switch from regular font weight to bold font weight, that's when it can get a little tricky. So let's just check and make sure we have the look that we want, and we have these two elements stacked close together. And by the way, I've left a bunch of extra space in this frame. Because a little bit later on, we're gonna be having two paragraphs in between each of our sets of headings here. So that's why you'll see me moving that stuff around a bit. And because this heading is bold, if you have it too large in comparison to this heading, it's gonna take some of the attention. So you do have to have a pretty significant difference in between these two sizes. Actually, let's just add that text on the end there too, to get that looking a bit more natural. But now there is enough size on this heading that even though this is bold, that still clearly a sub-headline that's secondary to this headline. So now that is all of our text sizes set up. And we can go back over here to our first frame, there's all our heading sizes. So now we can just kind of tidy this up a bit. So I've got a nice little reference to show off all the typography setup that we've done. And now we have that nice, smooth flow, a nice gradation from Heading 6 to Heading 1, but we've built it out with a focus on practicality. Everything has been tested here, the most common use cases are tested. So when a user takes this into the actual content creation workflow, they're not gonna get any surprises where they find that they can't set up the structure of their articles or their posts the way that they want to. So we have all our sizes set up. But what we haven't done yet is start to deal with spacing. There's two forms of spacing that are most important for typography. One is line height, and the other is margins or external spacing that surrounds an element. So the next section of the course is gonna be a two lesson section. And we're gonna cover both of those forms of spacing. In the first lesson, we're gonna get the line heights right for each of the text styles that we just set up. And we're gonna kind of rough out the spacing that we need to have in between these elements. And then in the lesson after that, I'm gonna show you how you can use Figma to plan out the margins that your elements are going to use once they're live in a site. In a way that will let you test things out and avoid getting any surprises about how the design looks when it's actually live. So next up, line heights and margins. I'll see you there.


