


- Overview
- Transcript
1.2 GSAP Refresher
For those of you who are new to GSAP, or for those who haven’t used it in a while, in this lesson I will give you a brief refresher on the structure of basic animations using GreenSock.
Related Links
1.Introduction
1.1Introduction00:44
1.2GSAP Refresher09:09
2.Project 1: Animated Preloader
2.1The Starter File07:48
2.2Creating a Timeline11:48
2.3Bouncing Circles13:08
2.4Animating the Shadows04:12
2.5Loading Images10:50
2.6Preloading Multiple Images08:48
2.7Animating the Preloader Off12:55
2.8Revealing the Main Content05:28
3.Project 2: SVG Animated Logo
3.1Examining the Logo03:44
3.2Setting Up the Styles04:29
3.3Randomizing Position and Opacity07:29
3.4Animating the Dots06:38
3.5Animating Paths With jQuery DrawSVG06:28
3.6Finishing Touches03:01
4.Project 3: GSAP Image Slider
4.1Getting Started05:21
4.2A Note on Slide Positioning04:59
4.3Setting Up Some Variables08:56
4.4Placing the Slides05:08
4.5On Deck12:24
4.6Setting Up the Animation Array09:53
4.7Setting Up the Animations11:36
4.8Creating the Button Events08:37
5.Conclusion
5.1Final Thoughts00:46
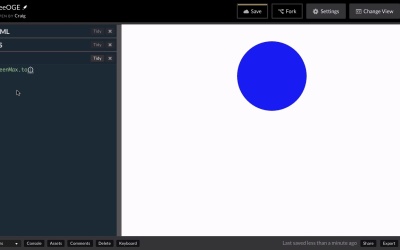
1.2 GSAP Refresher
Hello, and welcome back. In this lesson I want to give you a quick refresher course in the basics of a GreenSock animation. But before we do that, I just wanted to point you to the GreenSock website. As a web the professional, one of the most important things that you can learn Is where you need to go to find help. Even the most seasoned developers and designers don't have all the answers and one of the most important skills that you can develop as a web designer or developer is knowing how to find the answers you're looking for. And what better place to go for GreenSock Animations than the GreenSock website. So if this quick refresher course isn't enough, if it doesn't get you up to speed then first of all, I want to encourage you to check out our introductory GreenSock courses at tutsplus.com. And then secondly, it's always good to go to the source, and if you go to greensock.com and go to the support tab here and click on Docs, that will take you to all of the documentation for the GreenSock platform. So now that you know where to go when you need help, let's jump into CodePen and let's talk about how to create a very simple animation. So I'm gonna start just by creating a div here with a class of circle. And that's all I'm gonna put in the HTML. So let's jump into our CSS and I'm gonna point to the circle class. I'm gonna give it a background color of blue, we're gonna give it a width of 200 pixels, a height of 200 pixels, a border radius of 100 pixels. And then let's give it a margin of 50 pixels space auto, and there we go. So we have a circle right in the center of our stage, and now I want to animate that circle using GreenSock. And so the next thing I wanna do here in CodePen and if you've never use code pen before, this is just a website, it's codepen.io as we can see here. And if you're creating a new pen from scratch, you can just click on the dropdown menu and click on new pen. And that's what this is called this collection of HTML, CSS and JavaScript, this is called a CodePen or a pen for short. So one of the things we can do in our CodePen is we can click on the settings tab here and I'm gonna jump over to my JavaScript settings and notice you can add external JavaScript files here. So if there is a CDN that host's a particular JavaScript framework that you want to use you can enter in the URL for that CDN here. And then there's also a quick add drop down for some commonly used JavaScript frameworks, like jQuery, or jQuery UI. And if we scroll down to the very bottom, you'll see one for GreenSock TweenMax. And the TweenMax framework contains everything within GreenSock. It contains TweenMax, TweenLight, TimelineMax and TimelineLight. And it also contains a number of free plugins that come with it. So I'm gonna click on GreenSock TweenMax and now that we're linking to that in our pen settings we can move forward. So if you're doing this in a text file on your computer you would just create a script tag that links to this same link that you see here or you can do a quick search online for TweenMax CDN and you should be able to find this link. So I'm gonna close that, now that we've created or set up our CodePen, and now in our JavaScript we can use TweenMax. So let's talk about a basic TweenMax animation. And let say we wanted to animate the background color of our shape. The way we would do that is we would point to TweenMax first of all which has a capital T and a capital M. And then we can call on a number of different functions there is a two function a from function, a stagger Tu and a stagger from. And we're not gonna talk about all of those in this course, again that's what the introductory courses are for. But I do wanna give you a quick refresher on how these are structured. So I'm gonna use the two animation to illustrate what we're doing here. So all we're saying here is we're gonna animate from our current set of properties to a new set of properties. So we might be animating the position, the color, the border radius, any number of different CSS properties that you can think of to animate. So inside the parentheses for this two method, the first thing we need is the item that we want to animate and we can point to this item in a number of different ways. The easiest way is just to use a CSS selector inside quotation marks. So the CSS selector for this particular circle remember it's a div with a class of circle applied to it. So if you wanted to point to that in CSS you would type .circle and that would be enough to point to this item. You can get more complex with it, if you want to we could use a jQuery selector and points to the item itself that way which again uses that same CSS selector inside of it but we could use this jQuery selector here as well. TweenMax doesn't really care which way you refer to it. So let's again go back to the simpler version of just putting the CSS class or the CSS selector inside quotation marks here. Then we're gonna say comma space and the next thing we need to enter in is the duration of our animation. How long do we want this to last? And this is gonna be in seconds. So if I just type a number two here then that animation is gonna last two seconds. So then we'll say comma space and then we're gonna have an opening and closing set of curly brackets. You'll notice I've nudged that closing curly brackets down a couple of lines so that we can enter in some content here between those curly brackets. And I'm gonna space this out a little bit so we have a little more room to work with. And inside the curly brackets here, we're going to include the properties that we want to animate. So if we wanted to animate for example, the background color, we could do that here. Now you can animate most CSS properties that you might think should be animatable. And one of those is a background color but remember in CSS the background color property looks like this it has a hyphen in between the two words. If you come across any CSS properties that work like this, that have two separate words separated by a hyphen, then in GreenSock we need to make it into one word and we just need to capitalize the first letter of the second word. So instead of background hyphen color we have background color with a capital C as one word. So then after the property we're gonna type a colon space and then the value we wanna give to it and we could give it a number of different values. We could use a hexadecimal value here so for red it would be F00, and we can already see that animation taking place. If we change it to F0F, we can see it animating to that color. You can also use a word like red and you'll see it animates to red. You can change it to purple and we can watch it animate from it's original value of blue to the new value of purple. Now we can also animate other properties such as, let's say, the width. And if we want to animate multiple properties we just need to separate those properties by comma. So if I type comma go to the next line and then type width, we can set our new width to a value of let's say 400 pixels. And you'll notice I'm just typing in the the number 400. If we wanna use 400 pixels we're gonna need to put it inside quotation marks and you'll see that it still works just fine. But if we just put the number 400 itself without the quotation marks then it will assume we mean pixels and it will still animate it just as if we had. So then one more item I want to add here is the ease of property, and this determines the speed of an animation. This is not a CSS property here, this is a property specific to TweenMax to tell TweenMax how we want to the speed of this animation to be controlled. And so we can create a linear animation where it moves at the same rate of speed the whole time. We can create an ease in where it starts off slowly and eases into the animation, speeds up as it goes through it or a number of other different options. Again, you can get more information about that in our introductory course, but for now, I'm just gonna set it to Elastic with a capital E dot easeOut with a capital O. And now when it refreshes, you'll see that it kind of bounces back and forth as it eases into place. So then, at the very end of our TweenMax two function, we would just have a semi-colon to end that line. And obviously we saw that the animation worked just fine even without the semi-colon, but it's always good practice to use it. And that covers the basic structure of a TweenMax animation. Now obviously, it gets a little bit more complex than this, and we'll see some more complex TweenMax animations as we move through this course. But hopefully for now, that's enough to get our feet wet and give us a refresher on how we need to be creating your animations using the GreenSock framework. So thank you for watching and I'll see you in the next lesson.


