


- Overview
- Transcript
3.2 Setting Up the Styles
Now that we’ve pulled our SVG code into our HTML, in this lesson you will set up the styles for your graphics so that you can get started animating things.
Related Links
1.Introduction
1.1Introduction00:44
1.2GSAP Refresher09:09
2.Project 1: Animated Preloader
2.1The Starter File07:48
2.2Creating a Timeline11:48
2.3Bouncing Circles13:08
2.4Animating the Shadows04:12
2.5Loading Images10:50
2.6Preloading Multiple Images08:48
2.7Animating the Preloader Off12:55
2.8Revealing the Main Content05:28
3.Project 2: SVG Animated Logo
3.1Examining the Logo03:44
3.2Setting Up the Styles04:29
3.3Randomizing Position and Opacity07:29
3.4Animating the Dots06:38
3.5Animating Paths With jQuery DrawSVG06:28
3.6Finishing Touches03:01
4.Project 3: GSAP Image Slider
4.1Getting Started05:21
4.2A Note on Slide Positioning04:59
4.3Setting Up Some Variables08:56
4.4Placing the Slides05:08
4.5On Deck12:24
4.6Setting Up the Animation Array09:53
4.7Setting Up the Animations11:36
4.8Creating the Button Events08:37
5.Conclusion
5.1Final Thoughts00:46
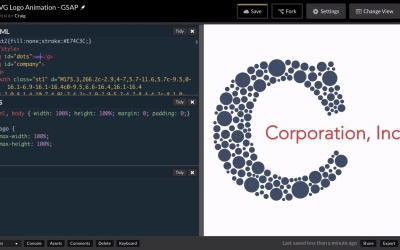
3.2 Setting Up the Styles
Hello and welcome back. As you can see in this lesson, I've already pulled in all of my SVG code that I exported from Illustrator. And we can see our logo now in code pen and you can find the link for this particular code pen in your course notes for this lesson. Now there are a couple of things I want to change as far as the styling goes. Notice that if I jag my width out, that the logo becomes taller than the viewable area and I don't want that. So I'm gonna set a max width and a max height for this, so that it stays within the bounds of the area. So once you open up that starting pen, let's go ahead and click on fork to create a new copy of it. And then in our CSS, you'll notice that first of all I applied a width and height of 100% to our HTML and body tags. I'm gonna skip a couple of lines after that. And then I wanna point to our SVG file and let's go up to our SVG first of all in our HTML. And I'm gonna give it an ID of logos, so that it will be easier to point to, and then in our CSS, we'll point to that ID. So #logo and I'm gonna set, let's go to the next line here, we'll set the max width to 100% and the max height to 100%. And when we do that, you'll notice that even if we go to a wider screen, that logo doesn't keep growing past the bounds of what we can see. So that helps us out quite a bit and keeps the whole logo visible for us. Another thing I wanna do is I wanna make the logo invisible for now. We're gonna set the opacity for it to zero. And when I say logo, I'm talking about the text itself, not these circles. We are gonna make the circles invisible as well, but for now I want to focus on the text. So we'll go back over to our SVG and we'll scroll down and we'll see that we have a group with an ID of dots. And inside that group, we have a bunch of circle elements here for SVG. And so we can click on this little triangle next to that group to collapse it, so that we can see everything else a little bit better. We can also collapse the company group and the outline group. So now we have everything in one little collapsed area that makes it a lot easier to read. And again as we mentioned before, we can see that these three groups here were named after the layers in Illustrator. So each one of those layers corresponds with one of these groups. And right now I wanna turn off the company and outline groups or make them invisible. So in our CSS, I'm gonna point to #company and then #outline. And I'm gonna set the opacity for both of those to zero and we see that they disappear. And you'll notice that for example, if we were to get rid of #company and just set the outline opacity to zero, that we could still see the regular text. And if we change that to company, set it to zero, then we can just see the outline text and that looks good. So let's undo those so that both of them have their opacity set to zero. And then one more thing I wanna do is I want to first of all set the position of these dots to absolute. Because we're going to start animating them in the next lesson and what I wanna do, is I want to randomized the position of each one of these dots. And we're going to randomize that position across the entire screen. And in order to do that, we need to set the position for these dots to absolute. So in order to point to those dots, I'm gonna point to the group with an ID of dots, we'll point to #dots. And then remember, inside this group, if we expand that out, there's just a series of circles. And each one of these circle elements represents one of these circles in the logo obviously. So we wanna point to each of the dots or each of the circles inside that group with an ID of dots, we'll point to #.space circle. And we'll set their positions, position there we go, to absolute and then we'll also set their opacity to zero for now. So those will be invisible as well. So now that we've got it set up how we want it, let's save that. And in the the next lesson we'll start randomizing positions and animating our dots in a way that's gonna make this look really cool. So thank you for watching and I'll see you then.


