


- Overview
- Transcript
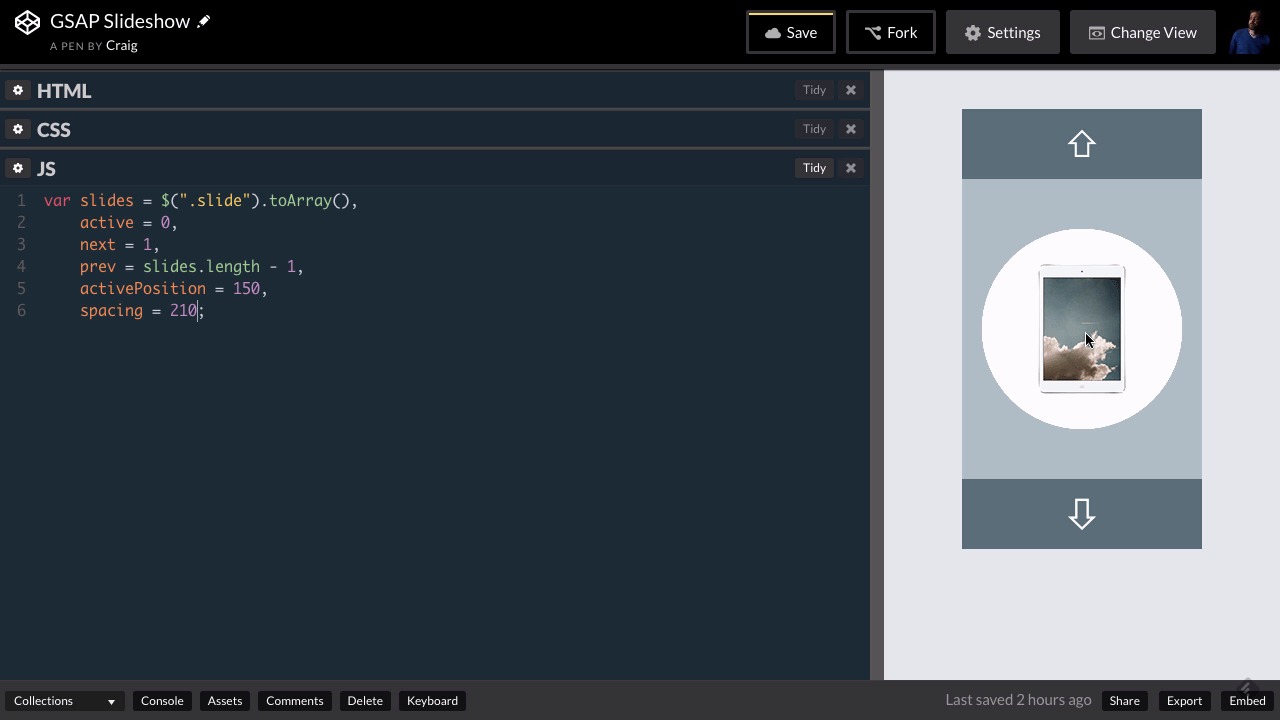
4.3 Setting Up Some Variables
Before we get too far into our JavaScript, we have a lot of values to keep track of. In this lesson you’ll create a series of variables to store your slides, plus a few properties related to those slides, including their positions.
Related Links
1.Introduction
1.1Introduction00:44
1.2GSAP Refresher09:09
2.Project 1: Animated Preloader
2.1The Starter File07:48
2.2Creating a Timeline11:48
2.3Bouncing Circles13:08
2.4Animating the Shadows04:12
2.5Loading Images10:50
2.6Preloading Multiple Images08:48
2.7Animating the Preloader Off12:55
2.8Revealing the Main Content05:28
3.Project 2: SVG Animated Logo
3.1Examining the Logo03:44
3.2Setting Up the Styles04:29
3.3Randomizing Position and Opacity07:29
3.4Animating the Dots06:38
3.5Animating Paths With jQuery DrawSVG06:28
3.6Finishing Touches03:01
4.Project 3: GSAP Image Slider
4.1Getting Started05:21
4.2A Note on Slide Positioning04:59
4.3Setting Up Some Variables08:56
4.4Placing the Slides05:08
4.5On Deck12:24
4.6Setting Up the Animation Array09:53
4.7Setting Up the Animations11:36
4.8Creating the Button Events08:37
5.Conclusion
5.1Final Thoughts00:46
4.3 Setting Up Some Variables
Hello and welcome back. In this lesson, we're gonna get started on the JavaScript for our final project, and there are several things that we need to keep track of, as we start creating this animated slide show. First of all, I wanna take all of our slides and put them in an array. And this array is going to help us kind of manage where we are in our slide show and what's coming next. So let's start by creating an array and we're gonna store it in a variable called slides. And I'm gonna set this equal to, I'm gonna use jQuery selector here to point to the .slide the class. I'm pointing to .slide inside this jQuery selector and then at the end of that I'm going to say .toArray() with a capital A in array, open and close parentheses. So now all of our slides are stored in a single array. And we can look through that array to see what order those slides need to be in. The next thing I wanna do is I want to keep track of the current or active slide which is whatever slide needs to be here in the center in the active position. As well as the previous and next slides. The previous slide is going to show up above the active slide. The next one will show up down below it. So instead of putting a semicolon here, let's put a comma, and let's create another variable here called active. Here we're just going to keep track of the Index number of the active slide. And since arrays are a zero based, then the index for the very first slide is gonna be zero. So we're gonna set active = to 0. The next slide is gonna be easy as well. It's gonna be the slide that's just below the active slide. It's gonna be the second slide in the array. And so the second slide in the array has an index of 1. Previous, on the other hand, is a little trickier, and I'm just gonna use prev for shorthand. It's a little bit trickier. We're gonna set it to slides.length- 1. And again we're using -1 because arrays are zero based. So if an array has four elements the first index is going to be zero. Second is one, then two and then three. So the highest index and array with four elements in it is three, which is the same thing as that arrays length, minus one, which is what we're doing here. So this will give us the array index of the very last slide in that array. And since the active slide is the very first slide, then the previous slide, we would have to loop back to the end of the array. Which is why we're using the last element in the array as the previous slide. In the previous slide again as we mention is gonna be up here at the top above the active slide. I've also mentioned before that we need to pay very close attention to all the numbers and the sizes and placements in our CSS. If you remember back when we were reviewing the CSS the top position of the active slide is set to 150 pixels. And that's what gets it right in the middle of this slider because the slider is 300 pixels tall. So let's keep track of that number as well. So I'm gonna put another comma after slides.length to- 1. We'll go to the next line, and I'm gonna create a variable called active position and set it = to 150, because again the active slide is always gonna be at a position of 150. So any time we're animating the next slide into the active position, that's the position we're gonna animate it into. And then the placement of our other slides is going to rely on spacing. How much spacing is there gonna be between one slide and the next? Well as we've mentioned before, these slides are each 200 pixels tall, and I want to put 10 pixels of spacing between those slides. So our spacing is gonna be 210 pixels. So I'm gonna create another variable called spacing, and set it = to 210. The next thing I want to keep track of, is a list of all of the potential positions we could be placing these slides in. So we already know the active position is 150 pixels. The next position is going to be 150 pixels plus that spacing that we're gonna have between each of these items. And then the previous position is gonna be 150 pixels minus that spacing. And then the onDeck position as we talked about in another lesson is going to depend on whether we've hit the next button or the previous button. Once we click one of those buttons we're going to decide where to place the onDeck slide to get it ready to animate where it needs to be. So again there are two possible positions for the on deck slide and I'm calling these positions up and down. The up position is going to be up here above our slider in the down position is going to be down below our slider. So, let's create an object that has a named list of each of these positions. And, I'll explain this as I'm typing it out. So, I'm gonna create a variable called positions and I'm gonna set this = to a JavaScript object with open and close curly brackets. Inside this object, we can create any number of properties for this object and give those properties values. And the way that would look as we would give it a property name such as prop1 and then we would type colon, space and a value. So let's say we wanted to give it a value of 1. Then these would be separated by commas so we'd have a comma and then prop2 and our second value which might be a string, "hello". So you can put any number of values inside this object and we're gonna use this object to keep track of where all of our positions need to be. So let's create a property here called active and I'm going to use all capital letters for these. And here we would just want to store the active position which we've stored in the active position variable. Then I want to store the position for our previous position which is going to be up here above the active position which is going to be 150 pixels minus the spacing value here. So for this we would put active position- spacing. Then for our next position and again you can give these values any name you would give a variable but for our next position, we would do just the opposite. We would use activePosition + that spacing value and we got to spell there right, here we go. And then again we have two more values one of them is called UP, the other one is called down. So, I want to keep this spacing the same, otherwise once we animate these on, the animation won't look quite right if it's not spaced the same as the others. So, for our UP position which again is going to be up here above our slider. We're gonna use activePosition again- and this time we're gonna do spacing times 2. So again since each of these are 210 pixels apart then the slide above the active slide which is the previous slide will be 150 minus 210 and the one above that is gonna be 150 minus 210 times 2. So that's why we have this calculation. So then for the DOWN calculation, as you can imagine, we would do just the opposite. We'll have activePosition + spacing times 2. And that will put it to 210 pixels below our next item. So it's going to be way down here below the bottom edge of the of the slider. And so now anytime we want to reference one of these values that we've stored here. All we need to do is point to for example, positions.ACTIVE. And that will be the same thing as saying 150. If we do positions.PREV, for previous then that would give us whatever the result of this calculation is. So now we have easy access, to those positions. So I realized we haven't covered a lot of ground yet. We haven't added anything to our functionality just yet but we have set up some variables that are really going to help us as we move forward. So with that done, let's go ahead and move on to the next lesson. Thank you for watching.


