
 Lessons: 16Length: 2.6 hours
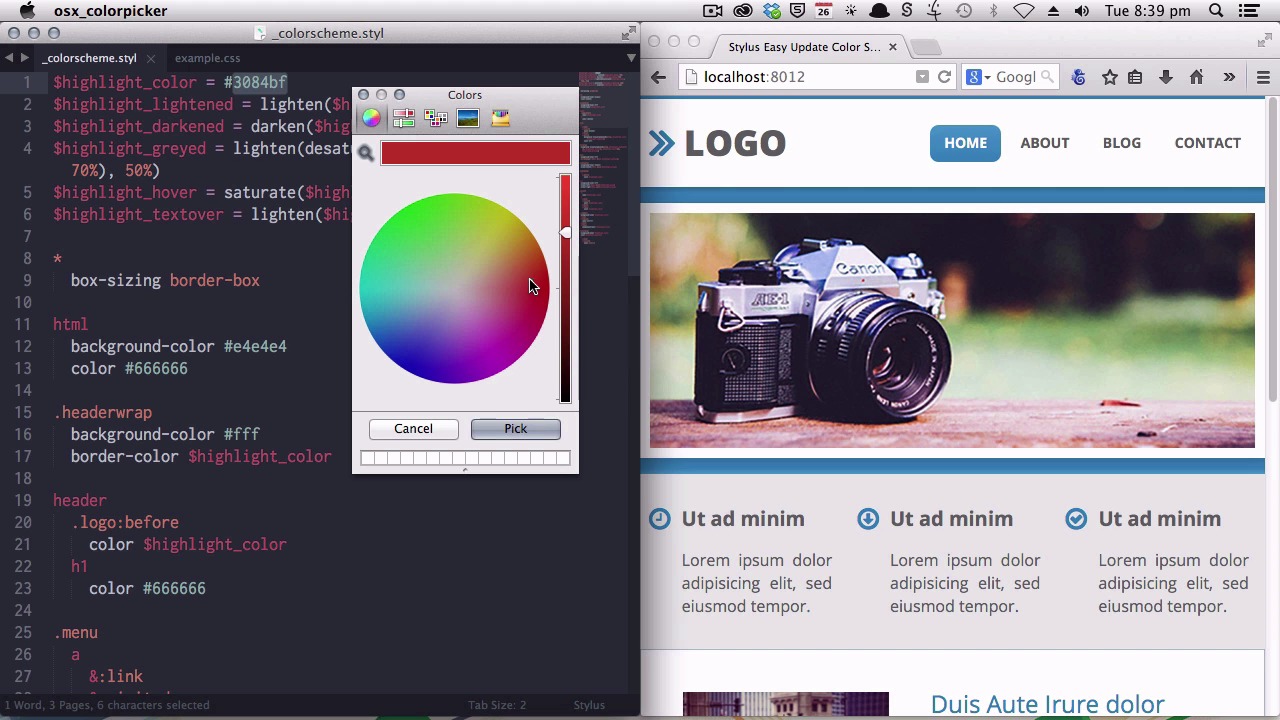
- Overview
- Transcript
7.1 Wrapping Up
Congratulations, you’re now officially a Stylus CSS Superhero! Let’s look back at what you’ve learned, and where you can take your training next.
Related Links1.Introduction
1.1CSS Needs a Hero01:17
2.Stylus Superhero Basic Training
2.1Quick and Easy Setup09:19
2.2Terse or Full Syntax, Your Choice05:50
2.3Faster Child and Pseudo Element Targeting via Nesting06:50
3.A Practical Intro to Stylus Variables
3.1Create an "Easy Update Color Scheme"08:02
3.2Create a "px to rem" Converter Variable14:35
4.Practical Intro to Mixins
4.1Create a "Zebra Stripe" Mixin12:45
4.2Use CSS3 Easily with Prebuilt "Nib" Mixins09:07
5.Practical Intro to Logic and Functions
5.1Adjust Base Font Size, Perhaps: Using Conditionals and Operators09:38
5.2What Functions Can Do That Mixins Can't06:16
5.3Create a "px to rem or em" Converter Function13:55
5.4Level Up Your Color Schemes With Stylus's Built-In Functions15:13
6.Stylus Superpowers
6.1Variables on the Fly: Property Lookup09:32
6.2Create a "Golden" Layout14:54
6.3Generate H-Tag Styles With a Single Line: Hashes, Iteration and Interpolation16:49
7.Conclusion
7.1Wrapping Up02:34
7.1 Wrapping Up
Congratulations. You just finished your Become a CSS Superhero with Stylus training. You've learned a lot of great stuff, so awesome job to you on completing the course. Let's have a quick recap of what you've learned so you can give yourself a big pat on the back. In Stylus Superhero Basic Training, you learned how to set up a Stylus project, how to order compile it. You then learned how to work with all the different Stylus syntax options, whether you wanted to work with pure syntax or for CSS formatting. After that, you learned how to deal with charled and the [INAUDIBLE] element targeting using Stylus Nesting. Then you went on to practical intro to variables where you learned how to use variables to create in easy update color scheme. And you've also created a pixel to rem converter variable. Then in Practical Intro to Mixins you learned how to create a Zebra Stripe mixin from scratch and you learned how to use Nib's mixins to easily deploy CSS3 into your projects. After that you went on to your Practical Intro to Logic and Functions. You learned how to use conditionals to sometimes change your base font size if you needed to. You learned what functions can do that mixins can't. And then you learned how to create a pixel to rem or em function. You also learned how to make your easy update color scheme even more easy to update using Stylus's built in color modification functions. After that you've graduated on to learning Stylus superpowers. You learned how to use property lookup inside classes. You learned how to create a golden ratio driven layout. And you learned how to generate all of your H tag code with one line. So that's amazing how much you have absorbed, really really great job. So what can you do next? Definitely the first thing that I would recommend is heading over to the stylus documentation site and just having a read of every piece of information that they have on there, you get ideas for what you can do with stylus just by having a look at the docs and seeing all of the different features that it has incorporated. As with anything the best thing that you can do is just get straight in and get some practical hands on experience. So just start deploying stylus in your projects right away and can use everything that you've learned in this course as a spring board. But pretty soon you'll find your own unique way of working with Stylus. So thanks for taking the become a C.S.S. superhero with Stylus course. I hope you had a really great time. And feel ready to create some super powered designs. I'll see you in the next course.


