


- Overview
- Transcript
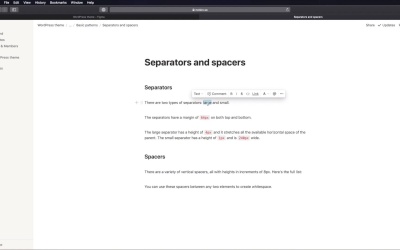
3.6 Separators and Spacers
In this lesson, we’ll design and document separators and spacers. These are some minor elements, but they can certainly prove to be very useful. So let’s begin.
1.Introduction
1.1Welcome to the Course01:55
1.2Design Considerations for WordPress Themes06:36
2.Preparation
2.1A Design System Approach07:43
2.2Defining Colors14:57
2.3Defining Typography21:15
2.4Defining Spacing and Sizing08:07
3.Basic Patterns
3.1Buttons15:42
3.2Forms16:22
3.3Menus08:22
3.4Icons and Images12:24
3.5Tables06:34
3.6Separators and Spacers06:09
3.7Grid System06:23
4.Advanced Patterns
4.1WordPress Widgets06:49
4.2WordPress Posts19:18
4.3Headers and Footers09:27
5.Page Layouts
5.1Creating Page Layouts06:14
5.2Designing a Full Page: The Index08:15
6.Final Words
6.1Conclusion03:36
3.6 Separators and Spacers
Welcome back to the course. In this lesson we're gonna design and document separators and spacers. And these might look like minor elements, but they can prove to be quite useful. So, let's begin. Starting a figma, as per usual basic patterns, we'll call this separators, and we have quite an easy task. Let's say I delete some of this content, let's actually grab, [COUGH] Some of that text content from here just as a demo. Let's create the actual separator, and this will be using, The gray 80 color. So make sure to update the fill. Height, we're gonna use four pixels, and for width, let's go with 320, maybe a bit more like 400. But the idea is, this type of separators spans the entire available horizontal space. And then let's duplicate this one more. And now, we're gonna grab this. We're gonna put it in its own frame with an auto layout. We're gonna set this to vertical side margins zero, and top and bottom, we're gonna set this to 64 and zero there. Okay, and I forgot to update separator default. Let's do one more. Let's do a small separator. Again, we might not use this, but it's always good to have. So for the small separator, we're gonna make it very thin, like one pixel, we're going to use a smaller width like 240. Notice how this is also a multiple of eight. And for color, Let's go with maybe gray 20. That should do the trick. And this is also going to have 64 pixels of padding top and bottom. All right, and this is how these two separators look like. So now, to document this, will basically go back here, add a new page, which we're gonna call separators and spacers. And then you can say something like this. There are two types, so we have the large for default and small. The separators have a margin of 64 pixels on both top and bottom. Now, I said margin here, because I'm referring to the CSS that we are gonna eventually write, but in Figma, this is padding, because it is inside a frame. I'm saying the large separator has a height of four pixels and it goes all the available horizontal space. And the small separator is one pixel and height, and 240 and width. And I believe that's how we made it right, 240, okay. You can also add information about color here. So like the large separator uses this color, the small separator uses the Auto Color. And you can also include screenshots right here, now, for spacers, what are spacers? Well, they're just blank elements that you can use between two elements to create whitespace, right? And we can create like a lot of vertical spacers, and the main idea is to have their heights created in increments of eight pixels, right? And we can make a quick table here, and we can say spacer sizes. And we're gonna have the sides, and then the height. And you can go like this, 1x, 2x, 3x, 4x, 5x. And then for the height you go, 8 pixels 1624 3240, and then you can go into each one. Make it look like a piece of code to get that highlight. And you can go all the way down to like 10x. You can create as many spacers as you need, and when you're in the design stage and you need a spacer between the two items, right? You just come back to notion or whatever you're using to edit your document. You go to separators and spacers. And you see the variable sizes, and you can see that, okay, I can use come, a five x spacer that will give me 40 pixels of vertical space. So you just grab that from there, it's really easy this way. All right, we're almost done with the basic patterns in our design system. There's only one element left to document, and that is the grid system that we're going to be using. That's coming up in the next lesson.


