

- Overview
- Transcript
4.2 WordPress Posts
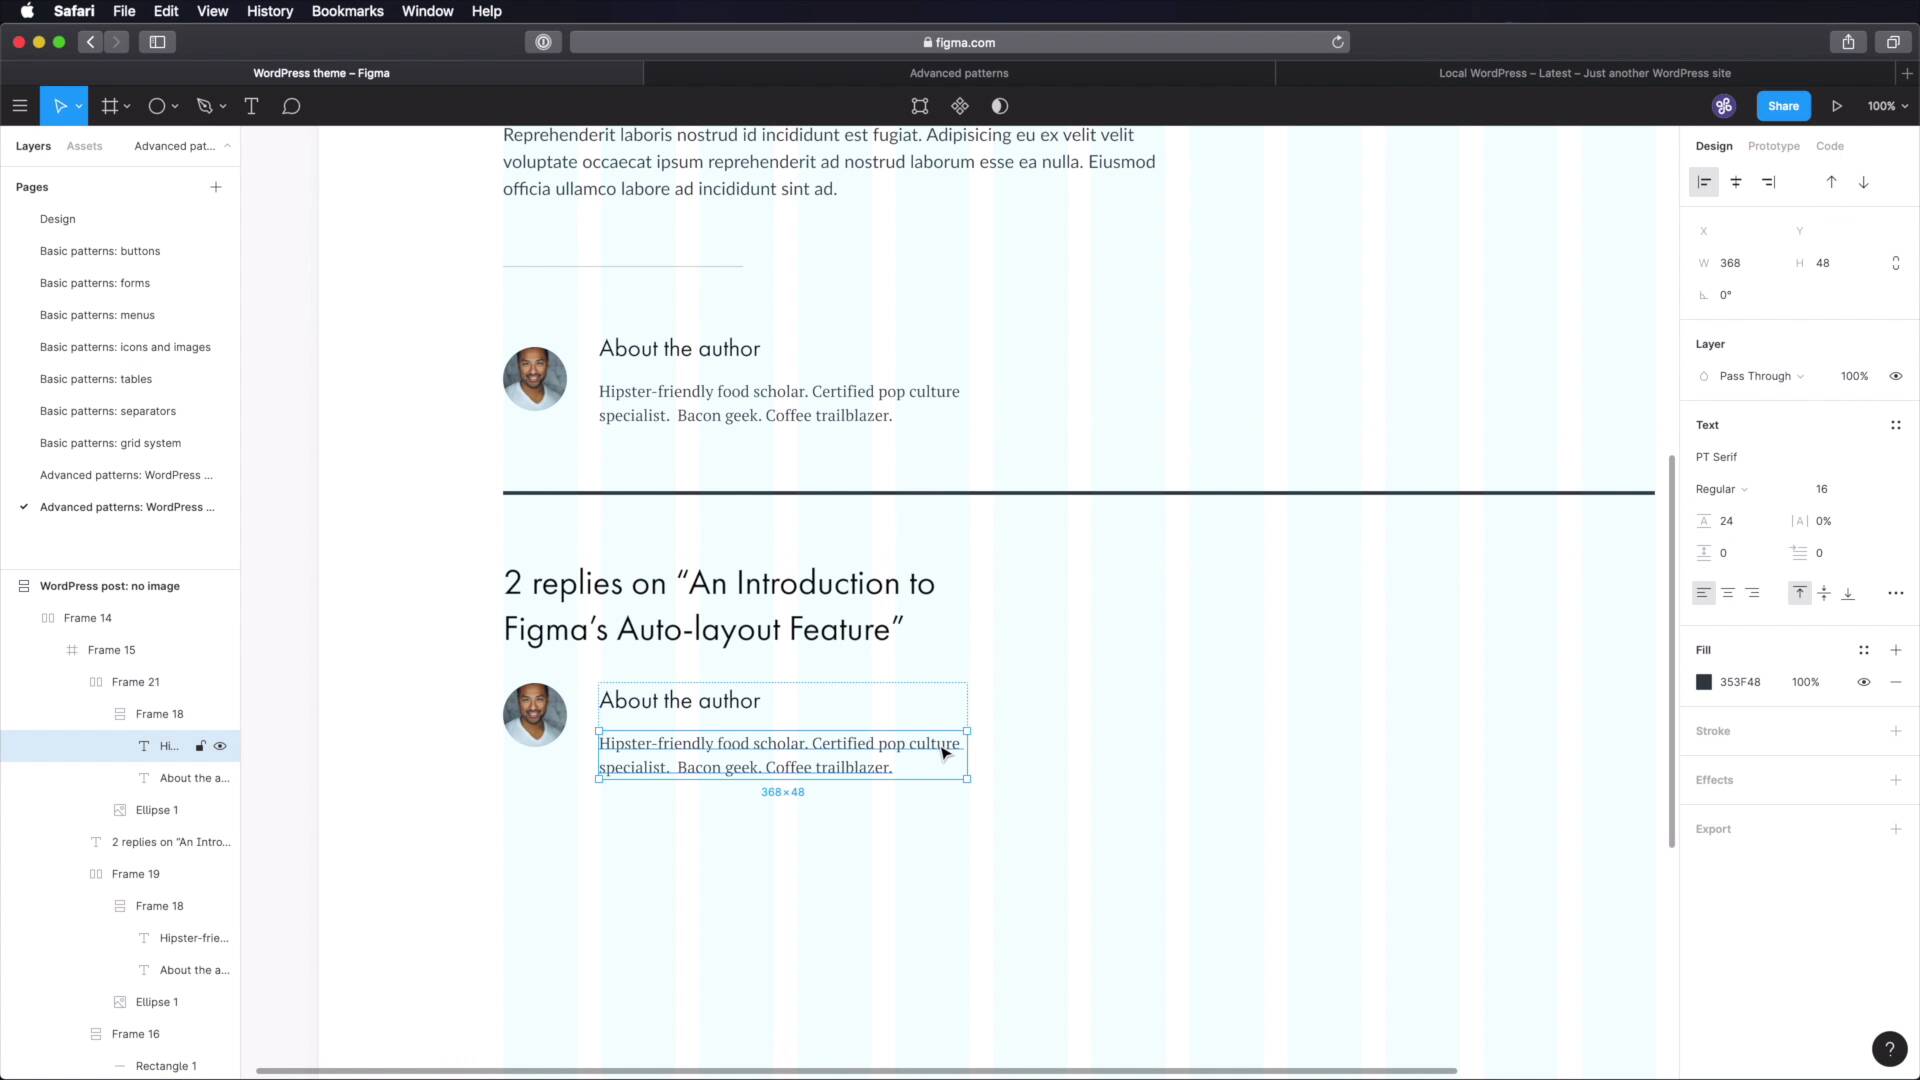
WordPress is a blogging platform, right? And every blog is made up of a series of posts. So let’s go ahead and design one of these posts and also document it inside our design system.
1.Introduction
1.1Welcome to the Course01:55
1.2Design Considerations for WordPress Themes06:36
2.Preparation
2.1A Design System Approach07:43
2.2Defining Colors14:57
2.3Defining Typography21:15
2.4Defining Spacing and Sizing08:07
3.Basic Patterns
3.1Buttons15:42
3.2Forms16:22
3.3Menus08:22
3.4Icons and Images12:24
3.5Tables06:34
3.6Separators and Spacers06:09
3.7Grid System06:23
4.Advanced Patterns
4.1WordPress Widgets06:49
4.2WordPress Posts19:18
4.3Headers and Footers09:27
5.Page Layouts
5.1Creating Page Layouts06:14
5.2Designing a Full Page: The Index08:15
6.Final Words
6.1Conclusion03:36
4.2 WordPress Posts
Welcome back to the course. Now WordPress is a blogging platform, right. And every blog is made up of a series of posts. So let's go ahead and design and document one of these posts for our design system. Let's begin. We start in Figma, where I've created this parent frame that has a little bit of padding. On the sides, and then inside, I have a smaller frame that's 1200 pixels, because we're gonna design this for desktop right now. And to which we're gonna apply a column layout, 12 columns, stretch 24 24. And I'm also gonna change the opacity of this to 5% and maybe choose a slightly different color, something like that. All right, let's start from the beginning. Each post has a title. That's where we start a title and some meta information. And meta information refers to the author, published date, number of comments, and also the category that belongs to. Now for the category and title, we can actually use this over line that we documented here. So the category is gonna be here and the title is gonna be here. So let's copy this, paste it in, and let's copy a title. I think I will go with display large because extra large seems too much for a post title. I added this to the design system just in case we're creating like a hero area, and we need a really big title. But for our purpose, a display large style is exactly what we need. So let's paste that in. Let's align these two to the grid, and let's move these at 64 pixels from the top. And then with these I'm gonna shift A to add auto layout, vertical 00. I'm gonna add 16 pixels of spacing between the two. So let's add a nice title here, like an Introduction to Figma's Auto-layout Feature. And let's make this title, a bit smaller, excuse me. Something like this will align it with the grid. So we're using up eight columns. And then let's add the meta information. And for the meta, it's probably a good idea to use the caption style. So let's paste that in and we'll say something like, by let's say Mark Adams as a fictional name. Let's shift A this to create another auto-layout frame. This one is horizontal, so I can very easily just do this. This will be for the date and this will be for the comments. Now some of these will be links. So we need to address that. The author name will be a link. So let's do underline, let's do this underline. This can be a link as well, but not all themes have this date as a link. In my case, I'll just leave it like this. And for the category, let's just say UI tools, something like that. So with this, the header of our article or of our post is done. Now, as you can see here, now we're creating a WordPress post that has no image, no cover image. Normally I will put an image here but since we don't have one, we're gonna put a separator. So we're gonna go to our basic patterns. We're gonna grab our separator and we're gonna paste them in, just like that, make this bigger. I'm gonna make it 1200 minus 48. That's 1152. And then we have the content. So let's go back here. Let's grab some body text. And let's paste it right here in the frame. And I'm gonna size this, so it occupies about seven columns. And I'm also going to just put some lorem ipsum in there, just for the lack of an alternative write here. I'm just gonna leave two paragraphs that's enough. Okay, so that will signify the content but obviously in a blog post. The content is gonna much more elaborate than this. And then we need to add a reference to the author, a little about section about the author of the post. So for that, we're gonna start with one of these small separators. Let's put that in. And below that, we're gonna add, first of all an image. So let's do an oval here and we're gonna do probably like 96 by 96 or I think that's a bit too big let's do 64 by 64 to maintain our correct sizing system. So that's gonna be for the image and let's get unsplash here. Let's search for a face, let's put this quote. And what else? Well, we need a small title that's gonna say about the author and then another short description of the author. So for the title, I'm going to use this display x small and let's actually do this. Let's add the description. And for the description I'm gonna use the body to style. See where this comes in handy. Let's just add a random description here. And let's also change the colors here because they're a bit off. So let's go back to our design, we're gonna use GREY 80 for the body text. And actually this, the headings will have GREY-100. Let's make sure to change that as well. All right, so we're gonna make one auto layout frame for the title and description. I'm gonna add 16 pixels of distance there, make sure everything is aligned to the left. And then I'm gonna select these and make another auto layout frame. This is gonna be horizontal. And let's make 32 pixel in between the two. And we're gonna make sure that these elements are aligned or let's make them aligned in the middle like that. And finally, let's resize this bit to kinda fit our grid here. Cool, not bad. Now let's duplicate this separator like that. And let's add the section for comments. For that, we need a title first. So I'm gonna use display small, and we're gonna say to replies to and the name of the post. Let's size this so it matches the text above. Great. And now let's style the comments. For that, I'm gonna grab this frame, copy it, and I'm gonna paste it right here. And I'm gonna position this 32 pixels from this title. We're gonna keep roughly the same characteristics, but we're gonna align everything to the top and we're gonna make this bigger. We're going to make it so that it matches the content of the posts. The body of the comment is gonna be using our main body text which is Lato, 18 pixels. The title here is also going to be the body text Lato but we're gonna use bold 18 and we're also going to add the date of this comment. So the date looks something like this. We're gonna use PT Serif italic 13, 24 pixel line of height. And for the color, well, we're gonna use the exact same color that we used here. Okay, now we need a slightly different spacing here because these are spaced out at 16. So I want the spacing at 8 but I want a little bit more spacing on the actual common body. So I'm gonna add another frame, vertical. Zero on the sides, I'm gonna add 16 on the top and bottom. And 16 or actually 32 as a distance between items because we're gonna add a button to it. We're gonna grab one of these small buttons and we're gonna place it right here. And this will be a reply button. Okay, so now this is that 24 pixels from the meta. And this is that 32 pixels from the comments text. Let's see how that looks like. It's a bit disproportionate. So Let's fix that. Let's do 24 here as well. Okay, so that looks much better. So let's change the author here. And let's also change this picture. Let's just select one that matches the name and then select this frame, duplicate it and just move it down like this. And we can actually select both of these, shift A to create auto layout and just change the distance between the two to 64, for example. So then just pick another color and then just change the name change the date, change the comment here, and we're pretty much good to go. Let's also change this picture, so it matches. Now let's look for Eduardo. This looks like an Eduardo. We have the title for the comment section, we have the comments themselves. Now we just need a section for leaving a comment with the comment form. For that, let's duplicate this title. Let's move it further down. Let's say I want to leave about 64 pixels of distance between the two Leave a reply, and here, we can actually grab a piece of text and we can move it right here. And we're gonna leave 32 pixels of distance between the two. And this text will say something like your email address will not be published and required fields are marked with an asterisk. So then we need to get a form. So we'll go to our basic patterns. We're gonna take this bit and we're gonna group it up, copy it. And we're gonna paste it right here. Also leaving 32 pixels at the bottom there. So what do we need for like a common form. We need the name, we need an email address. We need the website which is optional. But, the name is mandatory, email address. I don't actually know if it's mandatory or not but I'll just put an asterisk here. And we have the comment to which I'm gonna put an asterisk. And for the button, we'll just say Submit comment. Cool beans. Let's also change the width of this text area to match our grid. And I believe, That we are done. Let's go ahead and hide this grid, let's give it a final look. Let's see, we have the header with the title and the meta information. We have the content, a section about the author, comment area, and then reply area. And that's like the most basic thing you can do to a post. Cool. Now, if you remember I said that this post had no image but what if it does? Well, let's go ahead and duplicate this and I'm gonna say right here, come on with image, cool. So what I'm gonna do for this simply is just grab this, increase its height to about 560 and I'm gonna use the plugin to add an image to it. Nice, so now what we have to do is move the other stuff, further down the line. So what do we have here? We have the content, right? We have the content. This, this, these. So, just grab everything and move further down. And now, this is what a post with a featured image looks like. We basically replaced this separator with an image while keeping the same 64 pixel padding on the top and the bottom or margin, whatever you wanna call it. So there you go. That's the Figma part of designing these posts. Now what you can do is go into Notion, advanced patterns. You can say, in your page, WordPress posts. So in here we can document things like structure, and you go like this. Category, Title, Meta, Separator or image, Content, Author bio, Separator, Replies, and a Reply form, all right? So that's the structure. And then you can start going into details like how many columns should the content have, how many columns should the title have? What about the author? How are you aligning the image with the content? What kind of style are you using for this title here? What kind of style are you using for this description, all right? What sort of separators are you using, regular or small? What about the comments, right? You can start documenting all of these things. So when you come back later and you'll want to recreate this, so you have something to fall back on. All right, so the WordPress post is now designed and it's ready to be used. The final thing we need to design in these advanced patterns is headers and footers. And we're gonna deal with that in the next lesson.


