


- Overview
- Transcript
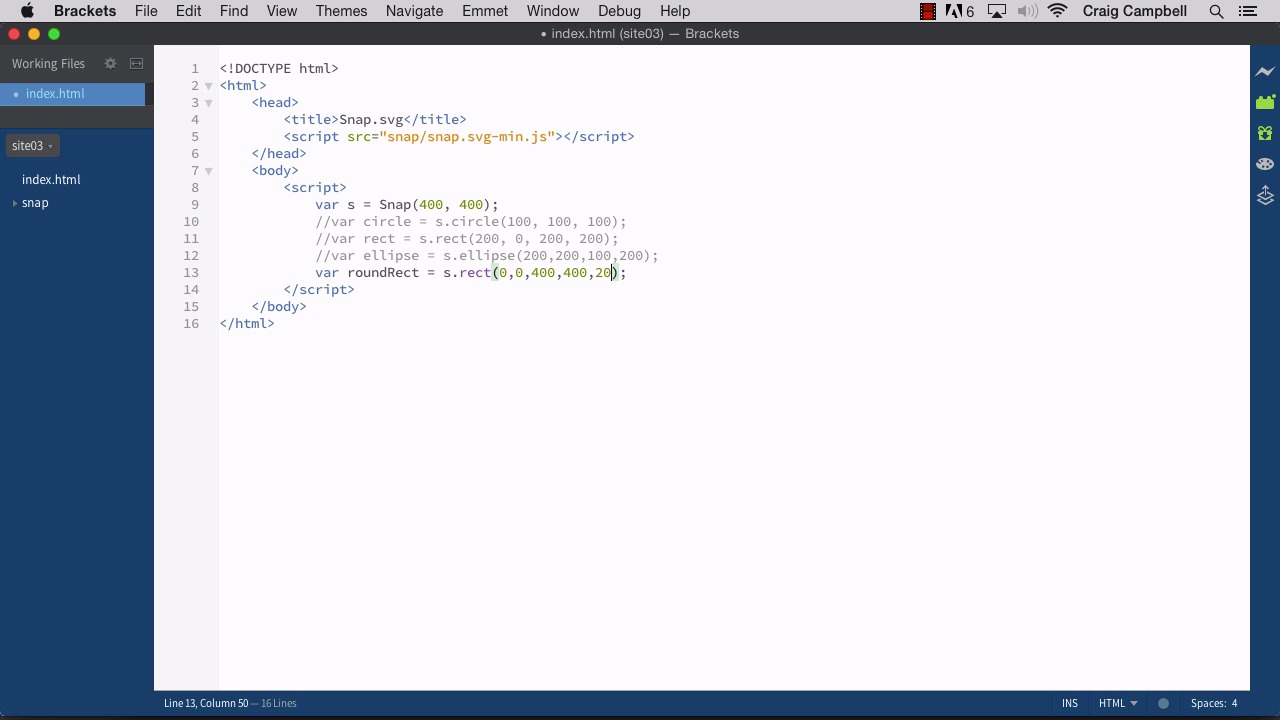
2.2 Complex Shapes
Now that you know how to create squares and circles, let’s start to make our shapes a little more complicated. In this lesson, you will learn how to create ellipses, rounded rectangles, lines, and polygons.
1.Introduction
1.1Introduction00:52
1.2Downloading Snap.svg07:42
2.Creating Graphics in a Snap
2.1Creating Basic Shapes09:38
2.2Complex Shapes08:16
2.3Shape Attributes05:57
2.4Grouping Shapes07:23
2.5Shape Transformations08:37
3.Animating in a Snap
3.1Animation Basics06:58
3.2Animation Callbacks04:53
3.3Easing06:26
4.Basic Interactivity
4.1Installing MAMP03:33
4.2Using an External SVG08:46
4.3Targeting Individual Shapes08:58
4.4Basic Interaction06:32
4.5Hover Events03:32
5.SVG Clock Animation
5.1Importing the Clock SVG06:08
5.2Targeting Individual Clock Shapes08:30
5.3Pulling the Current Time08:30
5.4Organizing the Code05:32
5.5Time Is Circular07:26
5.6Staying Current03:08
5.7Animating the Second Hand03:11
5.8Fixing the Second Hand Animation08:51
5.9Minutes and Hours09:43
5.10Adjusting the Hour Hand03:44
5.11Finishing Touches05:31
6.Conclusion
6.1Conclusion00:54
2.2 Complex Shapes
Hello, and welcome back to animating with snap.svg. In our last lesson, we talked about how to create some simple shapes. We created a circle and a square. And in this lesson, I wanna get into some more complex shapes. So, let's jump back into Finder.I'm gonna make another copy of the site02 folder, and we'll just rename this new one site03. So, all the changes we make in this lesson will be saved there. Or you can open that up in any text editor you prefer. And I've got the index.html file opened up. So, we have our circle and our rectangle. I'm gonna comment those out. So that we can get those out of the way. I'm also gonna make our snap canvas a little bit bigger, we'll make it 400 by 400. And now, let's talk about how to create another type of shape. Let's create an ellipse, which is basically just an elongated circle. So, we'll start by creating our variable, and I'll call it ellipse. You can call it whatever you want to. And then we're going to use the ellipse method to actually create the ellipse. So, we'll point to our snap object which is called s, and we'll type dot ellipse. And then we need a few things inside parenthesis here. The first thing we need is the x, y coordinate of the center of the ellipse. So, this works just like a circle, where the x, y coordinate is going to point to the center of the shape, not the top left corner. Like we see for the rectangle. So, for the center of our ellipse, let's put it in the center of our snap object. Our snap object is 400 by 400. So let's at the center of this at 200 by 200. Then we need the radius x and the radius y, or you can think of it as simply the width and the height of our ellipse. So, if we set our width and height both to 200. Then it's in essence going to make a circle, because of the width is going to be the same as the height. And if we were to save that, jump back into our browser and navigate to site03/index. You'll see we now have a circle. Now, if we were to make the height less than the width. Then we would have a flatter shape. And now we actually have an ellipse. And if we were to go the other way. Make the height a little bit taller and the width a little bit narrower, then we will have a taller shape. So that's the ellipse. Another option that we have is very similar to the rectangle but, we can create a rectangle with rounded corners.. So, let's create another variable here called roundedRect or roundRect, however you want to refer to it. And we're gonna set this equal to s.rect. We're going to use that same R-E-C-T method and all we need to do here is add extra parameters to the end. So, we have our first couple parameters which are the X and Y coordinates, which I am going to set to (0,0) to put it in the upper left hand corner. And then we can set the width and the height. So, let's set it to be 400 pixels wide by 400 pixels tall that will make it the same size as the svg itself. Let's save that, and refresh our page and now we have a rectangle that takes up the full size of our svg. But, now we can add a couple of more parameters here to round off the corners. And so, we have two numbers we enter here. One is for roundness of x, and the other one is for roundness y or the horizontal and vertical roundness. And so let's say we set one to ten and the other one to 20. Let's see what that looks like. We'll save that. Refresh our page. And you'll see that the corners are rounded, but, at kind of a weird angle. You'll see that the roundness is a little bit taller than it is wide. Now, if we set those two values to the same value for example 20 by 20, save that and refresh. Now we have nice, evenly rounded corners. Now if you want those nice, evenly rounded corners, you don't have to put both of these values in. If you only put one of those values in, it will assume that you want the width and the height to be the same. So, typing in a 20 here is the same as typing 20,20. So, if we save that and refresh. You'll see it gives us the same result. So, that's how you create a rounded rectangle. Next, I want to take a look at drawing a simple line. So, I'm going to comment out this line of code. And I'm gonna create another variable called line, and we're gonna set this equal to s.dot you guessed it line. And for the line, we simply need to set the x, y coordinate of the starting point and the x, y coordinate of the ending point. So, if we wanted it to move from upper left to lower right. We would type in (0, 0), for example, for the (X, Y) coordinate of the starting point, which would start it in the upper left hand corner. And then if we wanted it to go all the way down to the lower right hand corner of our SVG we would set the x y coordinate of the end point to 400 by 400. So let's see what that looks like. We're gonna save that. And when we refresh our page, you'll notice that everything goes away. However, our line is there. If we were to right click somewhere where that line is supposed to be and click on inspect element. We can see that our SVG exists right here, and if we expand the SVG out. A line was created here. It has values for x1,x2 and y1, y2, so, it has the coordinates we entered in. But we can't see that line because by default our shapes don't have a stroke Now, all of our shapes do have a fill by default. They have a black fill, but, when all you have is a line, you don't have a fill. There's no fill to see. There's just a stroke, which at this point doesn't exist. So, I'm going to prove to you that that line is there by adding a stroke here in a minute. Do this using the attr method which we'll talk more about later on. For now, I'm just gonna enter it in very quickly. So you can see that there is a line here. So, the way we do this is line.attr and then we need some parenthesis and some curly brackets. And then inside that, I'm gonna type in stroke and set it to a value. I'm gonna set it to #F00, which should make it red. And that should do it, let's save our file. Refresh our page, and now we can see a red line going from top left to lower right. So that's how you create a simple line. Now, let's talk about creating a polygon, which is basically just a series of connected lines that end up making a fill. So, I'm gonna turn off the stroke for now, I'll just comment these out. I think we can go to Edit Toggle Block Comment and that'll block those two lines out. I'm also going to turn off our line here and we'll just come down below all of our code. And now we're gonna create a polygon, so we'll create var polygon. And we're gonna do this using s.polyline. And so we can enter in any number of coordinates here. And the more coordinates we enter in the more points will show up on our polygon. So let's say we wanted to start it at 0, 0,and then we'll add another xy coordinate at 50, 50, another one at 100, 0, another one at 150, 50, another one at 150, 150, another one at 100, 100 and then 50, 150. And then our final Point at 0,100. So, we have, you can add any number of x, y value pairs, and it will keep adding points to this polygon. So, if we were to save this, jump back into our page and refresh. Now we can see our polygon has been created for us. And as you can imagine, you can get as detailed as you want to with this that's as far as we're gonna take it for now. So, I just wanted to show you how to create some more complex shapes using the Snap svg framework. And having done that, we'll move on to the next lesson. Thank you for watching.


