

- Overview
- Transcript
2.3 Shape Attributes
Having learned how to create your own shapes, in this lesson, we’ll look at a few attributes that you can use to style your graphics.
1.Introduction
1.1Introduction00:52
1.2Downloading Snap.svg07:42
2.Creating Graphics in a Snap
2.1Creating Basic Shapes09:38
2.2Complex Shapes08:16
2.3Shape Attributes05:57
2.4Grouping Shapes07:23
2.5Shape Transformations08:37
3.Animating in a Snap
3.1Animation Basics06:58
3.2Animation Callbacks04:53
3.3Easing06:26
4.Basic Interactivity
4.1Installing MAMP03:33
4.2Using an External SVG08:46
4.3Targeting Individual Shapes08:58
4.4Basic Interaction06:32
4.5Hover Events03:32
5.SVG Clock Animation
5.1Importing the Clock SVG06:08
5.2Targeting Individual Clock Shapes08:30
5.3Pulling the Current Time08:30
5.4Organizing the Code05:32
5.5Time Is Circular07:26
5.6Staying Current03:08
5.7Animating the Second Hand03:11
5.8Fixing the Second Hand Animation08:51
5.9Minutes and Hours09:43
5.10Adjusting the Hour Hand03:44
5.11Finishing Touches05:31
6.Conclusion
6.1Conclusion00:54
2.3 Shape Attributes
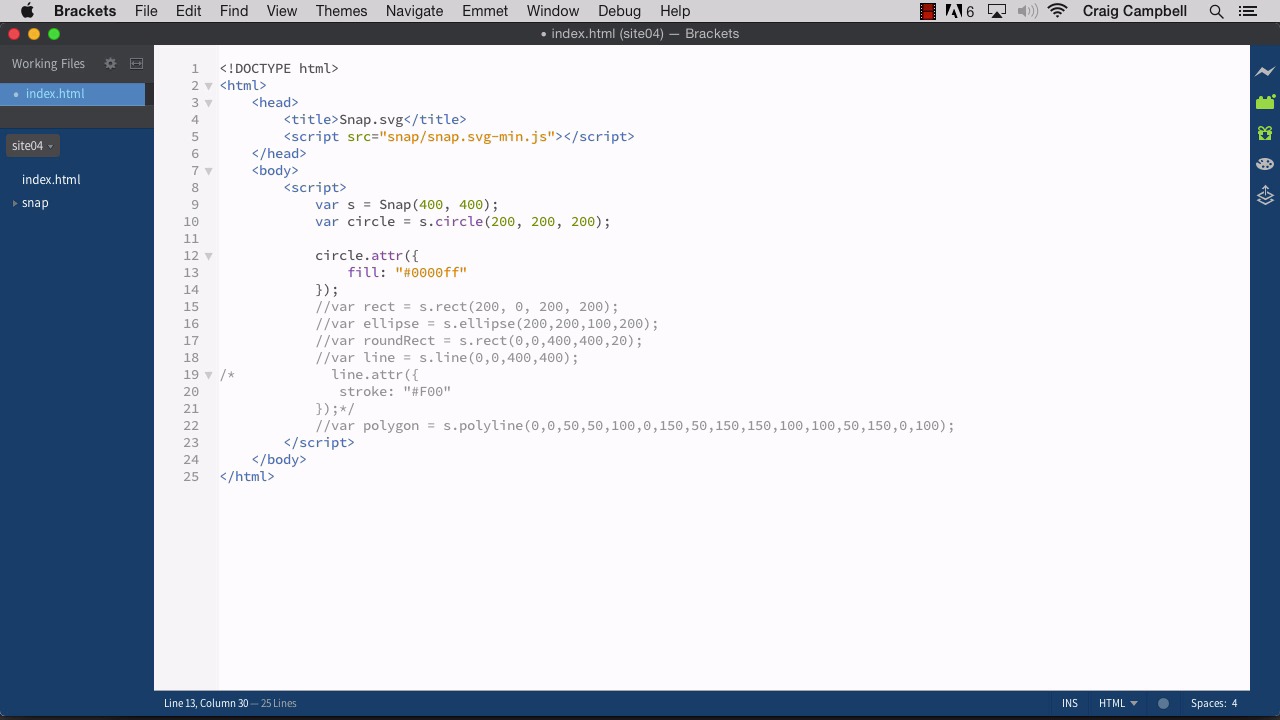
Hello and welcome back to Animating with Snap.svg. As we've mentioned before, when you initially create a shape using the Snap library, it gives your shape a default fill color of black, and by default, your shapes will not have a stroke at all. And in this lesson I want to talk about how we can apply some different attributes to our shapes in order to customize the way they look. So I'm gonna start by making a copy of the site03 folder just like we've been doing. And I'm going to rename it site04, and then we'll drag site04 down to our brackets icon. And then we can jump into our HTML file here. We're going to comment out our polygon. And I'm going to bring our circle back. So our Snap object here, our SVG objects is 400 by 400 pixels. And our circle is only 200 by 200 as far as width and height. And let's go ahead and change that radius to 200 so that we can make this just as large as the SVG object itself. So if we were to save that and jump back into Chrome, and let's navigate to site04/index. And that's not quite what we're looking for, because I didn't change the X,Y coordinate. We need to set those to the center. So we're gonna set those to 200 by 200. Save that. And there we go, so now we have our circle as is. And again, by default, it has a black fill. So let's talk about how we can customize the attributes of our shape to change the look of it. So the way we would do that is we would point to the shape itself, which is why we gave it a variable name to start with. Now we can refer to that shape by using that variable name. And we're going to use the .attr method in order to add attributes to our shape. So when we use the attribute method, we need a set of parentheses there, and we also need a set of curly brackets inside those parentheses. Now to make it easier to read, we're gonna grab the closing curly bracket and closing parenthesis and nudge it down a couple of lines. And then we'll put all of our attributes in between those curly brackets. So first of all, we have our fill. Our fill right now by default is black. Let's change that to a different color. So I'm gonna type in fill, colon, space and then we could use a color name here. For example, we could type in red. And if we save our file, refresh, you'll see that nothing happens. Let's go back here and put red inside quotation marks, and now when we refresh, we can actually see that color show up. So you can use color names, or you can use hexadecimal values, just like you would with CSS, so we could say #, and let's make it blue, 00F. That is the hexadecimal shortcut for blue. The longhand version is 0000FF. You could do it either way. You can use the shorthand or the longhand. If we were to save that, and refresh it and now we have a blue circle. Well, what about adding a stroke? Let's add a stroke to our shape. And we're going to do that by adding another attribute and we would add it inside the curly brackets, just like we did with the fill. And we would separate these attributes using a comma. So after our fill color, I'm going to type comma, and then on the next line, we'll set up our stroke. So the stroke attribute accepts a color value, as well. So again, we could type in the word black inside quotation marks. We could save our file and refresh. And you could see a black stroke around our circle now. And we could also do this if we preferred, using hex values. So we could do #000. Save that. And it gives us the same result. And we can also alter the width of that stroke, or the thickness of that stroke, using the stroke width attribute. So I'm gonna put another comma after stroke. And then on the next line. And we can actually do this one of two ways. We can type in stroke and then width with a capital W, and then we can set that equal to, let's say 4. Let's save our file and refresh. Now we have a thicker stroke, but we can't see the edges because now that stroke is basically increasing the size of our circle, so it's now going outside the boundaries of our SVG. So, just to alleviate that, I'm going to bring our radius down to 150. Oops, that's too many, there we go. Save that and refresh. And there we go, so our stroke is now four pixels thick. And as I mentioned, there are two ways we can write this attribute here. We can either write it with camel case, and camel case basically means you're going to write in lower case letters except for the first letter of each new word. So width is capitalized, for example. Another way we can write this is we could put it all in quotation marks. And instead of leaving it as one word with CamelCase, we would have two words separated by a hyphen. So stroke-width, all lowercase, we'll save that and refresh, and you'll see that that still works. So you could do it either way. I actually prefer the first way using CamelCase. I just wanted to show you that the other option was there. So get comfortable with using these attributes. It's very, very simple syntax. You simply have to remember that you've got a set of parentheses and inside those parentheses, we have a set of curly brackets. And then we have our key value pairs here separated by commas. So we have fill and then a colon, and then our value over here to the right inside quotation marks. The only value not in quotation marks is our stroke width which is a number, it's not a string. So that's just set to a value of 4. But that's how you add attributes and customize the look and feel of your shapes in Snap.svg. Thank you for watching and I'll see you in the next lesson.


