

- Overview
- Transcript
3.3 Code the “Accommodation” Page
Our next step is to code our first sub-page: the Accommodation page.
1.Introduction
1.1Welcome to the Course00:43
2.The Design Phase
2.1Design the Master Layout19:04
2.2Master Layout: Thin Width08:59
2.3Design the Home Page12:54
2.4Home Page: Thin Width05:03
2.5Design the “Accommodation” Page05:31
2.6Design the “Rates” Page03:41
2.7Design the “Guest Comments” Page03:33
2.8Design the Contact Page04:59
2.9Export Images03:43
3.The Coding Phase
3.1Code Up the Master Layout24:37
3.2Code the Home Page16:05
3.3Code the “Accommodation” Page04:50
3.4Code the “Rates” Page02:33
3.5Code the “Guest Comments” Page04:28
3.6Code the Contact Page06:39
4.Conclusion
4.1Wrapping Up04:35
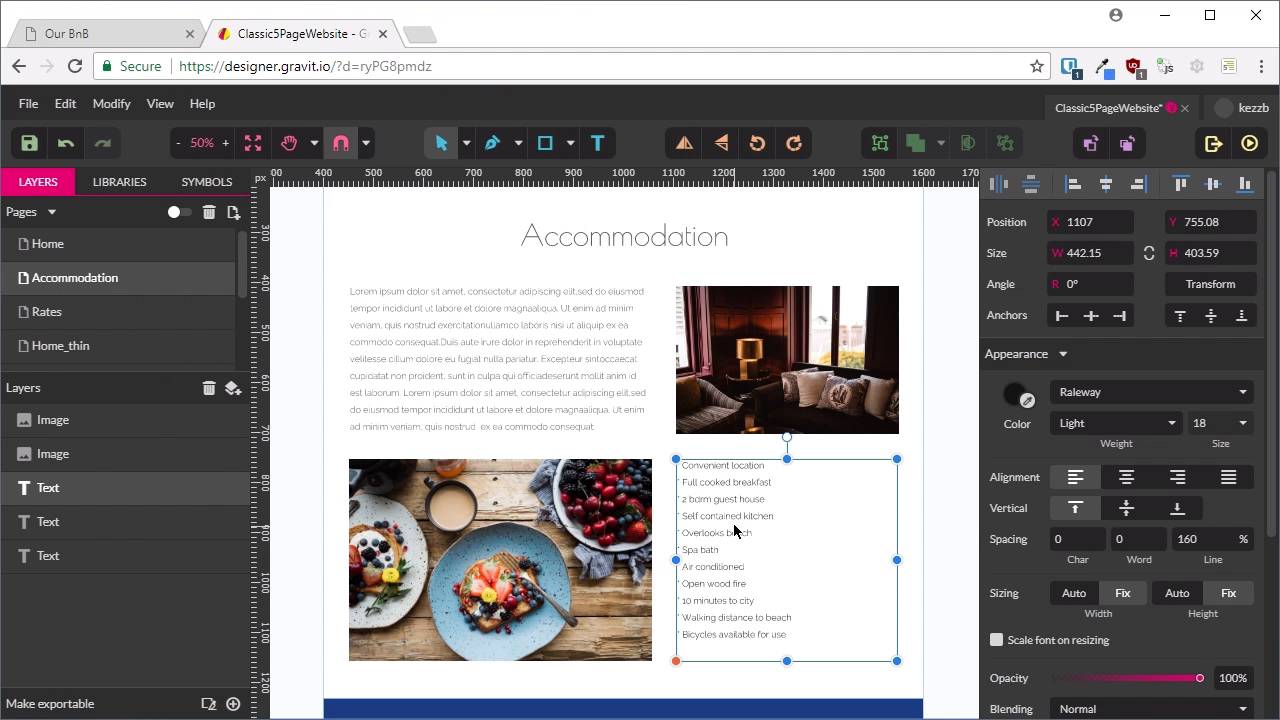
3.3 Code the “Accommodation” Page
Welcome back to build a classic five-page website. In the last lesson, we coded up our first page of our five-page website, that is this home page with our hero unit and this content here. And now, we're going to code up the accommodation layout that we already created a mockup for, and this is gonna be a fairly straightforward process. So we've actually done the bulk of the work at this point, most of what we have to do is gonna be pretty cruisy from here on in. So we're gonna just duplicate this index page that we've created, pull out this hero unit and then just adjust this content here, so that it looks like this content. All right, let's go ahead and do that. So in our project window, we're gonna right-click on the index file, and duplicate it. We're gonna name it accommodation. This over here on the left, close the index file, we don't need it right now. And then, the first thing we need to do is take this class active off the home link and put it onto the combination link so that the right link item is lit up in the menu. Now, we don't need our hero section at all anymore, so we're just gonna delete that whole thing. Now, we don't have to do much because we've already laid out the HTML for the type of layout that we're gonna be using in the accommodation page. So we'll just change the heading so that it reads accommodation. And it will also say Inclusions, and we need almost the same content here, we just went with a little bit different content, so we're just going to copy and paste all of that in. I'm gonna replace this image here with the first of our images for our accommodation page. I've just named mine accom_1.jpg. Just gonna add that in. Now, the cool thing is, for the next two areas here, this image and this bullet list, all we need to do is just add the HTML for these items in, and because they're children of the class that we applied our CSS grid to, they're gonna be automatically laid out for us. So I'm just gonna copy and paste this image tag, change it to accom_ 2.jpg to bring in this image here, change the alt so it reads Breakfast. Now, we wanna bring in our bullet list, so the way that you can do that is just copy, paste the whole list. This is gonna take just a little bit of manual effort here, cuz you're gonna need an unordered list, and you're gonna need several list items. So in order to get those list items in, you need to put an opening li tag at the start of the item and a closing one at the end of the item. So you just have to go through and add that content in manually, and when you're done, it will look like this. So we've introduced a new element here, and that is the only thing that we're gonna need to add some CSS for, because we've already completely done the CSS for everything else that's in this page. We already wrote that up in the last two lessons. Let's go back up outside of our media queries. And we're just gonna add in a little code to modify the spacing on the list items. So I've removed the margin on the unordered list to make sure that the top of the unordered list lines up with the top of the image that's next to it. And then, I've just adjusted the margin underneath each list item, so that it has a bit more natural spacing. All right now, let's see what we've got. So we can go up and click on our Accommodation page. All right, and that's taken us to our Accommodation page, we've got our heading, we've got our paragraph of text nicely lined up with our first image. And the layout for our next row of content has just been automatically handled for us by CSS grid. So we've got our breakfast image on the left, and our bullet list on the right. So that has all just come together perfectly. And if we activate responsive mode and we start shrinking this down, then you can see that this is being collapsed into a single column by the code that we've already created. And as we shrink it down, everything is gonna continue to fit perfectly. So by thinking ahead a little bit with how you lay out your HTML and your CSS, you can save yourself a lot of time and effort in creating subsequent pages. So that was pretty quick to put that one together. And the next page is gonna be even quicker, because it's gonna be the Rates page. And the Rates page is just about identical to the Accommodation page. So you can probably guess how we're gonna do that. We'll be duplicating the Accommodation HTML page and just swapping in this content with the content that's already there. So we'll go through that in the next lesson. I'll see you there.


