


- Overview
- Transcript
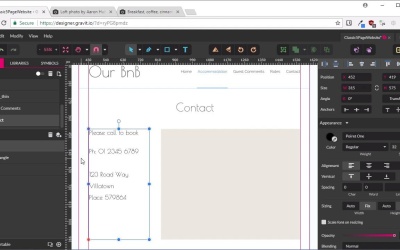
2.8 Design the Contact Page
No five-page website is complete without a contact page. We’ll design one for our site in this lesson.
1.Introduction
1.1Welcome to the Course00:43
2.The Design Phase
2.1Design the Master Layout19:04
2.2Master Layout: Thin Width08:59
2.3Design the Home Page12:54
2.4Home Page: Thin Width05:03
2.5Design the “Accommodation” Page05:31
2.6Design the “Rates” Page03:41
2.7Design the “Guest Comments” Page03:33
2.8Design the Contact Page04:59
2.9Export Images03:43
3.The Coding Phase
3.1Code Up the Master Layout24:37
3.2Code the Home Page16:05
3.3Code the “Accommodation” Page04:50
3.4Code the “Rates” Page02:33
3.5Code the “Guest Comments” Page04:28
3.6Code the Contact Page06:39
4.Conclusion
4.1Wrapping Up04:35
2.8 Design the Contact Page
Hello, welcome back to Build a Classic Five Page Website. This is the last of our five pages that we need to mock up, and it's gonna be the always necessary contact page. So, we've just finished our Guest Comments page. Let's make it easier to create the contact page by first just copying this heading. Now we're gonna make a new page. We're gonna name it Contact. Choose our Master page to go in the background here, paste in our heading, and change it to read Contact. And what we're gonna do is set up a square on the right here that's gonna represent where an embedded Google Map will be. There's no point in trying to take a screenshot of a Google Map to put in here. We would if we're trying to show this as a mockup to a client. But because it's just for our purposes, all we need to do is decide how much space that map is gonna take up. So we're just gonna grab the Rectangle tool once again to show our guides with Ctrl+comma. And I'm just gonna draw out a rectangle, and we're gonna make it 725 pixels wide. Set that up. Locked in on the right side so it's all aligned, and we'll make it 500 and that ratio button so we can change the height to 575. And just so that it looks a bit like a Google Map, we're gonna change the color to roughly match a typical Google Map color. So that's gonna be #ebe8de. And then all we need here is a text box with some contact details in here. So grab that Text tool once again. We'll draw out the text box, we'll allow a little space in between it and the menu. Make sure it's aligned here. We're gonna say, Please call to book. Now let's get this formatting right, we'll leave it as Poiret One. We're gonna bump it up to 32, most of our larger text is in Poiret One. And now we can just add in some extra contact details, so these are just placeholders, just made up. We've got an imaginary phone number, imaginary address, and that is all we need for this page. That actually changed itself to the wrong color there. I'm gonna change that back to a darker color. For this mockup, the text is just in black but we're going to also tweak that text color when we come to coding things up. Sometimes the way that a font color looks in a design software is gonna be different than how it actually looks in the browser. And even though we've got the text here set to jet black, it doesn't quite look jet black, it looks a little lighter. So when we are coding this up we're gonna change the text color for the default text to make it look like it does in the design application. So that is that, that's our Contact page mocked up, and that is all ready to go. So now we've got all five pages are mocked up, let's have a quick look through. We've got our Home page with our hero at the top. We've got our Accommodation page, with the images of the accommodation and the information. Got our Guest Comments with our block quotes and attributions to the guests that made the comments. Got our Rates page, same format again with the images and the text. And finally, we've got our Contact page. Then at the same time, we've also made sure that we have a plan for how the thinner version of our layout is gonna look. How our headings are gonna shrink, how our columns are gonna collapse. And how our different menu system is gonna work. Now you notice that we didn't make a plan for absolutely everything to do with how content is going to resize. So for example, we haven't made a mockup of how this text is gonna resize. Because sometimes it will actually take you more time overall to map something out in design software, and then go through the process of doing the same thing in CSS. In this case, it's just pure text, there's no columns. We know that all we're gonna need to do is possibly shrink it to make sure that it fits in nicely and that's it. And that's something that can be much more efficiently done by just getting into the browser and messing around with some text sizes and seeing what works out best. As for when to do a mockup and when to just jump straight into code, that's something that you would just get the hang of over time. If in doubt, you can always do a mockup, the worst thing that can happen is you might lose a little time that you didn't really need to spend. All right, so now we are almost ready to begin the coding process. But before we do, there's one more step we're gonna need to take, and that is to export these images that we created on each one of our pages. So I'm gonna show you how to do that in Graphic Designer in the next lesson. I'll see you there.


