

- Overview
- Transcript
3.5 Code the “Guest Comments” Page
We’ll now code up the styling for our guest comments and add them to our site’s fourth page.
1.Introduction
1.1Welcome to the Course00:43
2.The Design Phase
2.1Design the Master Layout19:04
2.2Master Layout: Thin Width08:59
2.3Design the Home Page12:54
2.4Home Page: Thin Width05:03
2.5Design the “Accommodation” Page05:31
2.6Design the “Rates” Page03:41
2.7Design the “Guest Comments” Page03:33
2.8Design the Contact Page04:59
2.9Export Images03:43
3.The Coding Phase
3.1Code Up the Master Layout24:37
3.2Code the Home Page16:05
3.3Code the “Accommodation” Page04:50
3.4Code the “Rates” Page02:33
3.5Code the “Guest Comments” Page04:28
3.6Code the Contact Page06:39
4.Conclusion
4.1Wrapping Up04:35
3.5 Code the “Guest Comments” Page
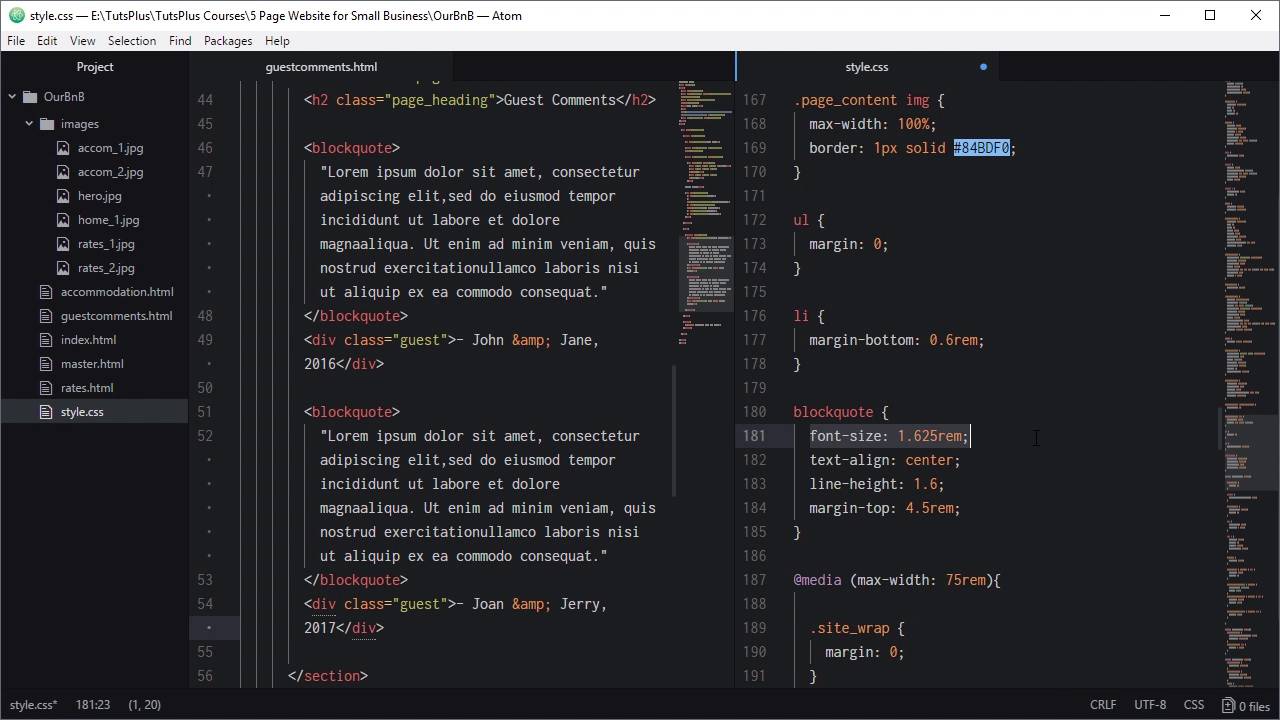
Hello, and welcome back to Build a Classic 5 Page Website. We're about to make the fourth of our five pages, and that is gonna be our guest comments page. For this one, we're gonna be using the black white element to display this text here. So it's just gonna be a matter of styling up that text and styling up our attributions. This time, we're gonna work off the master html page that we created before. So we'll duplicate that and name it guestcomments. The first thing we need do, like we did with the last couple of pages, is change which of these items has class active applied to it that are in guestcomments. And now, we can start adding in our wrapper elements that we need for all our pages. So the first one is section, the class page. We need our h2 heading with the class page_heading. And I'm gonna add in the heading Guest Comments. Now in here, we can start adding in the comments, and then we'll start on the map. So a blockquote element, need a citation link there so we'll just delete that. And in here, we can grab this text and paste it in. Then we need to give credit to the guest who made the comment. So we're just gonna use a div here with the class guest. And I'm just gonna put- John and Jane, 2016. And we want the same thing again. We're gonna have two comments in here, so we're just gonna copy and paste all that html. And we're just gonna change that to Joan and Jerry 2017. So now we'll go ahead and add some styling to control our blockquote. Back up above, our media queries, too high [INAUDIBLE]. I'm just gonna add in this styling for our blockquote. We don't need to specify a font family here because this is gonna be using the default font family that we applied to the body element. But here, we're just setting in the correct font sizing, aligning it to the center. Controlling our line height for our blockquote, and then just adding some spacing above each of the blockquotes so it doesn't get crowded against the one above it. Now to style our guest attribution, we need to add styling for the class guest. Once again, we're center aligning that text. This time we're gonna change the font. We'll set it to Poiret One and we'll increase its font-size up to 2rem. So, that's our essential styling incurred or put in place. So, let's have a look. Click our Guest Comments page. All right, so there we go. That's all looking really nice, our heading coming up just as we needed. We've got our blockquotes in there. We've got our attribution, a good amount of space in there. Everything is centered, and the line height makes everything nice and readable. What we still need to do though is a little bit of adjustment for responsiveness. When we shrink this down, that text is a little bit on the large side. So we're gonna go down to our 45rem media query. We're gonna add in these adjustments. So we're decreasing the font size that's used in the blockquote and the font size that's used in the guest attribution. And we're also decreasing the amount of space between the blockquote and the heading above it. So we're doing there the same thing that we did here with the page heading just reducing that space. Then we're gonna need to do the same thing for our 22rem media query. So we're shrinking down that spacing again, and we're reducing the font size and moving over to using a VW-based font size instead of a rem-based font size. So now let's see how that looks. Now that's much better. Everything fits in here a lot more comfortably, and everything is still staying readable. You can see that as we shrink it down, Everything adjusts and stays looking good. All right, so now we're almost there, we've just got one more page to code up, and that is our contact page. So that one, this is another one that we've kept pretty straightforward as well. So, we're just gonna be adding in contact text on the left side and an embedded Google Map on the right side. And we're gonna do that in the next lesson. I'll see you there.


