


- Overview
- Transcript
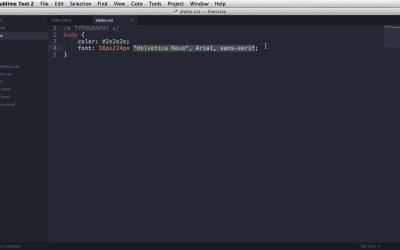
5.1 CSS: Reset CSS and Typography Rules
The first step when writing CSS is to include a reset file. Here’s how you do it.
Related Links
1.Introduction
1.1So, You Wanna Be a Web Designer?01:15
2.Web Design Fundamentals
2.1What is Web Design?04:03
2.2A Brief History of the World Wide Web03:32
2.3What is HTML?14:10
2.4What is CSS?14:17
2.5Tools of the Trade06:30
3.The Design Stage
3.1Always Plan Ahead04:23
3.2Create Some Sketches10:42
3.3Introduction to Photoshop09:30
3.4Photoshop Design: Homepage Header12:01
3.5Photoshop Design: Portfolio Area (Part 1)11:04
3.6Photoshop Design: Portfolio Area (Part 2)07:21
3.7Photoshop Design: The Portfolio and About Pages07:45
3.8Slicing the Images05:09
4.The HTML Stage
4.1HTML: Homepage (Part 1)08:11
4.2HTML: Homepage (Part 2), Portfolio and About Page09:46
5.The CSS Stage
5.1CSS: Reset CSS and Typography Rules12:41
5.2CSS: General Positioning09:01
5.3CSS: Page Headers10:20
5.4CSS: Final Touches10:34
6.Conclusion
6.1What You've Learned01:30
5.1 CSS: Reset CSS and Typography Rules
Welcome back. In this lesson, I'll start writing the CSS for our page. And as you can see, this is what our page currently looks like. It has the browser's default styling. And that's not a good thing because this style varies from browser to browser, so you will have inconsistent results. What you need to do is apply a reset file which basically creates some default styles. All right, so you can begin styling the page on a clean slate. There are a number of resets CSS files. But the one I started using lately is normalize css, and this is the one I strongly recommend. You can go to nicholas.git hub.io/normalize.css. You can also find a link in the lesson notes. So, now you need to download that. And I'm gonna go in my code editor and I'm gonna create a new folder. I'm gonna call it CSS. And this will hold all of our CSS files. Now if you remember from the previous lessons, I showed you how to write CSS using the style tag. And this is fine, I guess, if you're a beginner, but an even better solution is to use a link. So, you would do this link, rel has to be stylesheet, and href will contain the link or the path to your CSS file. So, in my case, it will be CSS. And let's call this master.css or, better yet, styles.css. This will load our CSS file. And the browser will read it. And then will render the page accordingly. Now I'm gonna create a separate CSS file for the reset. So I'll go right here. And I'll do another link, CSS. Normalize.CSS. So let's create those two files. New file. [BLANK_AUDIO] I'm gonna grab the normalize CSS, let's save it. I'm going to save it as, normalized.css in the CSS folder right here. Now normally you would grab the CSS folder you just downloaded, but I'm using a plugin. That will effectively fetch the file from the Git Hub server which is pretty awesome. Now once you do this I wanna show you the changes. Right? So this is our page before the reset file. And now if I refresh, this is after. Notice some margins, some some paddings are reset to 0. The fonts are reset as well. And now that you've applied this, you can go ahead and style the page any way you want. Now there is one more thing I wanna do there, and that is apply a style of my own right at the bottom of the, of the style sheet. And I'll say this, star or asterisk, this means all elements. Yeah so this is a selector that will target all of the elements in, in my page. I'm going to say box sizing border box. Now the way this works is kinda complicated, but you need to have it in your CSS file because it will allow you to create better layouts. Basically, it has to do with the, with the box model, with how the widths and the paddings are used in, in CSS. So, go ahead and write this appended to the very bottom of your normalized CSS. And we can we can start working from here. So I'm gonna do another refresh. And now, I wanna point out something else. The order in which you load the CSS files is very important, because it goes from top to bottom. So if you define one style here and then you define the same style here, that's going to be overwritten. The one from the first CSS file will be overwritten with this one. And that's very important to remember, especially if you're splitting your CSS files, your, actually your CSS into multiple files. All right so, let's go to styles.css. I'm going to create it in my CSS folder. [BLANK_AUDIO] Okay and first I'm going to start with typography. That's how I always start a CSS file. First let's target the body. And I'm gonna change the text color to, to e2e2e. Yeah, it's it's the color that I'm using right here. There it is. And this will apply to every single text on the page. Next, our, we got to set the font. Now the font, I'm gonna do this, 16 pixels. This is the font size. Next, 24 pixels, this is the letting or the line height. Next is the font family and I'm gonna use for this Helvetica Neue with a fall back to Arial, sans-serif. Now let me explain this for a bit. This right here is called a font stack. Meaning it goes from left to right. If Helvetica Neue is found on the user system. That's the one that's being used. If it's not it moves on to its fallback which is Arial. If Arial isn't found, it moves to the next fallback which is sans-serif. Now it can just go like this on and on and on. Now let's target the headings and style them. And by headings, I mean this which is an h1, this which is an h3. This right here, which is in h4. So the one thing they have in common, first of all, is the font family and the font weight. So we're gonna do this at the same time. So we're gonna target the h1, h3, and h4. Let me just double check the psd here. So h1. This is Georgia. h3 is Georgia. And this one is actually Helvetica Neue. So my mistake. Only h1 and h3 will have the same font family. And we're gonna say font-family, Georgia, serif. Now if you're wondering what serif and san serif is, well fonts, to put it simply, are categorized in two. You have the serif fonts which look like Georgia. Like this. They have these curls here. These are called serifs. Right so, they look like I like Times New Roman if you're familiar with that font. Sans serif are fonts without the serifs, so without these embellishments here. And those include this one, Helvetica, right? And as you can see, this doesn't have any, any flourishes, it, it just a simple, just simple letters. So that's the difference. So basically, when I'm doing this font stack, I'm saying look for Helvetica Neue. If you don't find it, use Arial. And if you don't find that, use the next sans-serif font or the default sans-serif font. And the same goes right here. Okay. A final thing here. Just set the font-weight to about 400. Now the font-weight is an indicator of how bold a text is. The lower the weight, the lighter the text. And the bigger the weight. The, the bolder the text, right? So with these changes, our page currently looks like this. So we have new fonts here, here and that's about it. Now font sizes, we're going to change those as well. So let's target the h1. [BLANK_AUDIO] And let's see, 55 pixels for this. So font size 55 pixels. Next, it's the h3, font size 32 pixels. And finally, h4 font-size. Let's see. It's 16 pixels. Now the h4 is also uppercase and has a distinct color. So I'm gonna copy that color and I'm gonna put it right here. And I'm gonna say text transform uppercase. Let's refresh. Now we have a much bolder title here. [BLANK_AUDIO] And there's our h4. The next thing on my agenda when doing typography are the paragraphs. So, I'm gonna target a paragraph, and the only thing that I'm gonna do is set a margin bottom of 24 pixels. And that will space out the paragraphs evenly. Why 24 pixels? Well, it's the baseline I've talked about in the previous lessons. Next and the final thing for the typography is the anchor tags, or the links. So the links, as you can see, they are not underlined and they have this fancy orange color. So I'm going to target the anchor tag. I'm gonna say, text decoration none. This will get rid of the underline. And then, I'm gonna set the color to the value I just copied. Let's refresh. And there it is. Now let's add a style for when the link is hovered. So a and I'm gonna add the hover keyword right here. And I'm gonna say text-declaration underline. And now I refresh and when I hover, we get an underline effect. So that's how you target elements using mouse events like hover. There are also more events like active, for example, that will, trigger when you click a certain, a certain element. So for example, if I say a active, for example, change it's color to blue. Okay, when I click it, it changes to blue. All right, if I delete this, it's not blue anymore. Okay, so that's about it for the typography. In the next lesson, I'm gonna target the general layout rules, like the container, the row, the columns. I'm gonna make those happen so, I'll see you then.


