

- Overview
- Transcript
3.3 Introduction to Photoshop
Photoshop can be a bit intimidating at first. In this lesson, I'll give you a quick tour.
1.Introduction
1.1So, You Wanna Be a Web Designer?01:15
2.Web Design Fundamentals
2.1What is Web Design?04:03
2.2A Brief History of the World Wide Web03:32
2.3What is HTML?14:10
2.4What is CSS?14:17
2.5Tools of the Trade06:30
3.The Design Stage
3.1Always Plan Ahead04:23
3.2Create Some Sketches10:42
3.3Introduction to Photoshop09:30
3.4Photoshop Design: Homepage Header12:01
3.5Photoshop Design: Portfolio Area (Part 1)11:04
3.6Photoshop Design: Portfolio Area (Part 2)07:21
3.7Photoshop Design: The Portfolio and About Pages07:45
3.8Slicing the Images05:09
4.The HTML Stage
4.1HTML: Homepage (Part 1)08:11
4.2HTML: Homepage (Part 2), Portfolio and About Page09:46
5.The CSS Stage
5.1CSS: Reset CSS and Typography Rules12:41
5.2CSS: General Positioning09:01
5.3CSS: Page Headers10:20
5.4CSS: Final Touches10:34
6.Conclusion
6.1What You've Learned01:30
3.3 Introduction to Photoshop
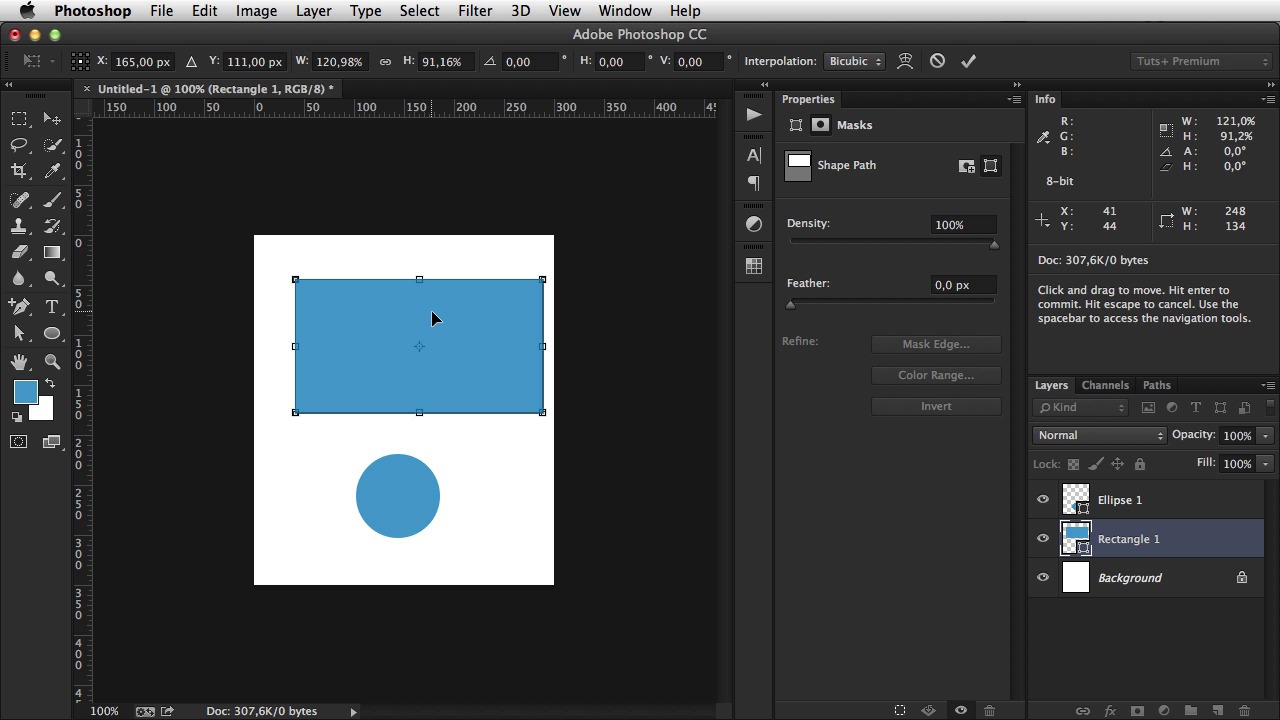
Welcome back. In the previous lesson, I've showed you how to create some wire frames. The next step is to create the actual design in Photoshop, but first, I want to give you a quick tour of the application. So, first things first when you open Photoshop, you're gonna go to File > New. It's gonna give you a dialogue where you can set the width and the height of your canvas. And the canvas is the area where you can draw, where you can place your, your elements, your text, your buttons, and so on. So i'm just going to choose like 200 by 200 for this when you're designing for web, a resolution of 72 PPI is perfectly fine so just stick with it. Make sure color mode is set to RGB, since this is the medium for for displays. Background contents, and that's pretty much what we need to set. Also, you can give it a name. Hit okay. So, as you can see this is the canvas you can change the canvas size by going to Image Canvas size. And you can input the new size here, and also you have anchors. The way anchors work is, pretty simple actually. If I leave this dot in the center, then, the changes will be made from the center to the outer edges If, for example, I choose to interfere with the height, make it about 350, and I choose this top arrow, well the changes will radiate from the top part. So, basically, the bottom part, of my image will be resized. I hope that makes sense. I'm gonna hit OK. As you can see, there are a lots of icons around here and it might seem a bit daunting to learn all of this, but it's really simple, trust me on the left side, you have your toolbar these are the tools that you're gonna use. The tool that's currently selected is called the move tool or V on the keyboard. And it allows you to move, various objects on the page. Other tools, that you're gonna use are this, It's the Rectangle Tool, click, and then draw a rectangle. And then you can hit V, or the Move tool, to move it around. It's really simple. And there are also, a bunch of other tools here but the thing is, you can click and hold on one of these icons and choose from a submenu the kind of tool that you need for example, the Rectangle Tool also has a round rectangle tool an ellipse tool and three others. So, choose the ellipse tool and you can draw circles notice that every time I drew one of these shapes, a new layer was created. And that's how Photoshop works. Each element can be placed on a new layer. Think of a stack of of translucent paper you can draw something on a piece of paper then put another translucent paper on top of that and draw something else, and so on and so forth until you get like a complete picture. By looking at all of those translucent papers, you can see. The overall shape that you wanted to make, but if you start, taking them apart, you only get pieces of that design well that's the same thing with, with the, the Photoshop layers. If I hide this layer, the ellipse is gone. Or if I hide the rectangle layer, or if I hide both. Now you can also group layers, by pressing Shift, you can click and select multiple layers and hit Cmd+G to group them. And now, both of these will be hidden, you can also rename this to test If you want to ungroup, simply right click on group layers alright, you can also, alter the sizes of different layers. So for example, if I want the rectangle layer to be smaller. I can select it, and then hit Cmd+T, or Ctrl+T if you're using Windows, and notice these handles that appeared well, I can grab any of these and start resizing my my elements. From this side, the top, or I can hold Shift, and, resize it proportionally It's really up to you and when I'm done you either hit this check mark, here on the top, or simply hit enter. Alright, so that's how you basically work with layers. Another thing that I want to show you here is, the foreground and background colors so, notice that these two elements have the foreground color. Well, if I delete them, and I set the foreground color to something else, say, this color, hit OK. Whenever I draw new elements, they will have that color. [BLANK_AUDIO] Okay and these are really useful because you can use some key combinations to. To work really fast, but that's more advanced stuff, so I'm not gonna go over it on the right side, we can see a few more panels. These panels are customizable for example, I can close this properties panel, I can close it altogether, and I can close this info panel, or I can move it around. It's really up to me how I arrange my workspace and this is how this is called. It's called a workspace. On this drop-down here on the top, I have three workspaces first is a, a workspace that I use in my everyday work. And this is more complicated It has more panels shown, and it's better displayed, when I view it full screen. For screen casting I usually go with this workspace, because it gives me the bare minimum. And also have, this workspace which is a bit different, but. You get the idea so you can create your own workspaces, arrange layers differently, add new layers. You can go to window, and you can have enough layers, excuse me, panels. You have all these panels here that you can show for example. Brush, yeah, this is a whole different panel that you can show or hide. And it's really up to, you how you use Photoshop some people use it for editing photographs, pictures some use it for photo retouching. I use it for web design. It's a really versatile application. Now, before before I finish, there are a few more options here on the top, on this toolbar now this toolbar will change according to the tool, you select on the toolbar on the left for example, on the move tool. We have these icons. If I select the Rectangle tool, I have different options I can select, the fill color. I can select the stroke, or the border for my element, I can select the width, and the height, and then if I choose the. What is this? The rectangular marquee tool I get different options for it. So Photoshop is not that hard to use, we just have to get acquainted to, some of its options some of this panels you need to know what tools, it has so you can use them in your web design workflow and I'm telling you I've been working with Photoshop for many, many years. And now when I'm designing, a website or a simple webpage, this is where I do it. So, whenever you're finished with, with the work you're doing, with the design yeah you have two options. First is to save the file as a PSD document or a Photoshop document and this is always recommended because you keep the original copy of your work. Or you can, save for web which will generate an image. And there are lots of image options like jpegs, png's gif's and usually Photoshop will always try to optimize those images, so that they have the lowest file size, and the highest quality. But if you want, you can manually tamper with with some of these properties now, Photoshop has a lot more features, but from a beginners point of view, this is pretty much all you need to know to to get started In the next lesson, I'll start creating the actual design.


