


- Overview
- Transcript
3.1 Auto-Height
Auto-height is a much-needed feature in any kind of slider. Due to the nature of this control, we’re most often limited to a fixed container height. Cycle, however, makes it easy for us with some built-in options. Let’s learn more about them.
1.Introduction
1.1Welcome00:34
1.2Why Cycle2?02:22
1.3Plugin Installation and License01:30
1.4A Basic Example03:19
1.5Settings Options04:42
2.Basic Usage
2.1Captions04:58
2.2Using Navigation Controls04:42
2.3Slideshow Effects and Options04:36
2.4Continuous Slideshow03:49
2.5Using Overlays04:32
2.6Using Pagers08:34
2.7Using Non-Image Slides03:34
3.Advanced Usage
3.1Auto-Height06:27
3.2Image Loader05:19
3.3Progressive Loading08:54
4.Optional Plugins
4.1Carousel09:04
4.2Flip and Shuffle05:53
4.3ScrollVert and Tile03:29
4.4Caption2 and Center05:55
4.5Swipe02:12
4.6YouTube05:22
5.The API
5.1Options09:45
5.2Commands07:15
5.3Events04:09
5.4Cycle States and Hash04:51
5.5Template Customization02:27
6.Conclusion
6.1Final Words00:42
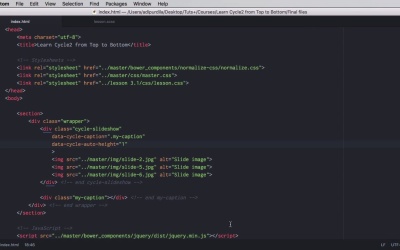
3.1 Auto-Height
Auto-height is a much needed feature in any kind of slider. And because of the nature of this control we're often stuck with a fixed height container. And that can cause problems for us especially when we're dealing with different height slides. So cycle actually makes things easy for us because of some pre-built options. Let's see what those are. >> Before we begin you should know that the auto-height feature is enabled by default. And this is how it works. Cycle uses something called a sentinel slide. Now a sentinel slide. And let me actually show you here what's going on. In the code, our sentinel slide is this one. It has a position of static, top 0, left 0, display block, and it's hidden. And this is being used so that the cycle container has a height because all of the images or all of the slides actually are positioned absolute as you can see here. So obviously the container will just not have a height. Therefore the sentinel slide is being used. Now the sentinel slide Is the very first slide in the sideshow. So as you can see this is a copy of slide number one. So what is this doing actually. Well, I have loaded three different images here, three images with different heights, right? So let me refresh, this is the first one and this is the sentinel slide. This is the second one which is much shorter in height. And this is the third one which is much bigger in height. Now notice where the caption is positioned and where the caption is position gives us the height of our container. You can see that is positioned right after damage here so in the correct position but here you can see that there is quite a big gap between the caption in the image. And on the third slide the image is just, the caption is just covered entirely by the image. What we can do, first of all we can set the auto-height to use a different sentinel, to use a different slide as the sentinel. And we do it out by specifying an integer. We would say data-cycle-auto-height to a number, depending on how many slides we have, so in my case this is gonna be from 0 to 2. So 0, 1, 2. So if I set the auto-height to be 2, for example, the sentinel slide will be based on the third image which is very high, so you are gonna see that the height of our container is this high. If I set this to 1, yeah, the height of the container will be equal to the height of the second image. So this is one way of setting the auto-height feature. Another way is to use a ratio. So let's say for example that you wanna use images that are 600 by 400. And that will equal to a three by two rate with the height. So you can set the auto-height like this 600 by 400. And that will create basically this very similar to what it was before. In fact, even exact because these images are 3 by 2 at least the first one. You can also set this as 3 by 2. It's exactly the same thing. Or you can set this for example if you have a square image you can set it to 1 to 1, right? And now the height is gonna be equal to the width. So, that's the second method. Now, the third method is called calc. Now, calc will actually calculate the tallest slide, and it will set the container height to that value. So, we set calc here. You'll notice that all the height is now calculated based on the tallest image. It's the same thing as putting a setting the second image or the third image as the sentinel slide. And if you want you can toggle this off altogether or just set false here. In that case, the behavior being something like this. So, if we're gonna look for our caption, we're gonna see that it's way up here. Now, notice that we don't have a sentinel slide anymore. There is a caption, yeah. You can just see it when the images are fading. There it is. And that's happening because the container now does not have a height, it's just collapsed. So again the three options either use an integer which will represent which slide to be used as the sentinel. Calc which will calculate the height of the tallest image and then set the container accordingly or ratio if you're working with images of a specific ratio. And one more thing this is entirely fluid, so if for example, we're going to set this to calc and I'll go ahead and resize my page here, yeah. You'll notice that the correct height is preserved here. So this makes it for a really good solution when it comes to responsive sliders. And that's it for auto-height. Now, let's continue learning about the more advanced functionality with something called an image loader. And you'll learn about that in the next lesson.


