

- Overview
- Transcript
2.5 Using Overlays
Overlays are elements quite similar to captions. They can both be adapted to do exactly the same thing. So how are they different? Well, let’s find out in this lesson.
1.Introduction
1.1Welcome00:34
1.2Why Cycle2?02:22
1.3Plugin Installation and License01:30
1.4A Basic Example03:19
1.5Settings Options04:42
2.Basic Usage
2.1Captions04:58
2.2Using Navigation Controls04:42
2.3Slideshow Effects and Options04:36
2.4Continuous Slideshow03:49
2.5Using Overlays04:32
2.6Using Pagers08:34
2.7Using Non-Image Slides03:34
3.Advanced Usage
3.1Auto-Height06:27
3.2Image Loader05:19
3.3Progressive Loading08:54
4.Optional Plugins
4.1Carousel09:04
4.2Flip and Shuffle05:53
4.3ScrollVert and Tile03:29
4.4Caption2 and Center05:55
4.5Swipe02:12
4.6YouTube05:22
5.The API
5.1Options09:45
5.2Commands07:15
5.3Events04:09
5.4Cycle States and Hash04:51
5.5Template Customization02:27
6.Conclusion
6.1Final Words00:42
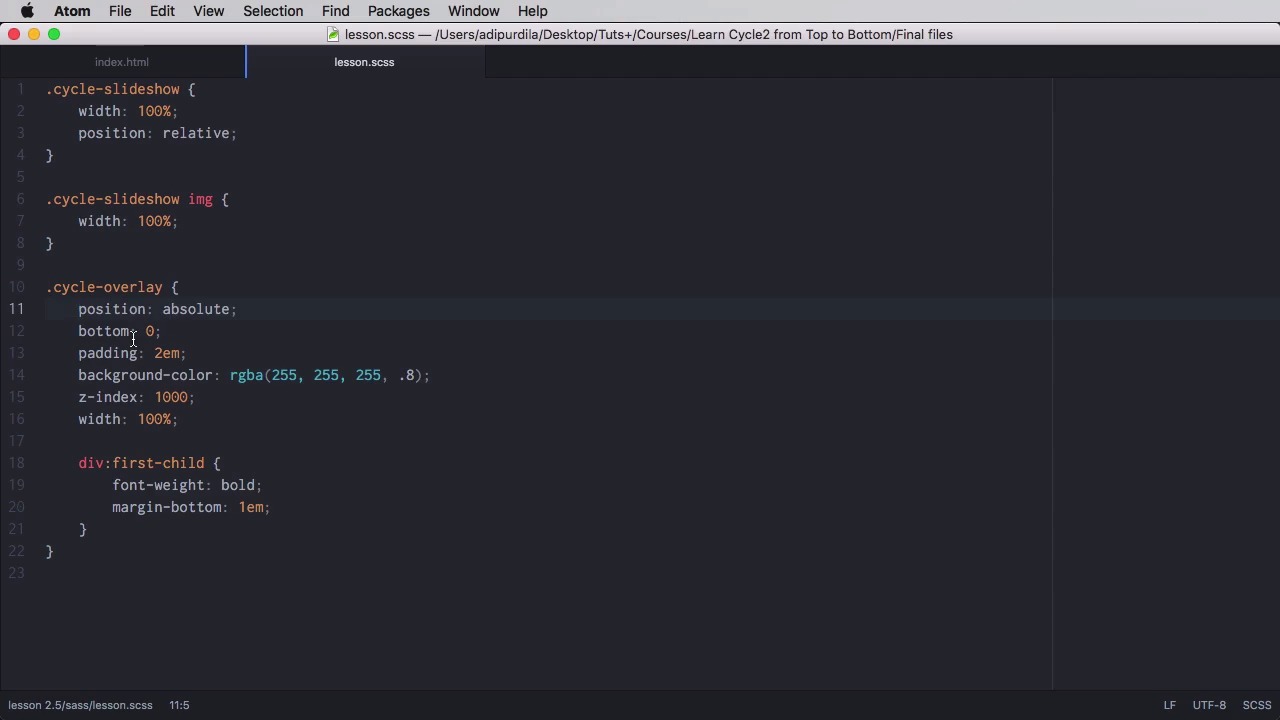
2.5 Using Overlays
Overlays are elements quite similar to captions and in fact they can be adapted so they do the exact same thing. So what are the differences? Let's find out. First of all, let's have a look at how an overlay looks like. And the easiest method to define it is, with an element with a class of cycle-overlay. Again, you do not set any kind of content on it. Now, this one currently looks like this. And that's because in addition to declaring the overlay element here, you need to set a title and a description on each slide. So you would do data-cycle-title. Let's say Title 1 for example, and just data-cycle-desk for description. For example, Slide 1 description. And you would do this for the other images, like this. So now that overlay will show the title and the description. And the markup is very simple. It just puts those two elements into this. The nice thing is you can also create your own template. So if we're gonna create another slideshow here and then in here. We're gonna say data cycle-overly-template, equals. And instead of those divs, let's use something else. Let's use, for example, a paragraph. And let's use cycleTitle here. So this refers to this attribute value right here. Now we are gonna close that paragraph. And let's define yet another paragraph, or we're gonna put the cycle description, yeah. Now our overlay will look something like this. Now let's do a quick customization on these overlays. We're gonna say cycle-overlay. Simply set position absolute, on the bottom, with some padding, background-color, make it 100%. And just in case we're not using the default template, we're targeting the first item and we're making it bold. So now it looks something like this. Yeah. Very nice. You can also define your very own container for the overlay. So back here instead of cycle overlay maybe you want a class of my overlay. Well in that case you need to go here and you can say cycle, data-cycle-overlay equals do a selector again, ,my overlay, okay? Save and maybe style that. So a very similar styling to the default overlay. But we change the background color and the text color right here. So now we have two different overlay styles. In addition to these attributes here, you can also add, any kind of data attribute and then the use it, in the template here. So for example if I were to add data theme here, and let's say trees. Let's add it on the outer images as well. All right, then inside here, inside a template we can target it. So we'll do another paragraph and let's do like and small and we're gonna do double brackets again. And we're gonna say theme. Now so no data, just this part here. Save, and now on the second one we have our normal contents, plus the other attribute. And that's it for overlays. Now I'm sure you've seen sliders before and those sliders usually have tiny circles or squares somewhere on them that you can click on. And they will take you to their corresponding slide. So in Cycle those are called Pagers. And you'll learn all about them in the next lesson.


