


- Overview
- Transcript
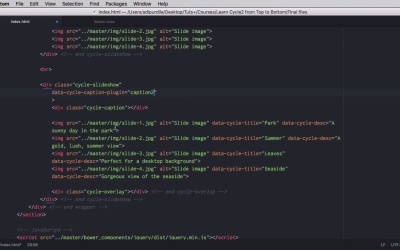
4.4 Caption2 and Center
In previous lessons you learned how to use captions and overlays. Now there is a plugin called “Caption2” which adds some extra functionality to these two elements. We’ll cover Caption2 in this lesson. On top of that, we’ll quickly talk about a plugin called “Center”. Let’s begin!
1.Introduction
1.1Welcome00:34
1.2Why Cycle2?02:22
1.3Plugin Installation and License01:30
1.4A Basic Example03:19
1.5Settings Options04:42
2.Basic Usage
2.1Captions04:58
2.2Using Navigation Controls04:42
2.3Slideshow Effects and Options04:36
2.4Continuous Slideshow03:49
2.5Using Overlays04:32
2.6Using Pagers08:34
2.7Using Non-Image Slides03:34
3.Advanced Usage
3.1Auto-Height06:27
3.2Image Loader05:19
3.3Progressive Loading08:54
4.Optional Plugins
4.1Carousel09:04
4.2Flip and Shuffle05:53
4.3ScrollVert and Tile03:29
4.4Caption2 and Center05:55
4.5Swipe02:12
4.6YouTube05:22
5.The API
5.1Options09:45
5.2Commands07:15
5.3Events04:09
5.4Cycle States and Hash04:51
5.5Template Customization02:27
6.Conclusion
6.1Final Words00:42
4.4 Caption2 and Center
In previous lessons you've learned how to work with captions and overlays. Well, there is a plugin called caption to that add some extra functionality to those two elements. That's what you'll learn in this lesson, and on top of that we'll quickly go over a plugin called Center. Let's begin. As usual I will begin by including the necessary plugin files in the footer of our page. So now we're loading Center and Caption2. Now we'll begin with Center because it's the smallest and easiest one to use of the two. Center can be used to center slides both horizontally and vertically. It's very, very easy to use. Now for that I'm gonna add an additional class of small to our slideshow here and add some appropriate CSS. Basically I added a border, a background color, a fixed height with margin auto to center it and make the images a bit smaller. So now our slider looks something like this. Now to center everything, it's actually quite easy. All we got to do is add data-cycle-center-hori="true". And that will center the slides horizontally. And if I want to to center them vertically. I would just change this to vert, and now we have centered slides. It's that easy, so the plugin works with these two options. center-hors for horizontal, and center-vert for vertical. Both default to false. But if you set that to true, you can create this layout. All right, now let's move on to Caption2. For that, let's go ahead and create another slideshow here. Something like this. So we have a simple slideshow with a caption, with an overlay and a bunch of images. Now the images, if you'll remember from the overlay lesson, have a title and have a description. Now let's go ahead and add some CSS for these captions and overlays. Something like this. So basically the caption is positioned on the top right side. And the overlay is positioned at the bottom. And they look something like this. Now to activate the Caption2 plugin to add that extra functionality to both overlays and captions, we have to do the following. We're gonna add some data attributes. We're gonna say data-cycle-caption-plugin="Caption2", right? So notice the default functionality of these two. They don't have any kind of affects applied to them. They're static basically and only the text changes inside them. However, if I save this and I reload the page. You'll see that there is a fade in and fade out effect applied to both of these, to the container of the caption or overlay, and also to the text inside it. There we go. Now what if you wanna change that effect to a slide effect, for example? Well, let's start with the captions. For captions you would say data cycle-caption-fx-out equals, let's say for example, slideUp and fx-in. We're gonna say slideDown. Let's have a look. And there it is. Slide up and slide down when it changes. We can do the same thing for the overlay. Simply replace caption here with overlay. Overlay effects out, overlay effects in. There it is. Now what if you just want to animate the text inside and not the actual container of the overlay or caption? Well you can easily do that with the following options, data-cycle-caption-fx-sel for select. And you can select the elements that you want to apply the effect to. In my case, the caption if we take a look here just has some text inside it. So we can't actually target that. However, the overlay has some divs inside it. So, I'm gonna change this to overlay and I'm gonna say, select the first level divs. And that will only slide the text, okay. Now if you're using a custom format or a custom template for the captions and you have a different HTML structure then you can very easily target those elements. But other than that, these are all of the options that you can use with the Caption2 plugin. And that's it for the Caption2 and Center plugins. Now as I was saying in a previous lesson, one of the very cool things about cycle is its support for swipe events. So we'll learn about those in the next lesson.


